
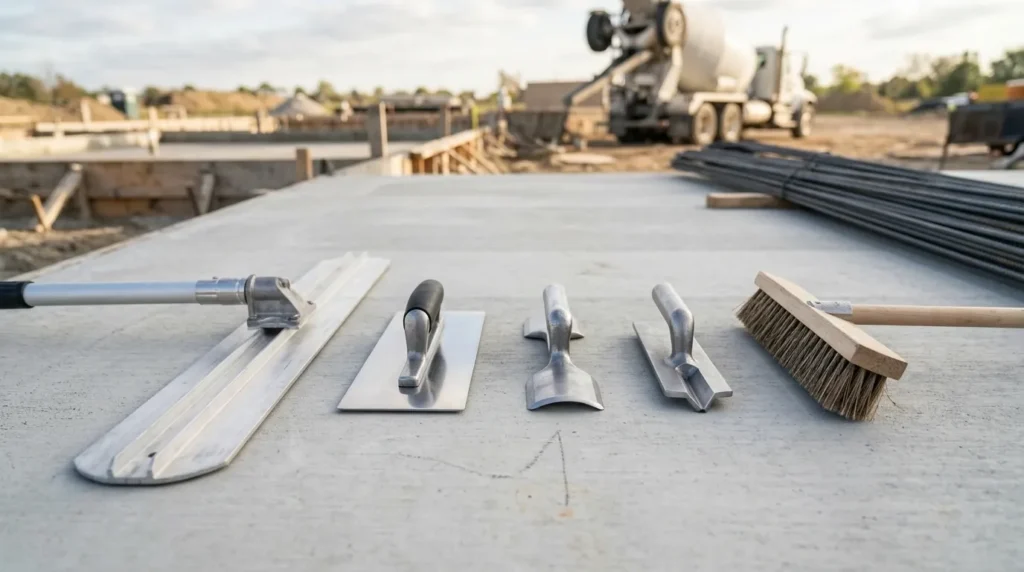

Concrete work is one of the most tool-intensive trades in construction. The right equipment determines whether a pour goes smoothly — properly consolidated, level, finished to specification, and cured correctly. The wrong tools, or tools used at the wrong stage, produce slabs that crack, surfaces that scale, and finishes that fail within a season.
The types of concrete tools span every phase of a project: mixing, pouring, consolidating, leveling, finishing, cutting, drilling, curing, and testing. Some are simple hand tools any DIYer can buy at a hardware store; others are professional-grade equipment rented or owned by contractors. Understanding what each tool does and when it’s needed is the foundation of any successful concrete project.
This guide covers every major concrete tool category — with specifications, selection guidance, and worked examples showing exactly where each tool fits in the workflow.
Before any pour, calculate your exact concrete volume and bag requirements with the free concrete calculator at ConcreteCal — then come back here to make sure you have the right tools for the job.
Table of Contents
- Why the Right Concrete Tools Matter
- Concrete Mixing Tools
- Concrete Pouring and Placement Tools
- Concrete Consolidation Tools
- Concrete Leveling and Screeding Tools
- Concrete Finishing Tools
- Concrete Cutting and Grinding Tools
- Concrete Drilling Tools
- Concrete Curing and Testing Tools
- Formwork Tools and Systems
- Safety Equipment for Concrete Work
- Tools by Project Type — Quick Reference
- Frequently Asked Questions
Why the Right Concrete Tools Matter
Concrete has a working window — the time between placement and final set when it can be worked, consolidated, leveled, and finished. Miss that window with the wrong tool and the result is permanent.
A bull float used too late leaves drag marks. A trowel used too early traps bleed water under the surface and causes delamination. A vibrator held in one spot too long causes segregation — the aggregate sinks and the paste rises. Every tool has a correct application, a correct timing, and a correct technique.
For DIYers, understanding the tool sequence — mix → place → consolidate → screed → float → trowel → edge → broom → cure — is as important as having the tools themselves. For professionals, tool selection affects crew size, pour speed, surface quality, and project cost.
Concrete Mixing Tools
Concrete Mixer / Cement Mixer
A concrete mixer is a rotating drum that combines cement, aggregate, sand, and water into a uniform mix. It is the starting point for any poured concrete project and the single most important piece of equipment for medium-to-large DIY pours.
Types of concrete mixers:
| Type | Capacity | Best For | Power Source |
|---|---|---|---|
| Portable drum mixer | 1–6 cubic feet | DIY residential, small pours | Electric or gas |
| Towable mixer | 6–12 cubic feet | Medium commercial, large residential | Gas |
| Transit/ready-mix truck | 8–10 cubic yards | Large commercial pours | Diesel |
| Pan mixer | 0.5–3 cubic feet | Precast, mortar, specialty mixes | Electric |
For most residential DIY projects — a driveway section, a shed base, or a set of post holes — a portable drum mixer rented from a tool rental store is the right choice. Rental costs approximately $50–$80 per day.
Worked Example: A 10×10 ft patio at 4 inches thick requires approximately 33 cubic feet of concrete. A 6 cubic foot drum mixer produces one batch per 5 minutes — requiring approximately 6 batches to complete the pour. At 5 minutes per batch, the mixing phase takes 30 minutes plus setup and cleanup. Manageable for a two-person crew.
Mixing Tubs and Buckets
For very small projects — post holes, repair patches, stepping stones — a mixing tub (16–20 gallon capacity) or a 5-gallon bucket with a paddle mixer attachment is the practical choice.
Paddle mixer: A spiral paddle attachment on an electric drill or dedicated paddle mixer machine. Mixes a full 5-gallon bucket in 2–3 minutes. Standard tool for small bagged concrete projects.
When to use a tub vs. a mixer: Under 4 bags of 80 lb mix — tub or bucket. Over 4 bags — rent a drum mixer or order ready mix. Hand mixing large volumes is slow, exhausting, and produces less consistent results than mechanical mixing.
Wheelbarrow
The wheelbarrow is the universal concrete transport tool — moving mixed concrete from the mixer to the pour location. For ready mix deliveries, it transfers concrete from the truck chute to areas the truck cannot reach directly.
Concrete wheelbarrow specifications:
- Capacity: Minimum 6 cubic feet (construction grade) — standard 3–4 cubic foot garden wheelbarrows are inadequate for concrete weight
- Material: Steel tray — plastic trays crack under concrete weight
- Wheel: Pneumatic tire — flat-free solid tire for rough terrain
A full concrete wheelbarrow load at 6 cubic feet weighs approximately 900 lbs — one of the heaviest common construction loads. Always use a properly sized barrow and never overfill.
Concrete Pouring and Placement Tools
Concrete Pump — Boom and Line
A concrete pump moves concrete from the ready-mix truck to the pour location through a pipe system — essential when the truck cannot position close enough to discharge directly.
Two types:
Boom pump: A truck-mounted pump with a hydraulic arm (boom) that positions the pipe over the pour area. Reaches 60–200+ feet horizontally and vertically. Used for elevated slabs, large pours, and any site with complex access.
Line pump (trailer pump): A trailer-mounted pump connected to flexible hoses. More maneuverable than a boom pump for ground-level pours in tight spaces. Typical range: 300–1,000 feet of hose.
| Pump Type | Day Rate | Best For |
|---|---|---|
| Line/trailer pump | $400–$800 | Ground slabs, moderate distances |
| Small boom pump | $900–$1,500 | Elevated slabs, large residential |
| Large boom pump | $1,500–$3,000+ | Commercial, high-rise |
For residential projects, pump hire adds $400–$800 to project cost but enables pours that would otherwise be physically impossible — backyard pools, rear-yard slabs with no truck access, below-grade foundations.
Concrete Chute
The concrete chute is the discharge trough attached to a ready-mix truck — the standard delivery method when the truck can position directly adjacent to the formwork.
Chute reach: Most ready-mix trucks carry 3–4 chute extensions, providing a maximum reach of approximately 18–20 feet from the truck body. For pours beyond this distance, a pump is required.
Best practice: Position truck so the chute reaches at least 60% of the pour area. Fill from the far end of the form back toward the truck — this reduces the need to move concrete after placement and prevents cold joints from improper sequencing.
Shovel and Concrete Rake
The shovel and concrete rake work together during placement — moving, spreading, and roughly leveling concrete immediately after it leaves the chute or pump.
Concrete rake (come-along rake): A flat-bladed rake with a straight leading edge and perforated surface — designed to pull and spread concrete without disturbing the aggregate below the paste. Standard tool for spreading ready mix during placement.
Worked Example — Garage Floor Pour: A 24×24 ft garage floor receiving ready mix from a truck chute. Two workers with come-along rakes spread concrete as the truck discharges — one worker pulling concrete into corners and along edges, the second raking the field area to approximate level before screeding. Without rakes, concrete piles where it falls and screed workers cannot work efficiently.
Concrete Consolidation Tools
Consolidation removes air voids from freshly placed concrete — air pockets reduce compressive strength and create surface defects. A properly consolidated slab has no visible honeycombing, no trapped air at form surfaces, and a uniform dense matrix.
Internal (Immersion) Vibrator
The internal vibrator — also called an immersion vibrator or poker vibrator — is a cylindrical head inserted directly into fresh concrete. It vibrates at high frequency (up to 12,000 vibrations per minute), causing the concrete to temporarily liquify around the vibrator head and flow into voids.
Vibrator head diameter and insertion spacing:
| Head Diameter | Radius of Action | Max Insertion Spacing |
|---|---|---|
| 1 inch | 3–4 inches | 6–8 inches |
| 1.5 inches | 5–6 inches | 10–12 inches |
| 2 inches | 7–8 inches | 14–16 inches |
| 3 inches | 10–12 inches | 20–24 inches |
Critical technique: Insert the vibrator vertically at regular intervals. Hold for 5–15 seconds at each location — until bubbles stop rising. Withdraw slowly (approximately 3 inches per second) to allow the hole to close without leaving a void. Never drag the vibrator horizontally — this causes segregation.
Worked Example: A 20-yard garage floor pour. Using a 2-inch head vibrator, insertion spacing of 14 inches, depth at each insertion 2 inches deeper than the slab thickness. At 400 sq ft, requiring approximately 250 insertions at 10 seconds each = approximately 40 minutes of vibration work — typically done by a dedicated crew member following the screed.
External and Surface Vibrators
External vibrators are clamped to formwork and transmit vibration through the form into the concrete — used for precast panels, columns, and walls where internal vibrator access is limited.
Surface vibrators (vibrating screeds) combine screeding and vibration in one pass — common on large residential and commercial slabs where full-depth consolidation during screeding is required. More efficient than separate screed + internal vibrator operations.
Concrete Leveling and Screeding Tools
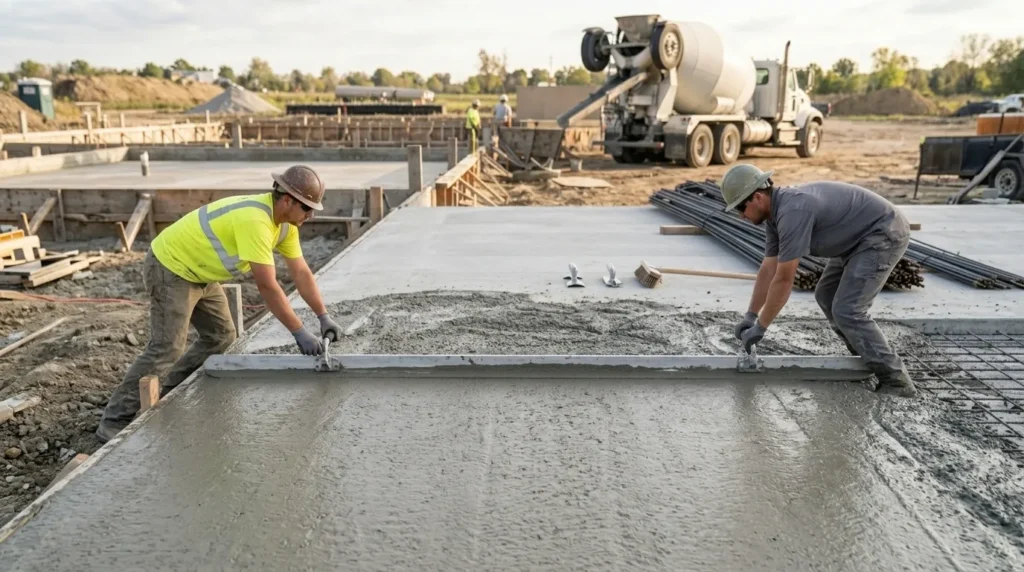
Screeding establishes the final surface elevation — the top of the slab. It is the first finishing operation and the one that determines whether the floor is flat and level or warped and irregular.
Screed Board
The screed board — typically an aluminum or magnesium straightedge — is pulled across the concrete surface in a sawing motion, resting on the form edges or screed rails to establish the correct elevation.
Screed board selection:
| Screed Type | Length | Best For |
|---|---|---|
| Wood 2×4 | 4–12 feet | Small DIY pours |
| Aluminum straightedge | 4–16 feet | Standard residential |
| Magnesium straightedge | 4–16 feet | Professional, lightweight |
| Vibrating screed | 6–24 feet | Large commercial slabs |
For any pour wider than 12 feet, intermediate screed rails or pins are required to support the screed board across the full width without sagging.
Power Screed
A power screed — also called a vibratory screed — is a motorized screed with a vibrating blade. It consolidates and levels simultaneously, reducing crew size and improving flatness on large pours.
Truss screed: A larger power screed mounted on a truss frame that spans the full pour width — standard for warehouse floors and large commercial slabs where extreme flatness (FF/FL values) is specified.
Laser Level
A laser level establishes precise elevation control across the entire slab area — placing screed rails, setting form heights, and verifying finished slab elevation.
For residential DIY: A basic rotary laser level ($150–$400) provides adequate elevation control for standard patio or driveway pours. A receiver rod reads the laser beam to set screed rails at the correct height.
For commercial work: Grade lasers with millimeter accuracy control screed rail elevation on large warehouse floors where floor flatness specifications require FF values of 50+.
Concrete Finishing Tools
Finishing is where concrete becomes a surface — the sequence of floating and troweling operations that close the surface, remove imperfections, and create the specified texture.
Bull Float
The bull float is a large flat rectangular tool (typically 8 inches × 36–48 inches) on a long handle — used immediately after screeding to flatten ridges, fill low spots, and embed coarse aggregate below the surface.
When to use: Immediately after screeding, while the concrete is still in the bleed water stage. Bull floating must be complete before bleed water accumulates on the surface — working over bleed water forces it into the paste and weakens the surface.
Handle length: Long enough to reach the center of the pour without stepping on the concrete — typically 6–16 feet of handle extensions for residential slabs.
Magnesium Float
A magnesium float (approximately 12×4 inches) is used after the bull float to further level the surface and begin closing the surface texture. Magnesium floats are preferred over wood floats because they slide more easily on the concrete surface and produce a finer texture.
Hand floating timing: When the concrete has stiffened enough to support your weight on a kneeling board — typically 30 minutes to 2 hours after screeding depending on temperature and mix design.
Hand Trowel and Power Trowel
Steel trowels — hand or power — perform the final finishing operation. Multiple trowel passes at progressively steeper blade angles close and densify the surface paste to the specified smoothness.
Hand trowel: A rectangular steel blade (4×12 inches to 5×18 inches) used for edges, corners, and small areas. Also used for the first trowel pass on residential slabs.
Power trowel (helicopter): A ride-on or walk-behind machine with rotating blades — standard for commercial and industrial floors. Walk-behind units handle areas up to approximately 2,000 sq ft; ride-on units are used on larger pours.
Trowel blade types:
| Blade Type | Use Stage | Surface Result |
|---|---|---|
| Float blades | First pass | Open, textured surface |
| Combination blades | Middle passes | Intermediate closure |
| Finish blades | Final passes | Smooth, dense surface |
Edger
The concrete edger is a hand tool with a rounded lip — used along form edges to create a smooth, rounded edge on the slab perimeter. The rounded edge is more durable than a sharp right-angle edge and prevents chipping at the slab corners.
When to use: After initial floating, before the surface is too stiff to work. Run the edger along all form edges to create a consistent radius (typically 1/4 or 3/8 inch radius).
Groover and Jointer Tool
The groover (also called a jointer) cuts control joints into fresh concrete — creating planned weak points where shrinkage cracks will form in a straight, controlled line rather than randomly across the slab.
Groover depth: Minimum one-quarter of slab thickness. A 4-inch slab needs grooves at least 1 inch deep.
Worked Example — 20×20 ft Patio Control Joints: A 20×20 ft patio requires control joints at maximum 10-foot spacing (2.5× slab thickness of 4 inches). Joint layout: one joint at 10 feet from each edge running both directions, dividing the slab into four 10×10 panels. Total grooves: 2 passes at 10 feet each direction = 40 linear feet of control joints. Cut with a groover while concrete is still workable — before the surface is too firm to accept the tool.
Broom
The broom is the final finishing tool for exterior concrete — dragged across the fresh troweled surface to create parallel grooves that provide slip resistance.
Broom types: Fine bristle (light residential texture), medium bristle (standard driveway/patio), coarse bristle (maximum traction, steep applications).
Technique: Drag consistently in one direction, perpendicular to the primary direction of travel across the surface. On a driveway, broom marks should run across the width — this maximizes traction for vehicles entering from the street.
Concrete Cutting and Grinding Tools
Concrete Saw
Concrete saws cut hardened concrete — for control joints (saw-cut after pour), demolition cuts, utility trenching, and repair work.
Types:
| Saw Type | Best For | Blade Size |
|---|---|---|
| Walk-behind saw | Large control joint cuts, road cutting | 12–48 inch |
| Handheld cut-off saw | Small cuts, utility work | 12–14 inch |
| Circular saw with diamond blade | Small residential cuts | 7–10 inch |
| Wall saw | Vertical cuts in walls | Variable |
Diamond blades vs. abrasive blades: Diamond blades are mandatory for any significant concrete cutting — they cut faster, last longer, and produce cleaner cuts than abrasive masonry blades. For saw-cutting control joints after a residential pour, a diamond-tipped circular saw blade on a standard circular saw is adequate for shallow joints (1 inch depth).
Worked Example — Saw-Cut Control Joints: A 20×20 ft garage floor. Control joints at 10-foot spacing require 40 linear feet of cuts at 1-inch depth. Using a walk-behind concrete saw at 4–6 hours after pour (when concrete has hardened enough to hold aggregate at the cut but hasn’t fully set): 40 feet of cuts takes approximately 15 minutes of saw time plus setup.
Angle Grinder
The angle grinder with a diamond cup wheel is the most versatile concrete surface tool — used for grinding high spots, removing coatings, chamfering edges, and surface preparation before overlays or coatings.
Diamond cup wheel types:
- Single-row cup: Fast, aggressive removal — surface prep and coating removal
- Double-row cup: Smoother finish — general grinding and leveling
- Turbo cup: Balance of speed and finish — most common for residential use
Concrete Polisher and Dust Collection
Concrete polishers use progressively finer diamond-impregnated pads to grind and polish concrete floors to a specified gloss level. They are the primary tool for the polished concrete finish.
Dust collection system: Any concrete grinding or polishing operation generates silica dust — a serious respiratory hazard. A HEPA-filtered dust collector connected directly to the grinder or polisher is mandatory for health and safety compliance.
According to OSHA’s silica dust standard (29 CFR 1926.1153), all concrete grinding and cutting operations must include engineering controls (wet cutting or dust collection) — worker exposure to respirable crystalline silica cannot exceed 50 micrograms per cubic meter averaged over an 8-hour shift.
Concrete Drilling Tools
Hammer Drill vs. Rotary Hammer
Both drill into concrete — but they work differently and suit different applications.
Hammer drill: Combines rotation with a hammering action produced by two ribbed discs. Adequate for light concrete drilling — anchor holes up to 3/4 inch diameter in standard concrete.
Rotary hammer (SDS drill): Uses a piston-driven hammering mechanism that is far more powerful than a hammer drill. The SDS chuck system locks bits securely. Suitable for holes from 1/4 inch to 2+ inches in hard concrete, masonry, and reinforced concrete.
| Feature | Hammer Drill | Rotary Hammer (SDS) |
|---|---|---|
| Impact mechanism | Mechanical (disc) | Pneumatic piston |
| Impact energy | 0.5–1.5 joules | 1.5–8+ joules |
| Max hole size | 3/4 inch | 2+ inches |
| Best for | Light anchor holes | Heavy drilling, rebar detection |
| Cost | $80–$200 | $150–$600 |
| Chuck type | Standard keyless | SDS-plus or SDS-max |
What Type of Drill for Concrete?
This is one of the most searched questions about concrete tools — and the answer is clear:
For anchor holes under 3/4 inch in standard residential concrete: A hammer drill with a carbide-tipped masonry bit is adequate and economical.
For any hole over 3/4 inch, any reinforced concrete, or frequent drilling: An SDS rotary hammer is the correct tool. SDS-plus for holes up to 1.5 inches; SDS-max for larger holes and demolition work.
Never use a standard drill (no hammer function) in concrete — it will burn out the motor and barely penetrate the surface.
For installing concrete anchors after drilling, see our complete guides on types of concrete anchors and types of anchor bolts for concrete — which cover the full range of fastener options for every anchoring application.
Concrete Curing and Testing Tools
Curing Blanket and Sprayer
Curing keeps the concrete surface moist for the minimum 7 days required for adequate strength development. Two methods:
Curing blankets: Insulated blankets placed over the finished surface — retain moisture and protect from temperature extremes. Essential in cold weather (below 50°F) to prevent freezing before concrete reaches 500 PSI.
Garden sprayer / soaker hose: For warm-weather curing — wet the surface with water and cover with plastic sheeting or burlap to retain moisture. Re-wet as needed to keep the surface continuously damp.
Curing compound sprayer: Applies a liquid curing compound (resin or wax-based) to the finished surface — forms a membrane that retains moisture without requiring repeated wetting. Standard method for large commercial pours.
Concrete Moisture Meter
A concrete moisture meter measures the moisture content of hardened concrete — critical before installing flooring over a concrete slab. Tile, hardwood, vinyl, and carpet installations all have maximum allowable moisture content specifications.
Pin-type meters: Measure surface moisture only — quick but limited to the top few millimeters.
Pinless (impedance) meters: Measure to approximately 3/4 inch depth without penetrating the surface — more representative of the slab condition.
When you need one: Any flooring installation over concrete — particularly wood, bamboo, or moisture-sensitive vinyl. Many flooring manufacturer warranties require documented moisture testing before installation.
Thermo-Hygrometer
A thermo-hygrometer measures temperature and relative humidity at the pour site — both factors that affect concrete set time, working window, and curing rate.
Critical thresholds:
- Below 50°F: Concrete gains strength very slowly — cold weather protection required
- Above 90°F: Concrete sets rapidly — working window shortened, plastic shrinkage cracking risk increases
- Relative humidity below 40% + wind: Evaporation rate exceeds bleed water rate — plastic shrinkage cracking risk high
Plastic shrinkage cracking risk table:
| Temperature | Humidity | Wind | Risk Level |
|---|---|---|---|
| 70°F | 70% | Calm | Low |
| 90°F | 50% | 10 mph | Medium |
| 90°F | 30% | 15 mph | High |
| 100°F | 20% | 20 mph | Extreme |
Formwork Tools and Systems
Formwork — the temporary molds that contain concrete during placement and curing — is essential for any pour that requires a defined shape.
Modular Formwork
Modular formwork uses standardized panels that connect and stack — used for walls, columns, foundations, and any vertical concrete element.
Panel materials:
- Steel panels: Reusable 50–100+ times, high initial cost, superior surface finish
- Aluminum panels: Lighter than steel, reusable 50–80 times, good surface finish
- Plastic/composite panels: Lightest option, good for curved forms, 10–30 reuses
Worked Example — Foundation Wall: A 30-foot long × 8-foot tall foundation wall. Using 2-foot × 8-foot steel panels: 15 panels per side = 30 panels total, plus walers, ties, and bracing. Crew of 4 sets formwork in approximately 4 hours. After pour and 24-hour cure: stripping takes 2 hours. Steel panels cleaned and stacked for reuse.
Custom Formwork
Custom formwork uses dimensional lumber (2×4, 2×6, plywood) cut and assembled on site for irregular shapes, one-time pours, and residential flatwork.
Standard residential formwork:
- 2×4 or 2×6 lumber for form sides (height matches slab thickness)
- Plywood for curved sections
- Stakes driven into subgrade every 2–4 feet to hold forms against concrete pressure
- Form release agent (oil, wax, or commercial release) applied before pour for easy stripping
Form release agents: Applied to the inside face of formwork before pouring — prevents concrete from bonding to the form, making stripping easier and cleaner. Diesel oil, vegetable oil, or commercial form release spray all work for standard lumber formwork.
Safety Equipment for Concrete Work
Concrete is caustic — Portland cement is highly alkaline (pH 12–13) and causes chemical burns on prolonged skin contact. Fresh concrete is also heavy, and the tools used with it create dust, noise, and physical hazards.
Essential safety equipment for concrete work:
| Equipment | Why It’s Needed | Standard |
|---|---|---|
| Safety glasses / goggles | Concrete splash, grinding sparks | ANSI Z87.1 |
| Rubber or PVC gloves | Chemical burns from wet concrete | — |
Rubber boots | Prolonged concrete contact with feet | — | | N95 / P100 respirator | Silica dust during cutting/grinding | NIOSH approved | | Hearing protection | Concrete saw, power trowel noise | ANSI S3.19 | | Kneeling board | Distributes weight during hand finishing | — | | High-visibility vest | Site traffic hazards | ANSI/ISEA 107 |
Silica dust warning: Cutting, grinding, and drilling concrete without dust control generates respirable crystalline silica — a proven cause of silicosis and lung cancer. OSHA mandates engineering controls (wet cutting or dust extraction) for all concrete cutting operations. Never dry-cut concrete without respiratory protection and dust collection.
Tools by Project Type — Quick Reference
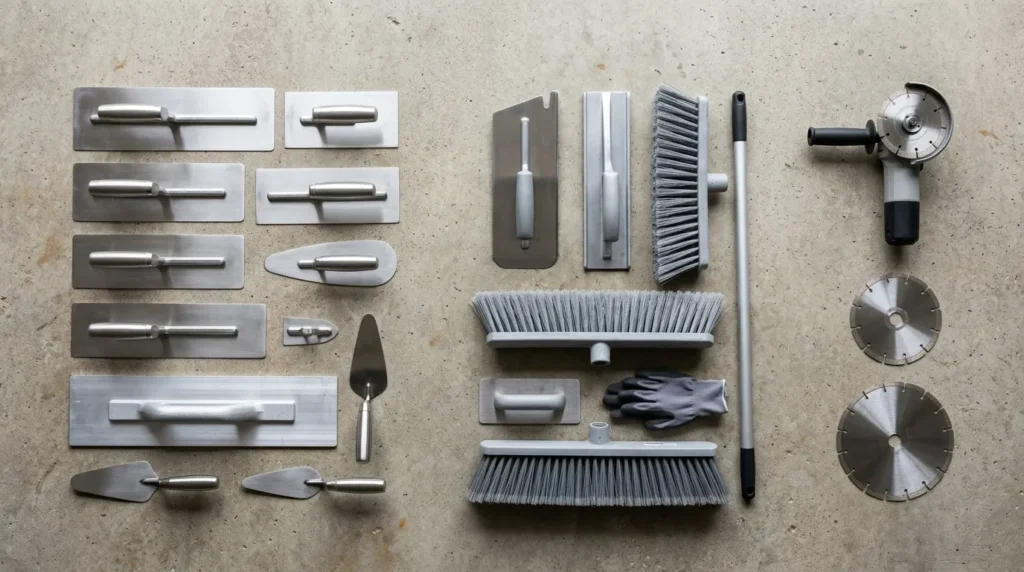
| Project | Essential Tools | Optional/Professional |
|---|---|---|
| Post holes (bagged) | Mixing tub, shovel, tamper | Paddle mixer |
| Small patio (bagged) | Drum mixer, wheelbarrow, screed, bull float, trowel, edger, groover, broom | Power trowel |
| Residential driveway | Drum mixer or ready mix, wheelbarrow, come-along rake, screed, bull float, edger, groover, broom, saw (joints) | Vibrating screed, concrete saw |
| Garage floor | Ready mix, pump (if needed), come-along rake, vibrator, screed, bull float, power trowel, edger, groover | Laser level, vibrating screed |
| Foundation wall | Modular formwork, vibrator, pump or chute | Boom pump, laser level |
| Concrete repair | Angle grinder, chisel, bonding agent, hand trowel | Rotary hammer (rebar) |
| Anchor drilling | Rotary hammer, SDS carbide bits, blow pump | Rebar scanner |
| Polished floor | Planetary grinder, diamond pads, densifier, dust collector | Ride-on polisher |
Frequently Asked Questions
What type of drill is used for concrete?
For light anchor holes under 3/4 inch in standard concrete: a hammer drill with carbide-tipped masonry bits. For any hole over 3/4 inch, reinforced concrete, or frequent drilling: an SDS rotary hammer is the correct tool. SDS-plus handles holes up to 1.5 inches; SDS-max for larger holes. Never use a standard drill without hammer function in concrete — it will not penetrate and will damage the motor.
What types of trowels are used for concrete?
Concrete trowels include the hand trowel (4–18 inch rectangular steel blade for edges and manual finishing), the margin trowel (small, pointed — for tight spaces and repairs), the pool trowel (rounded ends — for smooth interior curves), and power trowel blades (float, combination, and finish blades for machine finishing). The steel hand trowel and power trowel are the primary finishing tools for flatwork.
What is a bull float used for in concrete?
A bull float is used immediately after screeding to flatten ridges, fill voids, and embed coarse aggregate below the surface. It is the first large-area finishing operation — typically a rectangular aluminum or magnesium blade 8×36–48 inches on a long adjustable handle. It must be used before bleed water accumulates on the surface.
What tools do I need to pour a concrete slab?
For a standard residential slab: a concrete mixer or ready mix delivery, wheelbarrow, come-along rake, screed board, bull float, hand trowel or power trowel, edger, groover, broom, and curing compound or plastic sheeting. For larger slabs: add a concrete vibrator, laser level, and power screed.
What are concrete forms and what tools are used for formwork?
Concrete forms (formwork) are the temporary molds that contain concrete during placement. Residential flatwork uses 2×4 or 2×6 lumber stakes and boards assembled on site. Commercial work uses modular steel or aluminum panel systems. Tools include a hammer and nails or screws for lumber forms, tie wire and snap ties for modular systems, and a level for setting form height.
What is a concrete vibrator and when is it used?
A concrete vibrator is an immersion tool inserted into fresh concrete to remove air voids and consolidate the mix. The internal (immersion) vibrator is a cylindrical head that vibrates at up to 12,000 rpm. It is used immediately after placement — inserted vertically at regular intervals, held for 5–15 seconds, then slowly withdrawn. Skipping vibration on structural elements causes honeycombing and significantly reduced strength.
What tools are needed for concrete grinding and polishing?
Concrete grinding uses an angle grinder with a diamond cup wheel for surface prep and spot grinding. Full floor polishing uses a planetary grinder with progressively finer diamond pads (typically 16 grit through 3,000 grit), a densifier chemical, and a dust collection system. A HEPA-filtered dust collector is mandatory for health compliance during all grinding operations.
What safety gear is required for concrete work?
Minimum safety gear: safety glasses or goggles, rubber or PVC gloves (concrete causes chemical burns), rubber boots, and a kneeling board for finishing work. For cutting and grinding: add an N95 or P100 respirator and hearing protection. For site work: high-visibility vest. OSHA’s silica standard mandates dust control for all cutting and grinding — wet cutting or HEPA dust collection is required.
Conclusion
Every phase of concrete work has a corresponding tool — and using the right tool at the right time is what separates a professional result from a failed pour. Mixing, placing, consolidating, screeding, floating, troweling, edging, grooving, brooming, curing, cutting, and drilling all require specific equipment. For DIY projects, a drum mixer, bull float, hand trowel, edger, groover, and broom cover most residential pours. For professional work, add a vibrator, power trowel, laser level, and concrete saw. Calculate your concrete volume and material requirements before gathering your tools — use the free concrete calculator at ConcreteCal to get your quantities right before the first bag opens or the truck arrives.