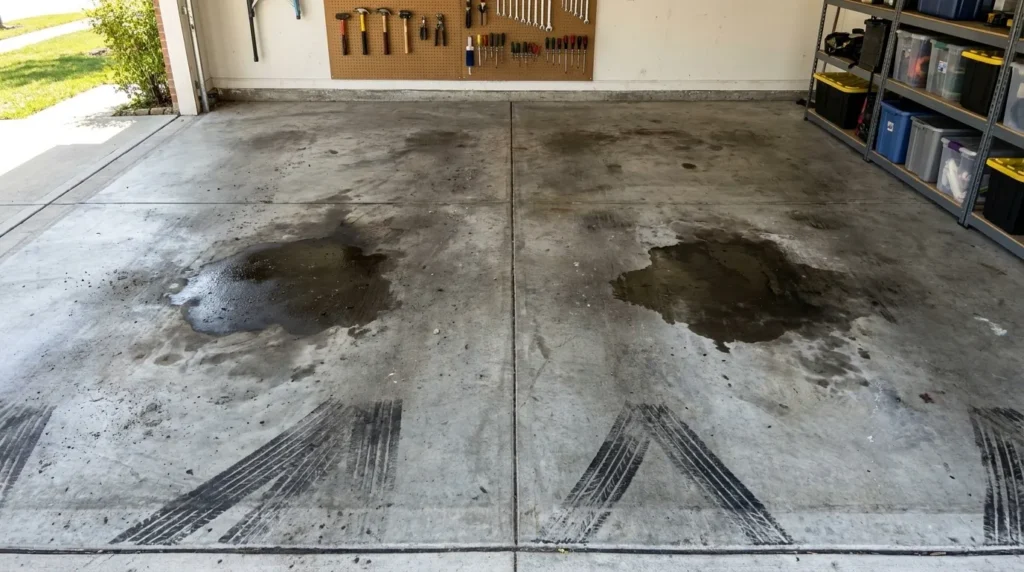

A garage floor takes abuse that no other concrete surface in a residential property experiences. Motor oil drips from a leaking sump, transmission fluid puddles under the car during a fluid change, antifreeze spreads across the slab when a hose blows, tire rubber deposits black marks with every turn of the steering wheel, and road salt and grit gets tracked in from the driveway every winter. Left unaddressed, these contaminants penetrate the concrete and become progressively harder to remove.
Knowing how to clean a concrete garage floor correctly — matching the right product to the right stain type, using the right tools for the floor condition, and following a method that actually removes contamination rather than just spreading it around — is the difference between a floor that looks presentable and one that looks like it has never been cleaned.
This guide covers the complete garage floor cleaning process: a step-by-step general cleaning method, specific stain removal techniques for every common garage contaminant, pressure washing guidance, epoxy floor care, and a maintenance schedule that keeps the work manageable.
Before any concrete project — including calculating sealer quantities for garage floor sealing after cleaning — use the free concrete calculator at ConcreteCal. For a complete guide to concrete maintenance beyond the garage, see our how to maintain concrete guide.
Table of Contents
- Why Garage Floors Need Their Own Cleaning Approach
- Tools and Products for Cleaning a Concrete Garage Floor
- How to Clean Concrete Garage Floor — Complete Step by Step
- How to Remove Oil Stains from Garage Floor
- How to Remove Tire Marks from Concrete Garage Floor
- How to Remove Other Common Garage Floor Stains
- Pressure Washing a Concrete Garage Floor
- How to Clean an Epoxy Garage Floor
- Garage Floor Cleaning Frequency and Schedule
- After Cleaning — Should You Seal Your Garage Floor?
- Frequently Asked Questions
Why Garage Floors Need Their Own Cleaning Approach
Most indoor floor cleaning guides focus on dust, foot traffic dirt, and occasional food spills. Garage floors deal with an entirely different category of contamination — petroleum-based fluids, rubber compounds, road chemicals, heavy grit, and sometimes caustic battery acid. These contaminants require different products, different mechanical action, and different protective measures than standard household dirt.
What Makes Garage Floors Different
Petroleum contamination: Engine oil, transmission fluid, power steering fluid, and brake fluid all contain hydrocarbon compounds that penetrate unsealed concrete deeply and resist water-based cleaning. Standard household cleaners do not break down petroleum compounds — you need a dedicated degreaser or solvent-based treatment.
Rubber compound deposits: Tire marks are not just surface dirt — they are a combination of rubber compound, release agents from tyre manufacturing, and road residue that bond strongly to the concrete surface. They resist scrubbing unless the right product is used to break the bond first.
Road salt and chemical residue: In winter climates, road salt and deicer chemicals are tracked into the garage on tyre treads and undercarriage drips. These chloride compounds are aggressively corrosive to both bare concrete and concrete reinforcement — they should be rinsed away promptly rather than left to accumulate.
Heavy grit and abrasive particles: The grit tracked in from driveways and roads is far more abrasive than household dust. On an epoxy-coated garage floor, this grit causes visible scratching if dragged under a mop before dry sweeping.
Sealed vs Unsealed Garage Floor — What You Have
The cleaning approach differs significantly depending on whether your garage floor has any surface treatment.
Bare concrete (most common): No sealer, no coating — the concrete is raw and porous. Absorbs oil and fluids rapidly. Tolerates aggressive scrubbing and a wide range of cleaning products. Most susceptible to permanent staining.
Penetrating sealed concrete: A silane or siloxane sealer has been applied — the surface looks like bare concrete but is more resistant to absorption. Clean similarly to bare concrete but avoid strong acids.
Topical sealed concrete (acrylic or polyurethane): A film-forming sealer on the surface. Clean with pH-neutral products — acidic or alkaline cleaners degrade the sealer.
Epoxy-coated floor: The most common garage upgrade — a two-component epoxy coating that creates a hard, chemical-resistant surface. Has its own specific cleaning requirements covered in a dedicated section below.
The water bead test: Pour a small amount of water on the floor. If it beads and sits: topical sealer or epoxy present. If it absorbs within 30 seconds: penetrating sealer. If it absorbs immediately: bare concrete.
Tools and Products for Cleaning a Concrete Garage Floor
Essential Tools
Stiff-bristle deck brush: The primary scrubbing tool for bare and penetrating-sealed garage floors. A long-handled deck brush with stiff nylon bristles provides the mechanical action needed to break up oil and grime — soft mop bristles are completely inadequate for garage floor cleaning.
Push broom with stiff bristles: For sweeping loose grit and debris before wet cleaning. A soft-bristle broom leaves too much fine grit on the surface.
Garden hose or pressure washer: For rinsing. A garden hose with a spray nozzle is adequate for regular cleaning. A pressure washer (1,500–2,500 PSI) is more effective for deep cleaning and stain removal — covered in detail below.
Wet vacuum or rubber floor squeegee: For removing dirty rinse water from the floor after cleaning. Essential for garage floors — mopping dirty water across the floor redeposits it rather than removing it.
Plastic scraper: For removing dried oil residue, adhesive, and any hardened material before liquid treatment.
Floor scrubbing machine (optional): A walk-behind auto-scrubber dramatically reduces labour on large garage floors (over 400 sq ft). Applies cleaning solution and scrubs simultaneously, collecting dirty water in an onboard tank. Available from equipment rental companies at $50–$100 per day.
Best Cleaning Products for Garage Floors
| Product | Use For | Application |
|---|---|---|
| Commercial concrete degreaser | General oil and grease, overall cleaning | Diluted or full-strength depending on contamination |
| Trisodium phosphate (TSP) | Heavy-duty degreasing, preparation for sealing | Diluted in warm water |
| Oxygen bleach (OxiClean) | Organic stains, general brightening | Mixed with warm water |
| Oxalic acid / rust remover | Rust stains, mineral deposits | Applied directly to stained area |
| Mineral spirits / naphtha | Deep-set oil stains in poultice | Mixed with absorbent material |
| Muriatic acid (1:10) | Efflorescence, preparation for epoxy | Careful dilution and safety precautions |
| pH-neutral floor cleaner | Epoxy floors, topical-sealed floors | Diluted per manufacturer |
The concrete garage floor cleaner and degreaser available here is purpose-formulated for the petroleum-based contamination typical of garage floors — effective on set oil stains, tire marks, and general garage grime without damaging bare concrete or common sealers. This is the type of product that professional concrete cleaners use rather than the household cleaners that most homeowners try first.
What to Avoid on Garage Concrete
Bleach (full strength): Discolors concrete and is not effective on petroleum-based stains. The alkalinity can saponify oil — turning it into a soap-like substance that is actually harder to remove.
Dish soap alone: Fine for regular maintenance of lightly contaminated floors but does not break down set oil stains. Not a substitute for a proper degreaser on a heavily contaminated garage floor.
Steam mops: Totally inappropriate for garage floors — they do not provide the mechanical scrubbing action needed for oil removal and can damage any existing sealer or coating.
Wire brushes: Scratch and damage the concrete surface — particularly harmful to epoxy coatings and any sealed surface. Use stiff nylon bristles only.
How to Clean Concrete Garage Floor — Complete Step by Step
This is the complete general cleaning sequence — use this for the full annual or biannual deep clean. Specific stain treatments are covered in subsequent sections.
Step 1 — Clear and Prepare
Remove everything from the floor — vehicles, tools, floor mats, storage items. Any item left on the floor during cleaning will have a dirty outline around it that must be cleaned separately. For a full deep clean, the floor must be completely accessible.
If possible, open the garage door fully and any side windows or doors — ventilation is important when using degreasers, which have strong fumes. Wear rubber gloves and eye protection throughout the cleaning process.
Step 2 — Dry Sweep Thoroughly
Sweep the entire floor with a stiff push broom, working from the back of the garage toward the open door. Collect all loose grit, dirt, leaves, and debris into a pile and remove it.
Why this step matters: The grit and debris on a garage floor is highly abrasive — dragging it under a wet mop or scrub brush scratches the surface and embeds particles more deeply. Complete dry removal before any water is applied is not optional.
For floors that have not been cleaned in more than six months, consider using a shop vacuum after sweeping to capture fine particles that the broom leaves behind.
Step 3 — Apply Degreaser
For moderately contaminated floors: Dilute the concrete degreaser at the manufacturer’s recommended ratio (typically 1:10 to 1:5, degreaser to water). Apply the solution across the entire floor surface using a watering can, pump sprayer, or mop. Ensure complete coverage — do not leave dry patches.
For heavily contaminated floors with significant oil staining: Apply degreaser at a stronger dilution (1:5 or even undiluted for the worst stain areas) as a pre-treatment to specific stain locations before the general floor treatment.
Dwell time: Allow the degreaser to sit for 10–15 minutes. Do not allow it to dry — if the floor is warm or the ventilation is strong and the product is drying, apply additional product to keep the surface wet. The dwell time allows the degreaser to break down the hydrocarbon bonds in the oil before scrubbing.
Step 4 — Scrub the Floor
With a stiff deck brush: Work in sections of approximately 3×3 feet. Scrub in overlapping circular passes, applying firm downward pressure. On stained areas, scrub more aggressively. Work from the back of the garage toward the open door.
With a floor scrubbing machine: Set the machine’s solution delivery to “on” and make overlapping passes across the floor in one direction, then repeat perpendicular passes. The machine’s rotating brushes provide more consistent pressure than manual scrubbing.
The scrubbing motion: Circular scrubbing is more effective than linear back-and-forth at dislodging embedded contamination. The circular motion attacks the stain from multiple directions rather than just pushing it in one direction.
Worked Example — Single-Car Garage:
A 240 sq ft single-car garage floor with moderate oil staining in the parking area and general grime across the full surface. Applied degreaser at 1:8 dilution across the full floor, 1:4 dilution on oil areas. Dwell 12 minutes. Scrubbed the full floor with a long-handled deck brush — approximately 20 minutes of active scrubbing. Paid extra attention to the oil area with an additional two minutes of concentrated circular scrubbing.
Step 5 — Rinse and Remove Water
Garden hose rinse: Direct the spray nozzle to rinse from the back of the garage toward the open door — or toward any floor drain if one is present. Use firm water pressure to push contaminated water off the floor rather than allowing it to pool.
Multiple rinses: The first rinse will be visibly grey and oily. Continue rinsing until the water running off the floor is relatively clear. On a heavily contaminated floor, two or three rinse cycles may be necessary.
Remove standing water: Use a rubber floor squeegee to push remaining water toward the door, or a wet vacuum to collect it. Do not leave water standing on the floor — concrete absorbs pooled water which can cause issues on epoxy coatings and contributes to efflorescence on bare concrete.
Step 6 — Inspect and Treat Remaining Stains
Once the floor is dry enough to see the results of the general cleaning, inspect for any stains that remain. Oil stains that have been in place for months or years often require additional targeted treatment beyond the general clean — covered in the next section.
How to Remove Oil Stains from Garage Floor
Oil stains are the most common and most persistent garage floor problem. The longer oil has been in contact with concrete, the deeper it has penetrated, and the more intensive the treatment required.
Fresh Oil Spills (Under 24 Hours)
Fresh oil has not yet penetrated deeply into the concrete pore structure — this is the easiest stage to address.
Method:
- Absorb as much liquid as possible immediately — pour cat litter, sawdust, or commercial oil absorbent directly onto the spill
- Leave the absorbent in place for 1–4 hours (longer is better for larger spills)
- Sweep up the absorbent material and dispose of it properly
- Apply dish soap or diluted degreaser to the remaining stain
- Scrub with stiff brush, rinse thoroughly
Key principle: Do not spread the oil by rubbing it across the floor. Pour absorbent directly onto the spill and allow it to draw the oil upward rather than pushing it sideways.
Set Oil Stains (Weeks to Months Old)
Oil that has had days or weeks to penetrate requires a dedicated degreaser and more aggressive scrubbing.
Method:
- Apply commercial concrete degreaser at full strength (undiluted) to the stained area
- Spread the degreaser over the stain with a stiff brush — do not allow it to run beyond the stain edges
- Allow 15–20 minutes dwell time
- Scrub vigorously with the deck brush in circular passes
- Rinse thoroughly
- Evaluate — if significant staining remains, proceed to the poultice method or repeat the degreaser treatment
Worked Example — 3-Month Old Oil Drip:
A dark engine oil stain approximately 8 inches in diameter from a recurring oil leak. Applied undiluted degreaser, dwell 18 minutes, scrubbed with concentrated circular pressure for 5 minutes. Rinsed. Result: approximately 70% improvement — stain shadow visible but much lighter. Second degreaser treatment followed by overnight poultice: 95% removal. Small residual shadow remains that will not affect floor function but is visible upon close inspection.
Deep-Set Oil Stains — The Poultice Method
The poultice method is the most effective technique for oil stains that do not respond adequately to degreaser scrubbing alone. A poultice draws the oil out of the concrete pores rather than simply cleaning the surface.
Making a concrete oil-stain poultice:
- Absorbent material: baking soda, diatomaceous earth, powdered chalk, or commercial concrete poultice powder
- Solvent: mineral spirits, acetone, or commercial poultice solvent
- Mix to a thick paste consistency — approximately peanut butter texture
Method:
- Clean the stain first with degreaser to remove surface oil
- Mix the poultice to a thick paste
- Apply the poultice approximately 1cm (half inch) thick over the entire stained area — extend 2cm beyond the stain edges
- Cover with plastic sheeting and tape all edges to seal — this slows the evaporation and forces the solvent to work through the concrete rather than evaporating upward
- Leave for 24–48 hours minimum
- Remove the plastic covering
- Allow the poultice to dry completely — it will dry to a crumbly powder (this is the oil it has drawn out of the concrete)
- Scrape up the dried poultice with a plastic scraper and dispose of it
- Scrub the area with degreaser and rinse
Multiple applications: Very old or deeply penetrated oil stains may require 2–3 poultice applications before the stain is adequately removed. Each application draws out another layer of the oil. Most stains show significant improvement after the first application.
How to Remove Tire Marks from Concrete Garage Floor
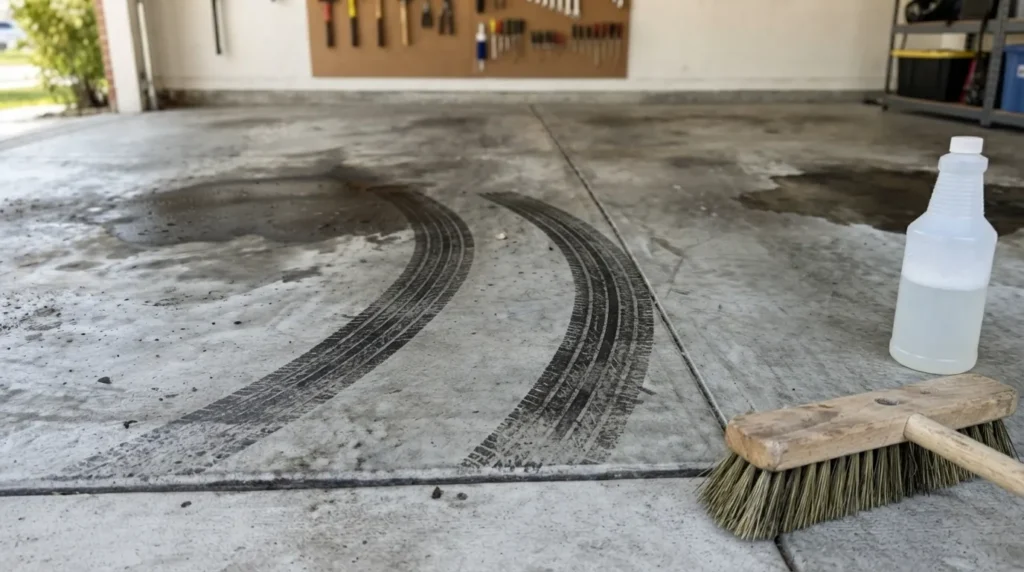
Why Tire Marks Are Difficult to Remove
Tire marks are not simply rubber deposited on the surface — they are a combination of tyre compound, plasticisers, and carbon black that bond to the concrete surface through heat and pressure. When a car turns tightly on a warm day, the tyre briefly softens and deposits this compound directly into the surface texture of the concrete.
Standard water-based cleaners do not break down the rubber compound bond — you need either a solvent-based product that dissolves the rubber, or a product specifically formulated to break the bond between rubber compound and concrete.
Tire Mark Removal Method
Method:
- Apply a dedicated tire mark remover or concrete degreaser — allow 10 minutes dwell time
- Alternatively: apply a small amount of mineral spirits or citrus degreaser directly to the marks
- Scrub with a stiff nylon brush in vigorous back-and-forth passes along the direction of the marks
- For stubborn marks: apply a commercial oven cleaner (alkaline, high-pH) — allow 5 minutes only, do not leave longer as it can affect the concrete surface
- Scrub again, then rinse thoroughly
What actually works: The most consistently effective over-the-counter product for tire marks on bare concrete is a strong alkaline degreaser — the high pH breaks down the rubber compound more effectively than neutral or acidic products. On epoxy-coated floors, stick to pH-neutral tire mark removers to protect the coating.
Prevention: Floor mats at the entry point where turning occurs prevent the majority of tire mark deposition. Rubber-backed mats designed specifically for garage entry positions are more effective than standard floor mats.
How to Remove Other Common Garage Floor Stains
Transmission Fluid and Coolant
Transmission fluid (red/pink): Treat identically to engine oil — degreaser, dwell time, scrub, rinse. The red colour is a dye that can remain as a faint tint even after the fluid is removed. A secondary treatment with oxygen bleach (OxiClean) helps lift the residual colour.
Coolant (green, orange, or pink): Antifreeze contains ethylene glycol which is water-soluble — easier to remove than oil. Rinse immediately with water, then clean with general degreaser. Old dried coolant may leave a sticky residue — apply warm water to re-dissolve before cleaning.
Environmental note: Coolant is extremely toxic to animals — never allow it to drain toward landscaping or storm drains. Collect all coolant-contaminated rinse water with a wet vacuum and dispose of properly.
Rust Stains
Rust stains on garage floors typically come from metal tools, car parts, or rebar bleeding through from below the slab.
Method:
- Apply commercial rust remover (oxalic acid-based) directly to the stained area
- Allow 5–10 minutes dwell time — watch for the rust colour lifting
- Scrub with nylon brush
- Rinse thoroughly — multiple rinses to remove all acid residue
- Neutralise with baking soda solution if using muriatic acid
Important: Oxalic acid and muriatic acid products can slightly lighten the surrounding concrete. Test on an inconspicuous area and apply carefully to the stain area only — do not allow the product to spread broadly.
Paint and Chemical Spills
Latex paint (still wet): Rinse with water immediately and scrub with a brush and soapy water.
Dried latex paint: Soak with warm water for 20 minutes to soften, then scrape with a plastic scraper. Remaining residue: apply commercial paint remover rated for concrete, follow manufacturer instructions, scrape and rinse.
Oil-based paint: Apply paint stripper formulated for concrete, dwell per manufacturer instructions, scrape with plastic scraper, clean with mineral spirits, rinse.
Chemical spills (solvents, acids): Neutralise first — alkaline spills with diluted vinegar, acid spills with baking soda solution. Then clean with water and degreaser. Some chemical stains permanently alter concrete colour and cannot be fully removed.
Battery Acid Stains
Battery acid (sulfuric acid) etches concrete, creating a rough, pitted area that may appear lighter than the surrounding floor. This etching is a permanent surface change — the goal is to neutralise remaining acid and clean the area, not to restore the original appearance.
Method:
- Apply baking soda directly to the area to neutralise remaining acid — it will bubble and fizz as it neutralises
- Continue adding baking soda until fizzing stops completely
- Sweep up neutralised material
- Clean with general degreaser and scrub
- Rinse thoroughly
- The etched texture will remain — sealing the area can reduce the visual contrast with the surrounding concrete
Pressure Washing a Concrete Garage Floor
A pressure washer is the most effective tool for deep cleaning a bare or penetrating-sealed concrete garage floor. The high-pressure water jet breaks up embedded contamination and flushes it off the surface more effectively than any scrubbing method.
Correct Pressure and Nozzle Selection
Pressure setting: 1,500–2,500 PSI for standard residential garage floors. Do not exceed 3,000 PSI — excessive pressure etches and pits concrete surfaces, and damages any existing sealer or coating.
Nozzle selection:
| Nozzle | Angle | Use |
|---|---|---|
| 0-degree (red) | Pinpoint | Never use on concrete — etches surface |
| 15-degree (yellow) | Narrow fan | Heavy stain areas only |
| 25-degree (green) | Standard fan | General floor cleaning — correct choice |
| 40-degree (white) | Wide fan | Light rinsing |
| Soap nozzle (black) | Wide, low pressure | Applying degreaser |
Pressure Washing Technique
Method:
- Apply degreaser with the soap nozzle or a pump sprayer — allow 10–15 minutes dwell time
- Switch to the 25-degree nozzle
- Hold the wand 6–12 inches from the surface — consistent distance produces consistent cleaning
- Work in overlapping passes in one direction — left to right, then advance toward the garage door
- Do not allow the wand to slow or stop over any one spot — constant motion prevents surface etching
- Rinse from the back of the garage toward the open door — or toward a floor drain
Worked Example — Two-Car Garage, Annual Deep Clean:
A 480 sq ft two-car garage floor, last pressure washed 14 months ago. Applied commercial degreaser by pump sprayer to the full floor plus extra on both oil drip areas. Dwell 15 minutes. Pressure washed at 2,000 PSI with 25-degree nozzle — worked in 5-foot wide strips from back wall to garage door. Two overlapping passes per strip. Total pressure washing time: approximately 25 minutes. Squeegeed standing water toward the door, wet vacuumed residual water. Floor visibly lighter and cleaner — oil areas 80% improved, requiring targeted follow-up treatment with poultice.
When Not to Pressure Wash
Do not pressure wash:
- Epoxy-coated floors — high pressure can delaminate epoxy from the concrete, particularly at edges and any existing chips or cracks
- Painted concrete — water pressure lifts paint from edges and hairline cracks
- Immediately before sealing — the floor must dry for 24–48 hours after pressure washing before any sealer is applied
How to Clean an Epoxy Garage Floor
Epoxy-coated garage floors are increasingly common — the coating provides chemical resistance, easy cleaning, and improved appearance. But epoxy has specific cleaning requirements that differ from bare concrete.
Regular Epoxy Floor Cleaning
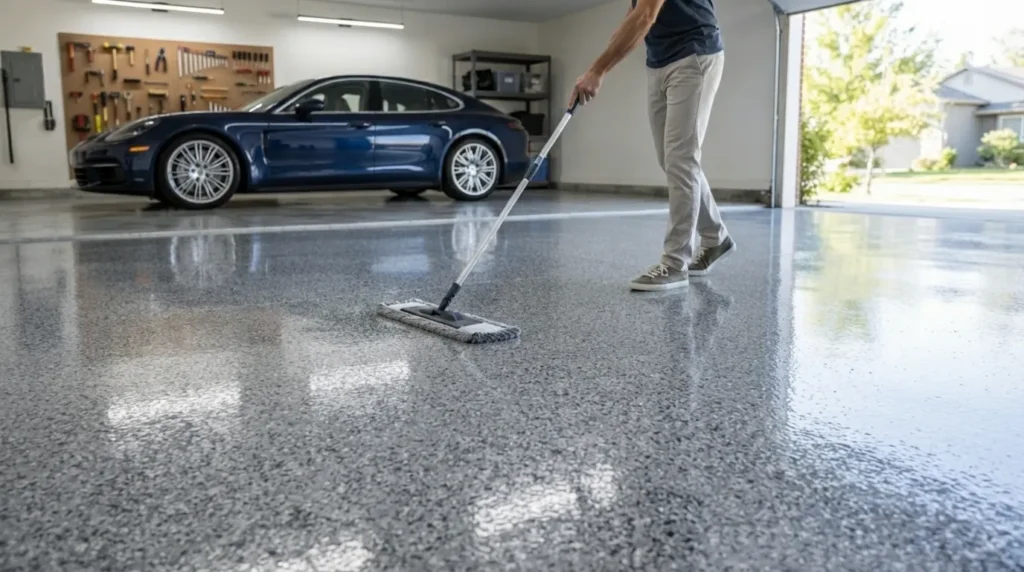
The critical rule for epoxy: pH-neutral cleaner only. Acidic cleaners (vinegar, citrus products) and strongly alkaline cleaners both degrade epoxy coatings over time — etching the surface, causing cloudiness, and eventually peeling.
Method:
- Dust mop or soft-bristle sweep — essential on epoxy where grit causes visible scratching
- Diluted pH-neutral cleaner (1 teaspoon dish soap per gallon of warm water)
- Mop with a microfiber flat mop — wrung nearly dry
- No-rinse approach: sufficiently diluted cleaner leaves no residue
- For spots: apply cleaner directly, scrub gently with a soft-bristle nylon brush (not stiff bristles), wipe clean
Oil spills on epoxy: Wipe up immediately with paper towels or rags, then clean the area with diluted degreaser (pH 7–9 maximum) and a soft cloth. Epoxy is more resistant to oil absorption than bare concrete — prompt cleanup usually prevents any staining.
Tire marks on epoxy: Use a tire mark remover specifically rated for epoxy-coated floors. Standard concrete tire mark removers may be too alkaline and can affect the epoxy surface. Test in a corner before applying broadly.
Deep Cleaning Epoxy
For quarterly or annual deep cleaning of epoxy garage floors:
- Sweep thoroughly
- Apply manufacturer-recommended epoxy floor cleaner at the specified dilution
- Scrub with a soft-bristle floor brush or microfiber scrubbing pad — never use stiff nylon or abrasive pads
- Rinse with clean water — mop up rinse water immediately
- Dry with a clean microfiber mop or allow to air dry with the garage door open
Restoring dull epoxy: If the epoxy surface has lost its sheen from cleaning product residue or light surface abrasion, apply a commercial epoxy floor polish or wax (available from floor coating suppliers). This restores the surface gloss without requiring professional refinishing.
Garage Floor Cleaning Frequency and Schedule
| Activity | Frequency | Tool | Time Required |
|---|---|---|---|
| Sweep loose grit and debris | Weekly | Stiff push broom | 5–10 minutes |
| Spot clean oil drips | As they occur | Absorbent + degreaser | 10–20 minutes |
| Damp mop (bare concrete) | Monthly | Deck brush + degreaser | 20–30 minutes |
| Damp mop (epoxy) | Monthly | Microfiber mop + pH-neutral cleaner | 15–20 minutes |
| Full deep clean | Every 6 months | All tools + pressure washer | 2–4 hours |
| Reapply sealer (bare concrete) | Every 2–5 years | Sealer + roller | 4–6 hours + dry time |
| Reapply epoxy topcoat | Every 5–10 years | Professional or DIY kit | Full weekend project |
The most important maintenance habit: Address spills immediately. Oil that sits for 24 hours is ten times harder to remove than fresh oil. Every hour of delay allows petroleum compounds to penetrate deeper into the concrete pore structure. Keeping a small container of cat litter or commercial oil absorbent in the garage means spills can be addressed within minutes.
After Cleaning — Should You Seal Your Garage Floor?
If your garage floor is currently bare concrete, cleaning it thoroughly and then sealing it is the most effective long-term maintenance investment you can make. A sealed floor resists oil absorption, cleans in minutes rather than hours, and looks dramatically better.
After deep cleaning: Allow the floor to dry completely — minimum 24 hours, preferably 48 hours in humid conditions. Test with the plastic sheet method (tape a sheet to the floor, check for condensation after 24 hours) before applying any sealer.
Sealer options for garage floors:
| Sealer Type | Protection | Appearance | Reapplication |
|---|---|---|---|
| Penetrating silane-siloxane | Good (pore blocking) | No change | Every 3–5 years |
| Acrylic topical | Moderate | Slight sheen | Every 1–3 years |
| Epoxy coating | Excellent | High gloss | Every 5–10 years |
| Polyurethane topcoat | Very good | Medium-high gloss | Every 3–5 years |
For a complete guide to sealer types and which is right for your garage floor, see our types of concrete sealers guide. For general concrete maintenance beyond the garage, see our best way to clean concrete floors guide which covers indoor, polished, and decorative floor surfaces.
Frequently Asked Questions
How do I clean a concrete garage floor?
Start by sweeping all loose grit and debris. Apply a commercial concrete degreaser at the manufacturer’s recommended dilution across the full floor — allow 10–15 minutes dwell time. Scrub with a stiff nylon deck brush using overlapping circular passes. Rinse with a garden hose or pressure washer, working water toward the garage door or a floor drain. Remove standing water with a squeegee or wet vacuum. Treat remaining stains (oil, tire marks, rust) with targeted products described in this guide.
What is the best product to clean a concrete garage floor?
A commercial concrete degreaser is the most effective product for garage floors — it breaks down petroleum-based contamination (oil, transmission fluid, grease) that standard household cleaners cannot address. For regular maintenance between deep cleans, diluted dish soap (1–2 teaspoons per gallon of warm water) and a stiff brush are adequate. For tile marks, a dedicated tire mark remover or strong alkaline degreaser works best.
How do I remove oil stains from a concrete garage floor?
Fresh oil: absorb immediately with cat litter or oil absorbent, then clean with degreaser. Set oil stains: apply commercial degreaser undiluted, dwell 15–20 minutes, scrub vigorously, rinse. Old deep-set stains: use the poultice method — mix absorbent material (baking soda, diatomaceous earth) with mineral spirits to a paste, apply 1cm thick over the stain, cover with plastic for 24–48 hours, remove and rinse. Repeat if necessary.
Can I pressure wash a concrete garage floor?
Yes — pressure washing at 1,500–2,500 PSI with a 25-degree fan nozzle is one of the most effective deep cleaning methods for bare or penetrating-sealed concrete garage floors. Apply degreaser first, allow dwell time, then pressure wash. Do not pressure wash epoxy-coated floors — high pressure can delaminate the coating. Allow 24–48 hours of drying time before applying any sealer after pressure washing.
How do I clean tire marks off a concrete garage floor?
Apply a dedicated tire mark remover or a strong alkaline concrete degreaser — allow 10 minutes dwell time. Scrub vigorously with a stiff nylon brush in the direction of the marks. For stubborn marks, a brief application (5 minutes maximum) of alkaline oven cleaner can break the rubber compound bond. Rinse thoroughly. On epoxy floors, use only products specifically rated for epoxy to avoid coating damage.
How do I clean an epoxy garage floor?
Use pH-neutral cleaner only — acidic or strongly alkaline products degrade epoxy coatings. Dust mop before any wet cleaning to remove grit that scratches the surface. Damp mop with very diluted dish soap (1 teaspoon per gallon) and a microfiber flat mop. For spills, wipe up immediately and clean with pH-neutral cleaner and a soft cloth. Never use stiff nylon brushes, abrasive pads, or pressure washers on epoxy.
How often should I clean my garage floor?
Weekly: sweep grit and debris. Monthly: damp mop the full floor (bare concrete with degreaser, epoxy with pH-neutral cleaner). Every 6 months: full deep clean with degreaser, scrubbing, and thorough rinsing. Immediately: any oil, fluid, or chemical spill — every hour of delay makes removal significantly harder. Annual: pressure wash bare concrete floors and inspect for any sealer or coating that needs renewal.
Conclusion
A clean garage floor is not just aesthetic — it prevents the petroleum contamination from becoming permanent, extends the life of any sealer or coating, and removes the road salt and chemical residue that attacks the concrete surface over time. The method is consistent: sweep first, apply the right product for the contamination type, dwell time, scrub mechanically, rinse thoroughly, remove standing water. Address oil spills immediately rather than allowing them to set. Deep clean twice a year rather than once a year when everything becomes difficult. And seriously consider sealing the floor after the next deep clean — it will reduce your cleaning time from hours to minutes for every session that follows. Calculate your sealer quantities with the ConcreteCal free concrete calculator before the next cleaning-and-sealing project.