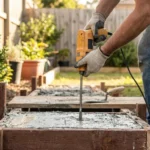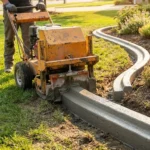

The difference between a concrete stepping stone that looks good for two seasons and one that looks good for twenty years comes down to three things: mix design, curing, and — most importantly — how completely the concrete was consolidated when it was poured. A stepping stone with trapped air voids is weaker, more porous, more vulnerable to frost damage, and visually inferior to one that was thoroughly vibrated. The surface is rougher, the colour is less uniform, and the detail from the mould is less crisp.
A vibrating table for concrete solves this consolidation problem without requiring any operator skill or technique. The mould sits on the table, the concrete is poured in, the table vibrates, and the concrete settles completely into every corner of the mould — releasing air and producing a dense, void-free cast that a poker vibrator could not match in a mould of this scale.
From craft concrete workshops making decorative planters, to commercial operations producing hundreds of paving blocks per day, the vibrating table is the production equipment that separates hobby results from professional quality. This guide covers everything: how vibrating tables work, how to choose the right size and motor, how to build a DIY version, what concrete mixes work best, and how to get consistent results pour after pour.
For concrete volume calculations before production runs, use the free concrete calculator at ConcreteCal. For guidance on the vibro motors that power vibrating tables, see our concrete vibration motor guide.
Table of Contents
- What Is a Vibrating Table for Concrete and How Does It Work?
- Types of Vibrating Tables for Concrete
- Vibrating Table Motor — What Powers the Vibration
- Vibrating Table for Concrete Size Selection Guide
- Vibrating Table for Concrete — Application Guide
- Vibrating Table Comparison — DIY vs Commercial
- How to Build a DIY Concrete Vibrating Table
- Concrete Mix Design for Vibrating Table Production
- Operating Tips for Best Results
- Vibrating Table Maintenance
- Frequently Asked Questions
What Is a Vibrating Table for Concrete and How Does It Work?
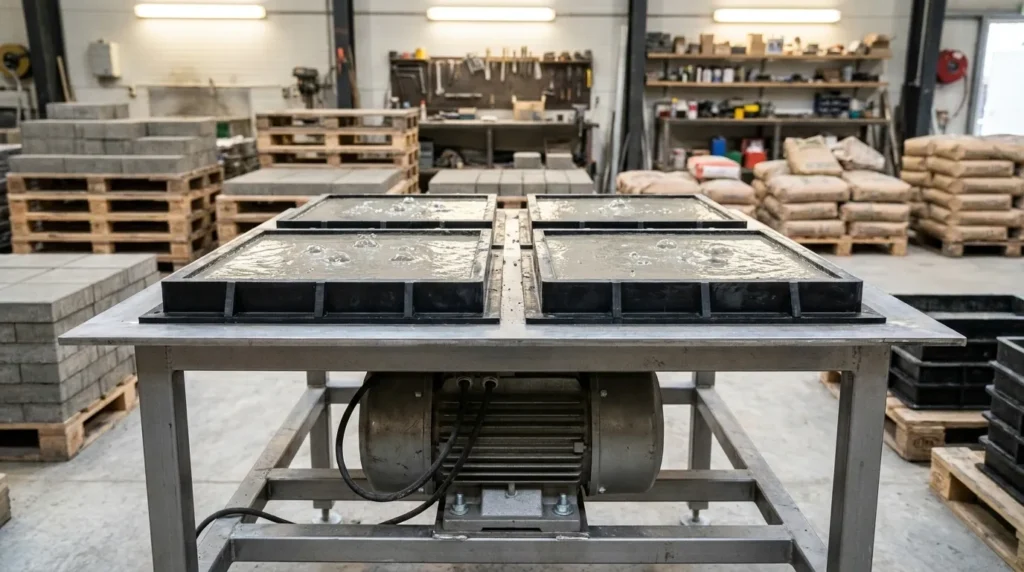
A concrete vibrating table is a steel surface mounted on rubber isolators and driven by one or more eccentric mass vibro motors. Concrete moulds are placed on the table, filled with fresh concrete, and vibrated for 15–60 seconds — the vibration consolidates the concrete within the mould, releasing trapped air and producing a dense, uniform cast product.
Internal vs External Vibration — The Key Difference
Every concrete vibration method works on the same principle — temporarily reducing the friction between concrete particles so the mix flows, air rises, and aggregate settles. The difference between internal and external vibration is where the vibration energy enters the concrete.
Internal vibration (poker vibrator): The vibrator head is inserted directly into the concrete. Vibration energy radiates outward from the poker — the concrete around the poker is directly mobilised. Effective radius is limited by the poker diameter (typically 6–10× the poker diameter). Requires an operator to manage insertion, dwell time, and withdrawal.
External vibration (vibrating table): The vibration source is outside the concrete. Vibration energy passes through the mould walls and base into the concrete from all sides simultaneously. Every particle of concrete receives vibration energy regardless of mould geometry. No insertion technique required — the operator fills the mould and the table does the work.
When external vibration is superior:
- Moulds too small or complex for poker insertion
- High-volume production where operator technique variation would affect consistency
- Decorative moulds where poker holes in the concrete surface are unacceptable
- Thin sections (under 50mm) where poker insertion would disturb the concrete geometry
How a Concrete Vibrating Table Actually Consolidates Concrete
The eccentric mass motor mounted beneath the table generates centrifugal force as its offset weight rotates. This force vibrates the table surface at the motor frequency — typically 50 Hz (3,000 vibrations per minute) for standard mains-frequency motors.
At 50 Hz, the table surface oscillates approximately 0.5–2mm in amplitude depending on motor size and table mass. This amplitude is the distance the table moves in each vibration cycle. The combination of frequency and amplitude determines the acceleration applied to the concrete — measured in multiples of gravitational acceleration (g).
Concrete consolidation requires 3–5g of vibration acceleration. Below 3g, the concrete is not adequately mobilised — air voids remain. Above 5g on fine concrete or decorative mixes, segregation can occur (aggregate sinks, paste rises). The table design targets 3–5g for the full range of payload conditions.
When a Vibrating Table Is Better Than a Poker Vibrator
| Scenario | Better Tool | Reason |
|---|---|---|
| Small decorative moulds (under 200mm) | Vibrating table | Poker too large to insert |
| High-volume production (50+ pieces/day) | Vibrating table | Consistent results, no operator skill |
| Complex-shaped moulds | Vibrating table | Vibration reaches all areas through mould |
| Thin sections (under 40mm) | Vibrating table | Poker disturbs thin sections |
| Large structural pours | Poker vibrator | Vibrating table cannot handle poured-in-place |
| Column and wall pours | Poker vibrator | External vibration insufficient for deep sections |
| Remote site pours | Poker vibrator | Portable equipment required |
Types of Vibrating Tables for Concrete
Small Craft Vibrating Tables (Under 0.5 m²)
Small vibrating tables — typically 400mm × 400mm to 600mm × 600mm surface area — are the entry point for craft concrete production. They are used by:
- Hobbyists making decorative concrete planters, stepping stones, and garden ornaments
- Small workshops producing concrete gifts and home décor items
- Craft studios teaching concrete workshops
- Artists working with concrete as a medium
Construction: Typically a light steel frame, 3–5mm steel plate surface, small single-phase eccentric mass motor (200–500W), rubber feet isolators.
Payload capacity: Typically 20–50 kg maximum — adequate for individual mould pieces up to approximately 15–20 kg of concrete.
Motor force: 300–800N centrifugal force — adequate for small concrete volumes in decorative mixes.
Worked Example — Craft Workshop:
A concrete craft workshop producing decorative concrete planters (300mm × 200mm × 150mm, approximately 4 kg each). Table: 500mm × 500mm, 25 kg, 350W motor producing 500N centrifugal force. Maximum payload: 3 planters × 4 kg = 12 kg. Total vibrating mass: 25 + 12 = 37 kg. Vibration acceleration: 500N ÷ (37 × 9.81) = 1.38g — slightly low for stiff concrete but adequate for the flowable decorative mix used in craft applications (higher water-cement ratio, finer aggregate).
Standard Production Vibrating Tables (0.5–2 m²)
Standard production tables — 600mm × 800mm to 1,200mm × 1,500mm — cover the majority of small-to-medium commercial precast operations.
Typical users:
- Landscape supply businesses producing stepping stones, garden slabs, and decorative edging
- Small precast yards producing fence posts, garden furniture bases
- Construction supply businesses making small concrete products
Construction: Heavier steel frame (50×50mm or 75×75mm RHS), 5–8mm steel plate surface, motor(s) rated 370–750W, heavy-duty rubber anti-vibration mounts.
Payload capacity: 50–200 kg — handles multiple moulds simultaneously for production efficiency.
Worked Example — Stepping Stone Production:
A small business producing 500mm × 500mm × 50mm concrete stepping stones. Table: 1.0m × 1.2m, 85 kg, single 550W motor producing 2,500N. Payload: 4 stepping stones × 30 kg = 120 kg. Total mass: 205 kg. Vibration acceleration: 2,500 ÷ (205 × 9.81) = 1.24g. This is low — indicating the motor is under-specified for this payload at maximum capacity. Reduce to 3 moulds simultaneously (95 kg payload + 85 kg table = 180 kg → 1.42g) or upgrade to a 750W motor producing 4,000N (1.98g — approaching the minimum 2g for this application).
Large Industrial Vibrating Tables (Over 2 m²)
Industrial vibrating tables — over 2 m² surface area — are used in high-volume commercial precast production: paving blocks, kerb stones, concrete pipes, architectural panels.
Construction: Heavy structural steel frame, 10–12mm steel plate, twin synchronised vibro motors (750W–2,200W each), industrial-grade isolators designed for continuous-duty operation.
Payload capacity: 200–500+ kg — multiple heavy moulds in simultaneous production.
Production rates: Industrial tables operating on 8-hour shifts can produce 500–2,000+ paving blocks per day depending on mould size and cycle time.
DIY Homemade Vibrating Tables
A significant portion of the vibrating table market is DIY-built — fabricators, concrete hobbyists, and small precast operators who build their own tables from steel and a purchased vibro motor.
DIY tables range from very simple (a sheet of steel on rubber feet with a $50 import vibro motor bolted underneath) to sophisticated engineering (properly sized RHS steel frame, matched isolator spring rates, correctly specified motor force). The difference in performance between these approaches is significant — but even a basic DIY table outperforms no vibration at all for small craft applications.
Vibrating Table Motor — What Powers the Vibration
The motor is the most important component in any vibrating table. The table structure, surface plate, and isolators all affect performance — but the motor determines the fundamental vibration force available.
Single Motor vs Twin Motor Configuration
Single motor: Generates circular vibration — the eccentric mass rotates and the table vibrates in a circular or elliptical pattern. Adequate for vibrating tables where the primary goal is concrete consolidation (the pattern does not matter, only the force level).
Twin motor (counter-rotating): Two identical motors rotating in opposite directions generate linear vibration — their circular force components cancel perpendicular to the motor shaft axis and add along it, producing a directional vibration vector. Used on production lines where linear vibration direction improves mould filling or product ejection.
For standard concrete vibrating table applications — single motor is sufficient. Twin motor configurations are used in industrial screens and feeders where the vibration direction controls material movement, not just consolidation.
Motor Power and Force Selection
The eccentric mass vibro motor is the standard power unit for concrete vibrating tables — an electric motor with offset weights on the shaft that generate centrifugal force when rotating.
Force requirement formula:
Required centrifugal force (N) = Total vibrating mass (kg) × 9.81 × g-factor
G-factor for concrete applications:
- Standard concrete mix (4–6 inch slump): g-factor = 3–4
- Stiff concrete mix (under 3 inch slump): g-factor = 4–6
- Decorative/flowable mix (over 6 inch slump): g-factor = 2–3
Motor power to force relationship (approximate):
| Motor Power | Centrifugal Force (typical) | Table Application |
|---|---|---|
| 200W | 300–600N | Craft tables, under 30 kg payload |
| 370W | 600–1,500N | Small craft tables, 30–60 kg payload |
| 550W | 1,500–3,000N | Medium tables, 60–120 kg payload |
| 750W | 3,000–5,000N | Standard production, 120–200 kg payload |
| 1,100W | 5,000–8,000N | Large production, 200–350 kg payload |
| 1,500W | 8,000–12,000N | Industrial, 350–500 kg payload |
Frequency and Amplitude for Concrete
Standard mains-frequency vibro motors operate at 3,000 RPM (50 Hz) — producing 3,000 vibrations per minute at the table surface. This frequency is well-matched to the particle size and viscosity of standard concrete mixes for consolidation.
Higher frequency (via inverter drive): Operating the motor at 75 Hz or 100 Hz through a variable frequency drive increases vibration frequency, allowing faster consolidation or improved performance with stiff mixes. The table and isolator system must be designed for higher frequency if this approach is used.
Amplitude: The distance the table moves per cycle — typically 0.5–3mm on standard tables. Higher amplitude (achieved by increasing eccentric weight) moves more concrete per cycle but risks segregation in fine mixes. Standard concrete production targets 1–2mm amplitude.
Vibrating Table for Concrete Size Selection Guide
Table Size by Product Type
| Product | Mould Size (typical) | Recommended Table Size | Moulds Per Batch |
|---|---|---|---|
| Craft planters | 150×150mm to 300×300mm | 400×400mm to 600×600mm | 1–4 |
| Stepping stones | 400×400mm to 600×600mm | 800×1,000mm to 1,200×1,200mm | 2–4 |
| Paving bricks (standard) | 200×100mm to 200×200mm | 800×1,000mm+ | 10–20 |
| Garden slabs | 600×600mm to 900×600mm | 1,200×1,500mm | 2–4 |
| Fence post bases | 200×200mm × 400mm deep | 600×800mm | 2–4 |
| Kerb sections | 250×300mm profile | 1,000×1,500mm+ | 4–8 |
| Concrete tiles | 300×300mm to 600×600mm | 800×1,200mm | 4–8 |
Rule for table sizing: Table surface area should be at least 20% larger than the combined footprint of all moulds in one batch — allow clearance around moulds for consistent vibration transmission.
Payload Capacity Calculation
Total vibrating mass = Table frame weight + surface plate weight + mould weight + concrete weight
For selection purposes:
Payload capacity (kg) = Force (N) ÷ (g-factor × 9.81)
At 4g and 2,500N motor force:
Payload = 2,500 ÷ (4 × 9.81) = 63.7 kg
This means the table can handle approximately 63.7 kg of payload (moulds + concrete) — the table’s own structural weight is excluded because the isolators support it.
Motor Force Matching Formula
The complete calculation for matching motor force to a specific table and application:
- Weigh the empty table structure (or estimate from drawings)
- Weigh the moulds and maximum concrete payload per batch
- Calculate total vibrating mass: table + payload
- Multiply by 9.81 × target g-factor
- Add 25% safety margin
- Select motor with maximum force output above this figure
Worked Example — Paving Block Production Table:
- Table structure: 120 kg (welded steel frame + 8mm plate)
- 15 paving block moulds × 3 kg each = 45 kg
- Concrete per batch: 15 × 2.5 kg = 37.5 kg
- Total payload: 82.5 kg
- Total vibrating mass: 120 + 82.5 = 202.5 kg
- Target g-factor for stiff paving concrete: 5g
- Required force: 202.5 × 9.81 × 5 = 9,932N
- With 25% margin: 9,932 × 1.25 = 12,415N required
- Motor selection: 1,500W motor producing 12,000–14,000N at maximum eccentricity ✅
Vibrating Table for Concrete — Application Guide
Paving Blocks and Kerb Stones
Paving block production is the most common commercial application for concrete vibrating tables. Standard concrete paving blocks — 200mm × 100mm × 60mm or similar — are produced in steel or rubber moulds with a dry, stiff concrete mix pressed and vibrated simultaneously or in sequence.
Mix specification for paving blocks:
- Cement: Sand: Aggregate = 1:2:3 (M20)
- Water-cement ratio: 0.40–0.45 (stiff mix)
- Aggregate: 10mm maximum — 6mm preferred for block production
- No additives required for standard grey blocks
Vibration cycle: 15–30 seconds at full vibration followed by immediate demoulding (stiff mix holds shape without curing). This rapid cycle allows high production rates — experienced operators using a production table achieve 60–120 blocks per hour.
Concrete Tiles and Stepping Stones
Decorative concrete tiles and stepping stones use a wetter mix than paving blocks — easier to release decorative detail from rubber moulds but requiring longer vibration and mould retention time.
Mix specification for decorative tiles:
- Cement: Fine sand = 1:2.5 (no coarse aggregate for fine surface detail)
- Water-cement ratio: 0.50–0.55 (more workable than block production)
- Pigment: Iron oxide at 2–5% of cement weight for coloured tiles
Vibration cycle: 30–60 seconds — longer than block production because the wetter mix takes more time to release all air bubbles. The surface should be bubble-free before vibration is stopped.
Decorative Garden Concrete
The craft concrete market — planters, bird baths, garden sculptures, hypertufa, and decorative elements — uses vibrating tables extensively because the complex mould geometries (undercuts, fine detail, irregular shapes) cannot be vibrated with a poker.
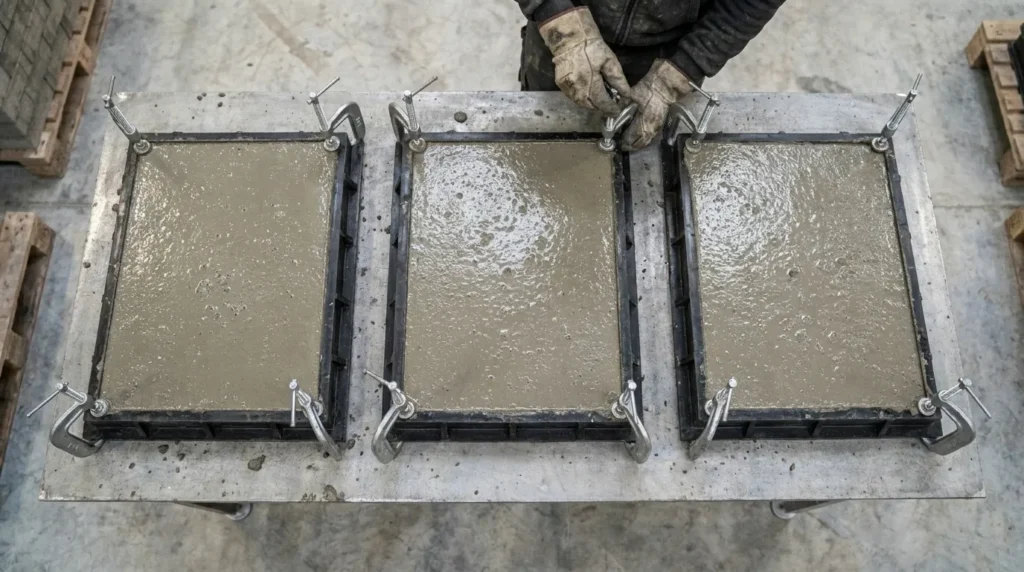
Critical detail for decorative moulds: The mould must be secured to the vibrating table during operation — even light vibration at 3,000 RPM will walk an unsecured mould off the table surface within seconds. Use G-clamps, bungee cord, or purpose-built clamp fixtures.
Worked Example — Concrete Bird Bath:
A garden supplier producing decorative bird baths in fibreglass moulds. Bird bath weight when poured: approximately 8 kg. Table: 500mm × 600mm craft table, 370W motor. Mould clamped to table surface. Vibration: 45 seconds (flowable decorative mix). Surface checked for bubble-free appearance before stopping. Demould after 24 hours. Result: crisp surface detail, no honeycomb, consistent colour distribution.
Architectural and Craft Concrete
Architectural concrete — pieces requiring exceptional surface finish, embedded aggregates, or precise colour — benefits enormously from vibrating table production. The table ensures complete air void removal without any poker marks in the finished surface.
Exposed aggregate casting: Decorative aggregate (coloured stone, recycled glass, seashells) is placed face-down in the mould before concrete is poured. Vibration settles the concrete against the aggregate without displacing it — when demoulded, the aggregate face is revealed. This technique is impractical with poker vibration (the poker disturbs the arranged aggregate).
Fence Post Bases and Small Structural Precast
Small structural precast items — fence post bases, sign bases, bollard bases — benefit from vibrating table production because the structural requirement demands thorough consolidation without the surface quality concerns of decorative items.
For structural precast: Use a stiffer mix (water-cement ratio 0.40–0.45) and longer vibration time (30–45 seconds) compared to decorative applications. The stiff mix requires more vibration energy but produces higher-strength finished pieces.
Vibrating Table Comparison — DIY vs Commercial
| Factor | DIY Built | Entry Commercial | Professional Commercial |
|---|---|---|---|
| Cost | $100–$400 | $300–$800 | $800–$3,000+ |
| Motor quality | Variable (import) | Moderate | Good to excellent |
| Force consistency | Variable | Consistent | Consistent |
| Table construction | User-dependent | Welded steel | Heavy welded steel |
| Isolator quality | Basic rubber | Standard | Engineering-grade |
| Payload capacity | 20–80 kg | 50–150 kg | 100–400 kg |
| Production rate | Low | Moderate | High |
| Maintenance | User serviced | Standard | Professional |
| Best for | Craft, hobby | Small business | Production |
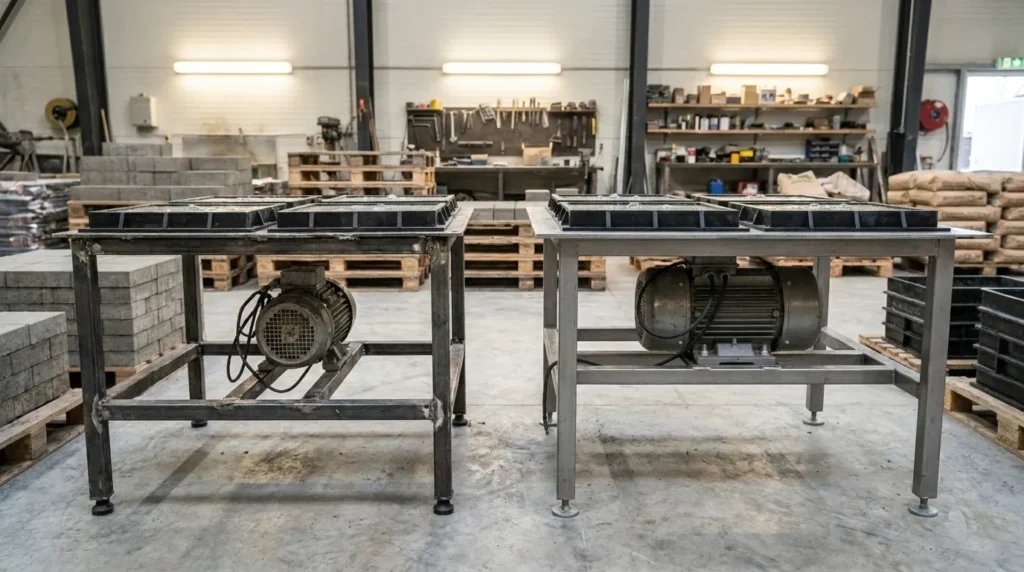
The entry commercial table on Amazon — like the vibrating table for concrete available here — sits between DIY and professional commercial. For craft users and small precast producers who need consistent results without the commitment of a full professional table, this category offers the best value entry point. Verify payload capacity and motor force specifications against your specific production requirements before purchasing.
How to Build a DIY Concrete Vibrating Table
Building a DIY vibrating table is a viable option for hobbyists and small producers who want vibrated concrete quality at craft-table cost. The key to a successful DIY table is matching the motor to the table mass and payload — under-powered motors on heavy tables produce inadequate vibration.
Materials Required
For a 600mm × 800mm craft vibrating table (approximate):
| Material | Specification | Quantity |
|---|---|---|
| Steel RHS (frame) | 40×40×3mm | 6 metres |
| Steel flat plate (surface) | 5mm thick | 600×800mm sheet |
| Anti-vibration mounts | M10, 30 Shore hardness | 4 units |
| Vibro motor | 370W, 3,000 RPM, ~1,000N | 1 unit |
| Motor mounting bolts | M10, Grade 8.8 | 4 sets |
| Base frame steel | 40×40×3mm RHS | 4 metres |
| Paint/primer | Anti-rust | As required |
Estimated material cost: $120–$200 depending on steel prices and motor source.
Step-by-Step Construction
Step 1 — Build the base frame.
Weld a rectangular base frame from 40×40mm RHS — this is the fixed base that sits on the floor. Size: 650mm × 850mm (slightly larger than the vibrating surface). Add rubber feet to prevent the base from moving.
Step 2 — Build the vibrating surface frame.
Weld a second rectangular frame the same size as the base. Weld the 5mm steel plate to the top of this frame — this is the vibrating surface that the moulds will sit on.
Step 3 — Install anti-vibration mounts.
Bolt four anti-vibration rubber mounts to the corners of the base frame. Bolt the vibrating surface frame to the top of these mounts. The surface frame should sit 20–30mm above the base frame on the mounts — free to vibrate independently.
Step 4 — Mount the vibro motor.
Bolt the vibro motor to the underside of the vibrating surface frame — centred along both axes. Use Grade 8.8 bolts and spring washers — vibration loosens standard fasteners quickly.
Step 5 — Electrical connection.
Connect the motor to a switched power supply via appropriate cable and switch. Ensure proper earthing. Add a timer switch if available — simplifies vibration cycle control.
Step 6 — Test and commission.
Run the table empty and check for excessive vibration noise (indicates loose bolts or misaligned motor). Place a tray of water on the surface — the water should show concentric ripple patterns without sloshing excessively. Adjust motor eccentric weight setting if the vibration is too strong or too weak for your application.
Motor Selection for DIY Tables
For a DIY table with a 25 kg steel frame and typical craft payload of 20 kg:
- Total vibrating mass: 45 kg
- Required force at 3g: 45 × 9.81 × 3 = 1,324N
- With 25% margin: 1,655N
- Select: 370W motor producing 1,500–2,000N
For a heavier DIY table (50 kg frame) with larger payload (40 kg):
- Total: 90 kg
- Required at 3g: 2,648N
- With margin: 3,310N
- Select: 550W motor producing 3,000–4,000N
Concrete Mix Design for Vibrating Table Production
Getting the mix right for vibrating table production is different from standard poured concrete — the table changes what mix works best.
Water-Cement Ratio for Table Vibration
Standard poured concrete is mixed at water-cement ratios of 0.45–0.55 — workable enough for poker vibration to consolidate thoroughly.
Vibrating table concrete can use a wider range:
| Product Type | Water-Cement Ratio | Consistency | Notes |
|---|---|---|---|
| Paving blocks (dry press) | 0.35–0.40 | Very stiff, crumbly | Immediate demould |
| Standard precast | 0.42–0.48 | Stiff | 4–24 hour demould |
| Decorative/craft | 0.50–0.58 | Workable | 24+ hour demould |
| Flowable decorative | 0.55–0.65 | Fluid | 24–48 hour demould |
The table’s advantage: Because vibration reaches all areas of the mould simultaneously, stiffer mixes (lower water-cement ratio = higher strength) can be used successfully on a vibrating table that would be difficult to consolidate with a poker. The strength benefit of lower water-cement ratio is directly realised.
Aggregate Selection for Mould Casting
Maximum aggregate size matters: The aggregate maximum size should not exceed one-third of the minimum mould dimension. For a mould with a 25mm minimum section: maximum aggregate = 8mm.
Recommended aggregate for vibrating table production:
| Product | Maximum Aggregate | Why |
|---|---|---|
| Fine decorative items | 2–4mm (coarse sand) | Sharp detail reproduction |
| Stepping stones | 6–10mm | Good strength, acceptable finish |
| Paving blocks | 10mm | Efficient production |
| Garden slabs | 10–14mm | Economical |
| Structural precast | 14–20mm | Maximum strength |
Fine aggregate (all-sand mixes) for decorative: For the finest surface detail — planters, sculptural pieces, tiles with texture detail — an all-sand mix (no coarse aggregate) produces the smoothest casting. Polypropylene fibres (0.5–1 kg per cubic metre) added to all-sand mixes significantly improve crack resistance in thin sections.
Operating Tips for Best Results
Vibration Duration
Vibration time depends on mix consistency and mould depth:
| Mix Type | Mould Depth | Vibration Time |
|---|---|---|
| Stiff (paving block) | Under 100mm | 10–20 seconds |
| Standard (garden products) | 50–150mm | 20–40 seconds |
| Workable (decorative) | 100–200mm | 30–60 seconds |
| Fluid (craft/flowable) | Any | Until surface bubble-free |
Do not over-vibrate: Excessive vibration (over 90 seconds on standard mixes) causes segregation — aggregate sinks, paste rises. The surface may look smooth but the strength is unevenly distributed through the depth.
The bubble test: For decorative and craft concrete, vibrate until no air bubbles appear at the mould surface. This is the most reliable indicator that consolidation is complete, regardless of timer setting.
Mould Clamping
Moulds must be secured to the vibrating table surface — this is the most commonly overlooked operating requirement for new vibrating table users.
Clamping methods:
- G-clamps at mould corners (most common for workshop use)
- Bungee cord or cam straps across the top of moulds
- Purpose-built clamp bars spanning across multiple moulds
- Heavy rubber anti-slip mat beneath moulds (adequate for heavy moulds, not light ones)
What happens without clamping: Even a heavy mould will walk across the table surface during vibration and eventually fall off. The walking motion also creates uneven vibration distribution through the mould — one side of the casting receives more energy than the other.
Release Agent Application
Apply release agent (form oil, petroleum jelly, or commercial concrete release) to all mould surfaces before every pour. Release agent prevents concrete from bonding to the mould and ensures clean demoulding without surface damage.
For rubber moulds: A thin coat of petroleum jelly or vegetable oil applied with a brush or cloth. Avoid heavy application — pooled release agent in mould corners creates surface defects.
For steel moulds: Commercial form release oil (diesel can substitute) applied by spray or brush. Allow to drain for 30 seconds before pouring.
Vibrating Table Maintenance
Daily (after production):
- Clean concrete residue from table surface and mould areas — fresh concrete cleans easily, cured concrete requires mechanical removal
- Inspect motor mounting bolts for any loosening — retorque immediately if movement detected
- Check anti-vibration mount condition — cracks or hardening reduce isolation effectiveness
Weekly:
- Inspect motor terminal box for any moisture ingress
- Check eccentric weight guard condition and security
- Observe motor running temperature — should be warm but not painful to touch after 30 minutes of operation
Monthly:
- Retorque all structural fasteners — motor mounting bolts, frame connections, isolator mounting hardware
- Check table surface flatness — weld distortion or impact damage can create low spots that affect mould contact
- Inspect isolator rubber for cracking or compression set — replace when hardness increases noticeably
Annual:
- Listen for bearing noise in the motor during operation — grinding or rumbling indicates bearing wear requiring replacement
- Verify motor earth connection resistance with a multimeter
- Clean motor body exterior — accumulated concrete dust reduces heat dissipation
Frequently Asked Questions
What is a vibrating table for concrete?
A concrete vibrating table is a steel surface mounted on rubber isolators and driven by one or more eccentric mass electric motors. Concrete-filled moulds are placed on the table surface and vibrated for 15–60 seconds, consolidating the concrete within the mould without any internal poker insertion. Used for precast concrete production — paving blocks, stepping stones, decorative garden products, tiles, and small structural precast items.
How does a concrete vibrating table work?
An eccentric mass motor mounted beneath the table generates centrifugal force as its offset weight rotates at 3,000 RPM (50 Hz). This force vibrates the table surface at 3,000 vibrations per minute. Concrete moulds on the table receive this vibration through their base and walls — the vibration temporarily mobilises the concrete mix, allowing air to rise and aggregate to settle, producing a denser, void-free cast.
What size vibrating table do I need for concrete production?
Choose table size based on your mould dimensions and batch size. The table surface should be 20% larger in each dimension than the combined mould footprint per batch. For stepping stone production (600×600mm moulds): minimum table 800×800mm. For paving block production (200×100mm bricks, 20 per batch): minimum table 1,000×600mm. Motor force must be matched to total vibrating mass — calculate required centrifugal force as mass × 9.81 × g-factor (3–5 for concrete).
Can I build a DIY concrete vibrating table?
Yes — a basic DIY vibrating table using 40×40mm steel RHS frame, 5mm plate surface, rubber anti-vibration mounts, and a 370–550W vibro motor costs $120–$200 to build. The critical requirement is matching motor force to the table and payload mass. Under-powered DIY tables produce inadequate vibration — calculate required centrifugal force before selecting the motor.
What concrete mix is best for a vibrating table?
Standard concrete mixes work well. Paving blocks use a very stiff mix (water-cement ratio 0.35–0.40) for immediate demould. Decorative products use a workable mix (0.50–0.55) for better surface detail. Use maximum aggregate size of one-third the minimum mould dimension — for 25mm section moulds, maximum 8mm aggregate. All-sand mixes with polymer fibres work well for very fine decorative products.
How long should I vibrate concrete on a vibrating table?
Stiff paving block mixes: 10–20 seconds. Standard garden products: 20–40 seconds. Decorative and craft concrete: 30–60 seconds, or until no air bubbles appear at the mould surface. Do not over-vibrate — more than 90 seconds on standard mixes causes aggregate segregation (heavier particles sink, paste rises).
Do I need to clamp moulds to the vibrating table?
Yes — always. Even heavy moulds will walk off the vibrating table surface during operation if not secured. Use G-clamps, bungee cord, cam straps, or purpose-built clamp bars to secure all moulds before starting the motor. Unsecured moulds also receive uneven vibration — one edge of the mould vibrates more than the other, causing uneven concrete consolidation.
What motor do I need for a concrete vibrating table?
Calculate total vibrating mass (table weight + mould weight + concrete weight per batch). Multiply by 9.81 × target g-factor (3–4 for standard concrete). Add 25% safety margin. This gives the minimum centrifugal force in Newtons. Select a vibro motor with maximum force output above this figure. For a typical craft table (45 kg total): minimum 1,300N, recommend 1,500–2,000N (370W motor). For production tables (200 kg total): minimum 7,800N, recommend 10,000N (1,100W motor).
Conclusion
A vibrating table transforms concrete casting from an unpredictable manual process into a consistent production system. Whether you are making decorative concrete planters in a craft workshop or running a small paving block production operation, the table does the consolidation work reliably — every mould, every batch, without operator technique variation. Choose the table size that matches your mould dimensions and batch requirements, match the motor force to your total vibrating mass, always clamp your moulds, and use a mix design appropriate to your vibration capability. The investment — whether in a purchased production table or a DIY build — pays back in consistently higher-quality products from the first pour. Calculate your concrete production volumes accurately using the ConcreteCal free concrete calculator before specifying your table and motor, and see our concrete vibration motor guide for detailed motor selection guidance beyond what this article covers.