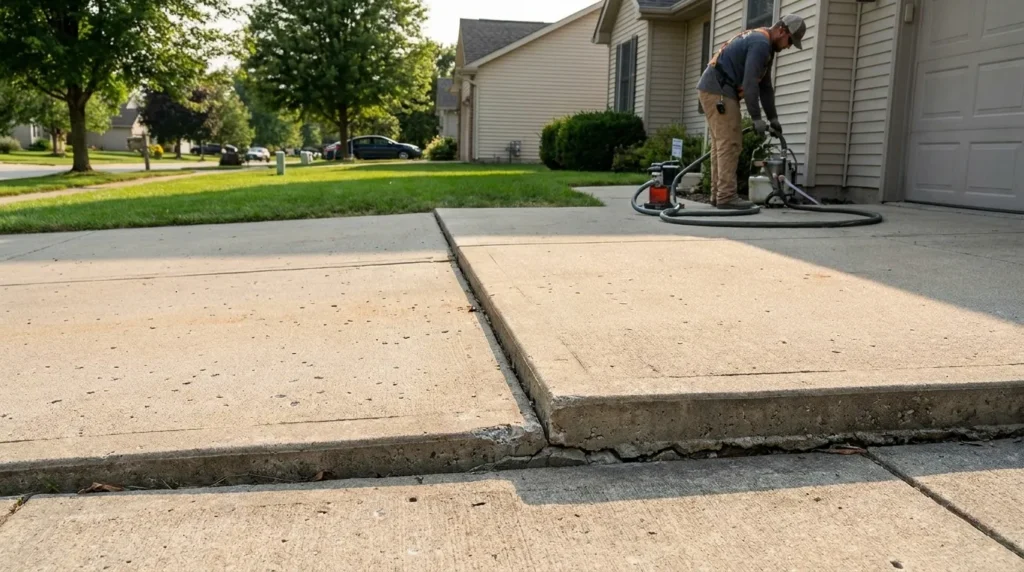

A sunken concrete slab is one of the most common property maintenance problems in residential and commercial construction — and one of the most misunderstood. Many property owners assume that a settled, uneven slab means full replacement: ripping out the old concrete, disposing of it, and pouring fresh. That assumption costs thousands of dollars that, in most cases, is completely unnecessary.
Concrete leveling — the process of lifting a settled slab back to its original elevation without removal — solves the majority of uneven concrete problems at 30–70% of the cost of replacement. The technology has advanced significantly in recent decades, from the traditional mudjacking that has been used since the 1930s to modern polyurethane foam injection that lifts slabs with minimal drilling and cures in 15 minutes.
This guide covers everything: why concrete settles, how to identify when leveling is needed, a complete comparison of leveling methods, step-by-step process explanations, cost breakdowns, and the decision framework for knowing when leveling makes sense and when replacement is the correct answer.
For any related concrete repair or maintenance work, see our types of concrete damage guide to understand what you are dealing with before calling a contractor. And always calculate your concrete quantities accurately using the free concrete calculator at ConcreteCal for any replacement sections.
Table of Contents
- What Is Concrete Leveling?
- Why Does Concrete Become Uneven?
- Signs You Need Concrete Leveling
- Concrete Leveling Methods — Complete Comparison
- Mudjacking vs Polyurethane Foam — Which Is Better?
- How Concrete Leveling Works — Step by Step
- Concrete Leveling by Application
- How Much Does Concrete Leveling Cost?
- Concrete Leveling vs Replacement — The Decision Framework
- Post-Leveling Care and Maintenance
- Choosing a Concrete Leveling Contractor
- Frequently Asked Questions
What Is Concrete Leveling?
Concrete leveling — also called slab lifting, concrete raising, or mudjacking depending on the method — is the process of injecting material beneath a settled concrete slab to fill the voids beneath it and raise the slab back to its original elevation. The existing concrete is retained; only the support beneath it is restored.
Concrete Leveling vs Concrete Replacement
The comparison that determines most property owner decisions:
| Factor | Concrete Leveling | Concrete Replacement |
|---|---|---|
| Cost | $3–$25 per sq ft | $6–$18 per sq ft (material + labour) |
| Disruption | Minimal — hours | Significant — days to weeks |
| Cure time | 15 minutes (foam) to 24 hours (mudjacking) | 28 days for full strength |
| Concrete retained | Yes | No — disposed and repoured |
| Addresses root cause | Partially | Partially (same soil conditions remain) |
| Surface match | Existing concrete retained — no colour mismatch | New concrete — colour mismatch for years |
| Lifespan after treatment | 5–15 years depending on soil conditions | Same as new installation — 25–50 years |
| When appropriate | Structurally sound slab, soil void below | Severely cracked, broken, or thin slab |
The key insight: Concrete replacement does not address the underlying cause of slab settlement — the soil beneath the new slab is in the same condition as beneath the old one. Without soil stabilisation, a replacement slab may settle in the same locations within 5–10 years. Concrete leveling with polyurethane foam, in contrast, fills and stabilises the soil voids while lifting the slab.
What Concrete Leveling Cannot Fix
Concrete leveling is not appropriate for every situation. It cannot:
- Fix severely fractured or crumbling concrete — the slab must be structurally intact enough to be lifted as a unit. A slab broken into many pieces cannot be uniformly raised.
- Restore very thin slabs — concrete under approximately 2.5 inches thick may crack during the lifting process rather than rising as a unit.
- Address concrete that is heaved upward — leveling lowers high points only in some methods; it primarily raises low points.
- Solve drainage problems — if the root cause of settlement is a plumbing leak or chronic drainage failure, leveling provides temporary relief until the water issue is resolved.
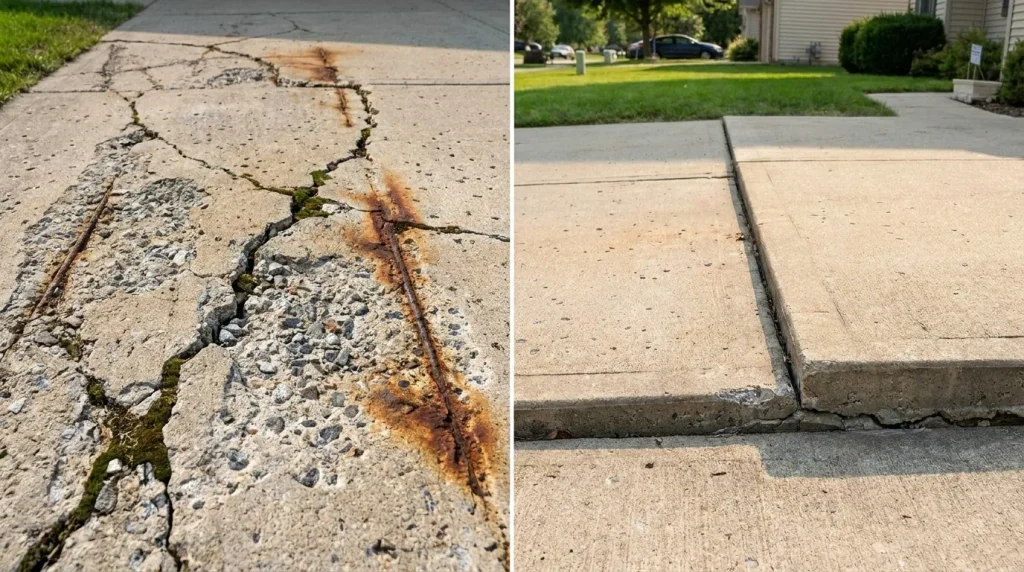
- Replace structurally compromised concrete — if the concrete itself has deteriorated significantly (carbonation, rebar corrosion, freeze-thaw damage), the concrete must be replaced, not lifted.
Why Does Concrete Become Uneven?
Understanding why concrete settles is the foundation of choosing the right repair approach — and of preventing recurrence after leveling.
Soil Settlement and Erosion
The most common cause of slab settlement is the loss of soil support beneath the concrete. Soil under a concrete slab compresses over time under the weight of the slab and any loads on top of it. In areas with clay-heavy soils, this settlement is accelerated — clay compresses significantly under sustained load.
Erosion is a related cause — water flowing under or around a concrete slab washes away the fine soil particles that provide support. This creates voids beneath the slab, which allow sections to sink under their own weight.
Worked Example — Driveway Settlement:
A residential driveway poured over a clay subgrade. The first two years: stable. Year 3: one panel begins to sink slightly at the edge adjacent to the lawn. Year 5: the panel has settled 1.5 inches — the water that drains from the lawn runs under the driveway panel at this edge, gradually washing away fine soil particles. By year 8: a void of approximately 1.5 inches depth and 3 feet in diameter exists beneath the sunken corner. Classic erosion-driven settlement.
Moisture and Drainage Problems
Water is the primary driver of concrete settlement in the majority of cases. The mechanisms:
Under-slab washing: Water flowing under the slab carries fine soil particles with it — a process called piping or erosion. Even small volumes of sustained water flow can remove significant soil volumes over years.
Clay shrink-swell: Clay soils expand when wet and shrink when dry. Seasonal cycles of expansion and contraction progressively consolidate and reorganise the clay beneath a slab, creating settlement.
Frost heave: In cold climates, water in the soil beneath a slab freezes and expands, lifting the slab upward. When the ice melts, the slab settles back — but not always to its original position if the soil has shifted during the heave. This can create a net lowering over multiple freeze-thaw cycles.
For guidance on how moisture problems manifest in the concrete above (cracking, spalling, efflorescence), see our types of cracks in concrete guide.
Tree Roots and Organic Material
Tree roots grow beneath concrete slabs seeking moisture. As they grow, they can lift sections of concrete (heave) or, over time, decay and create voids that cause settling. Old tree stumps and buried organic material decompose beneath slabs, creating voids as the organic volume reduces.
The double problem with trees near concrete: Active roots heave concrete upward. Removed trees leave decaying root systems that create settlement voids over 3–10 years as the root mass decomposes. Both scenarios are common causes of uneven concrete.
Poor Initial Installation
Settlement due to installation quality issues:
Inadequate compaction: If the subgrade soil was not compacted to the correct density before the concrete was poured, the soil compresses under the slab weight in the years following installation. This type of settlement typically manifests within the first 2–5 years.
Poor drainage design: If the site drainage directs water toward or under the slab rather than away from it, settlement will occur regardless of initial soil quality.
Organic material in fill: Buried topsoil, roots, or other organic material in backfill beneath the slab decomposes over time, creating voids.
Signs You Need Concrete Leveling
Identifying the problem early allows leveling rather than replacement — slabs that are left to settle for years develop secondary cracking and structural damage that eventually requires the more expensive solution.
Visible Trip Hazards and Uneven Surfaces
The most obvious sign — one slab panel is noticeably lower than an adjacent panel, creating a step that someone can catch their foot on. OSHA considers a vertical difference of 0.5 inches or more between adjacent concrete panels to be a trip hazard requiring repair.
Where to look:
- Driveway panels — particularly at edges adjacent to lawn or planting beds where water flows
- Sidewalk sections near trees
- Patio sections that have settled toward the house or garden
- Steps where one tread has dropped relative to adjacent treads
Water Pooling on the Slab
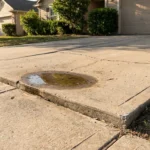
A properly installed concrete slab slopes at minimum 1–2% away from structures to direct surface water away. When a section settles, it creates a low point where water pools — particularly visible after rain.
Why water pooling indicates a leveling need (not just drainage): The pooling is a symptom of elevation change, not simply a drainage design problem. The concrete has moved from its original drainage slope. Leveling the slab restores the slope and eliminates the pooling without any drainage modification.
Widening Cracks
All concrete cracks eventually — but cracks that are actively widening indicate ongoing movement beneath the slab. A crack that was hairline width two years ago and is now 1/4 inch wide suggests the slab section is continuing to settle, and the underlying void is growing.
Distinguishing settlement cracks from shrinkage cracks: Shrinkage cracks from initial curing are stable — they do not widen over time. Settlement cracks widen, often with vertical displacement (one side of the crack higher than the other). Settlement cracks typically run diagonally from corners of openings or at slab joints.
Sticking Doors and Windows (Interior Floors)
For basement and interior concrete floors, settlement manifests differently — the concrete slab movement can affect the door frames and window openings above it. Doors that suddenly begin sticking, or cracks appearing at the corners of door and window openings, can indicate foundation slab movement below.
Concrete Leveling Methods — Complete Comparison
Mudjacking (Stone Slurry Grouting)
Mudjacking — the original concrete leveling method, developed in the 1930s — pumps a slurry of water, soil, sand, and cement (or stone slurry) beneath the settled slab through drilled holes. The hydraulic pressure of the pumped slurry fills the void beneath the slab and lifts it back toward its original elevation.
The slurry mix: Traditional mudjacking uses a mixture of water, topsoil, and sand. Modern mudjacking often uses a stone slurry — pulverized limestone mixed with water — which is denser and more stable than soil-based mixes and does not shrink as it dries.
Process: 1–2 inch holes are drilled through the concrete at strategic locations. The slurry is pumped in under pressure until the slab rises to the correct level. Holes are filled with non-shrink grout.
Cure time: 24–48 hours before vehicle traffic; foot traffic in 1–2 hours.
Advantages:
- Lower material cost than polyurethane foam
- Uses natural, inorganic materials
- Effective for large slabs (driveways, commercial flatwork)
- Long track record — decades of proven performance
Limitations:
- Heavier material adds weight to the subgrade (can be a concern on already-weak soil)
- Larger drill holes (1–2 inches vs 5/8 inch for foam)
- Longer cure time
- Slurry can shrink slightly over time — may allow minor re-settlement
- Not suitable for interior floors where hole size and mess are concerns
Polyurethane Foam Injection
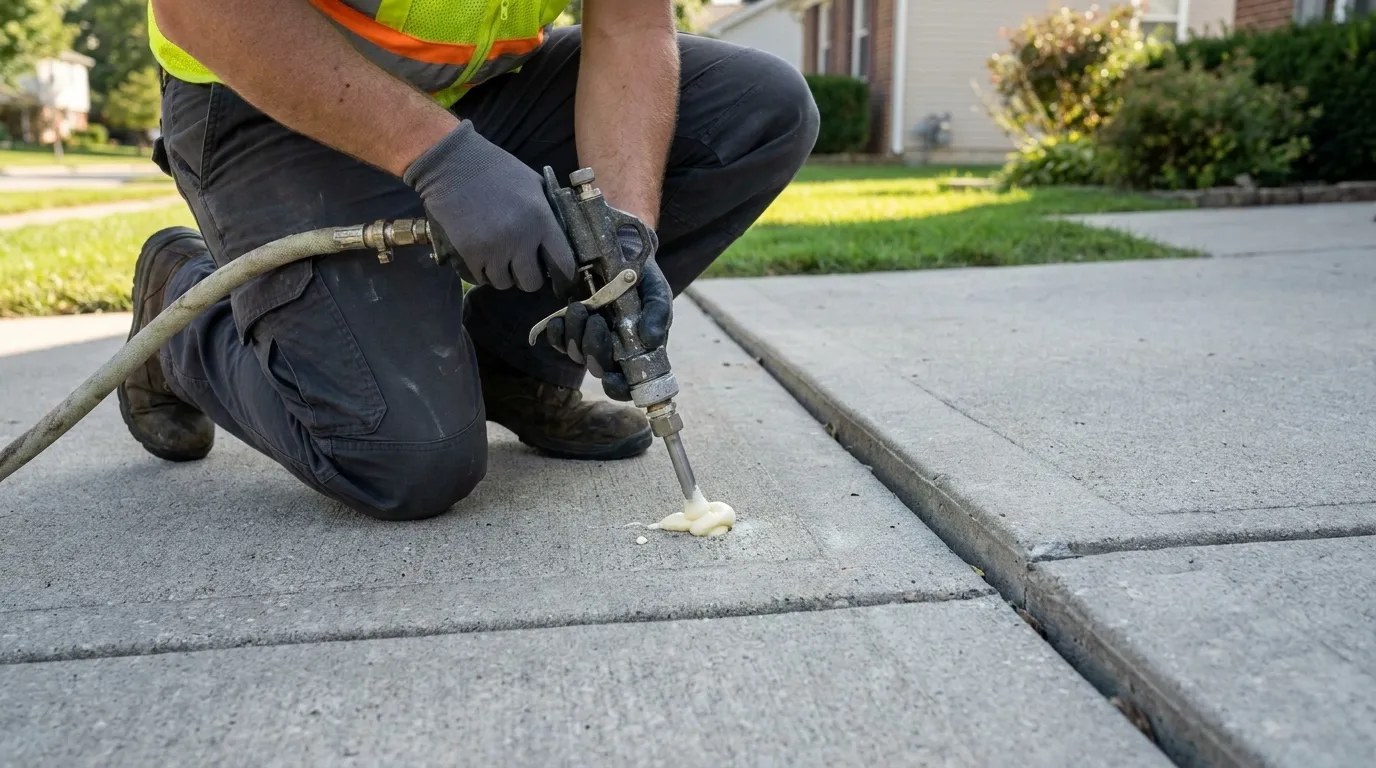
Polyurethane foam injection (also called foam leveling, polyjacking, or slab lifting with foam) injects a two-component expanding polyurethane foam beneath the slab through small drilled holes. The foam expands to fill the void, lifts the slab, and cures rigid within minutes.
How it works: Two liquid components (polyol and isocyanate) are pumped separately to a mixing nozzle at the injection point. They combine, react, and expand to 20–30 times their liquid volume as a rigid closed-cell foam. The expansion generates the upward pressure that lifts the slab.
Advantages:
- Minimal disruption — 5/8 inch holes (much smaller than mudjacking)
- 15-minute cure time — traffic can resume almost immediately
- Lightweight — does not add significant load to the subgrade
- Waterproof and stable — does not erode or wash away
- Excellent for interior floors and basement slabs
- Precise control — foam expansion can be stopped at exact elevation
Limitations:
- Higher material cost than mudjacking
- Requires specialist equipment
- Not all contractors have foam injection capability
- The environmental impact of polyurethane foam is a consideration for some clients
Self-Leveling Compound
Self-leveling compound is a cement-based product poured on top of an existing slab surface to fill low spots and create a flat surface — it does not lift the slab. This is appropriate for interior concrete floors with minor surface irregularities, not for exterior slabs with structural settlement.
When self-leveling is appropriate:
- Interior concrete floors with elevation variations under 1 inch
- Preparation for floor covering installation
- Filling surface irregularities on an otherwise stable slab
Not appropriate for: Any exterior slab, any slab with void beneath it, any settlement exceeding 1 inch, or any situation where the slab itself has moved (rather than just the surface being rough).
Slab Replacement
Full slab removal and replacement — the most disruptive and expensive option. Covered in the decision framework section below.
Mudjacking vs Polyurethane Foam — Which Is Better?
The choice between mudjacking and polyurethane foam injection is not a universal answer — it depends on the specific project.
Weight and Load Considerations
Mudjacking slurry weighs approximately 100–150 lbs per cubic foot — a significant additional load on the soil beneath the slab. For slabs over areas with already-weak or compressible soil, this additional weight can accelerate future settlement.
Polyurethane foam weighs approximately 2–4 lbs per cubic foot — essentially weightless compared to the concrete above it. This is the decisive advantage for:
- Any slab over previously settled or soft soil
- Basement slabs (where structural load is a concern)
- Any situation where adding subgrade weight is undesirable
Cure Time and Downtime
| Method | Foot Traffic | Vehicle Traffic | Return to Full Use |
|---|---|---|---|
| Mudjacking | 1–2 hours | 24–48 hours | 24–48 hours |
| Foam injection | 15 minutes | 15–30 minutes | 30–60 minutes |
| Self-leveling compound | 4–6 hours | N/A | 24 hours |
For commercial properties, parking areas, and any surface where downtime costs money, polyurethane foam’s near-immediate cure time is a significant operational advantage.
Cost Comparison
Mudjacking: $3–$8 per square foot installed. Lower material cost per cubic foot makes it more economical for large volumes of void filling.
Polyurethane foam: $5–$25 per square foot installed. Higher material cost per cubic foot, but requires fewer injection points and less material per project due to the expansion ratio.
The crossover point: For small to medium residential projects (under 500 sq ft), polyurethane foam is often competitively priced with mudjacking when total project cost is calculated. For very large commercial flatwork requiring significant void filling volume, mudjacking may offer lower total cost.
Longevity and Future Settlement Risk
Mudjacking slurry: Can slowly wash away or compress over years in areas with active water flow. Stone slurry mixes are more resistant than soil-based mixes.
Polyurethane foam: Waterproof, rigid, and stable — does not erode or compress over time. In areas where water flow was the original cause of settlement, foam is significantly more durable because it is not susceptible to the same erosion mechanism.
How Concrete Leveling Works — Step by Step
When preparing a concrete leveling project, having the right tools can make the job easier and help you get more accurate results. Before starting, check the uneven area carefully and make sure you have the necessary equipment for your chosen repair method. You can also check out this useful tool on Amazon to see whether it fits your project needs.
Site Assessment
Before any drilling or injection, a professional contractor assesses the slab to:
- Confirm the slab is structurally sound enough to lift
- Identify the location and approximate size of voids beneath the slab
- Determine the appropriate injection method and material
- Mark injection hole locations based on slab geometry and void location
Void location methods: Experienced contractors can often identify void locations by the hollow sound of the slab when walked on or struck with a hammer. More precise assessment uses ground-penetrating radar (GPR) for larger commercial projects.
Drilling Injection Holes
Mudjacking: 1–2 inch holes drilled at 4–6 foot intervals across the settled slab area. The pattern is designed so that slurry pumped from each hole can flow to adjacent holes, filling the full void area.
Foam injection: 5/8 inch holes at 3–4 foot intervals. The smaller hole size is one of the primary practical advantages for decorative or finished concrete where larger holes would be more visually intrusive after patching.
Hole placement strategy: Holes are positioned to allow the lifting material to reach all areas of the void. At the edges of the slab — where settlement typically begins — holes are placed within 6–12 inches of the edge.
Injecting the Leveling Material
Mudjacking injection: A pump forces slurry through a flexible hose connected to the drilled hole. The contractor monitors slab elevation at multiple points simultaneously, stopping pumping when the target elevation is reached.
Foam injection: Two-component foam components are pumped through separate hoses to a mixing nozzle at the hole. The foam begins expanding immediately — the operator controls the slab rise by monitoring elevation and stopping injection when the target is reached. Multiple holes may be injected in sequence to achieve uniform lifting.
The precision challenge: Lifting a slab evenly requires monitoring multiple points simultaneously and adjusting injection to prevent one side from rising faster than another. Experienced operators develop a feel for this that comes only with practice.
Worked Example — Residential Patio Settlement:
A 200 sq ft patio, settled 1.5 inches in one corner and 0.5 inches in the centre. Foam injection contractor assesses — slab structurally sound, void approximately 2 inches at deepest. Drills 6 injection holes at strategic locations. Injects foam at the deepest corner first — monitors adjacent holes for foam emergence indicating void filling. Slab rises 1.5 inches at that corner. Moves to centre hole — injects to raise 0.5 inches. Final inspection with level confirms uniform surface. Total time: 2.5 hours including assessment, drilling, injection, and hole patching.
Sealing the Holes
After lifting is complete, injection holes are filled with non-shrink grout (mudjacking) or patching compound (foam injection). The patches are visible after the job — 5/8 inch foam patches are much less noticeable than 1.5–2 inch mudjacking patches.
Post-Leveling Inspection
A final inspection checks:
- Elevation uniformity across the lifted slab — checked with a level or string line
- Cracks that may have opened during lifting (minor cracks at lift points are normal; significant cracking indicates the slab was too fragile to lift)
- Drainage slope — the leveled slab should now drain appropriately
Concrete Leveling by Application
Driveway Concrete Leveling
Driveways are the most common concrete leveling application — the combination of vehicle loads, water runoff, and exposure to the elements creates ideal conditions for slab settlement.
Typical driveway settlement pattern: Panel edges adjacent to lawn or garden areas settle first — water flows from the lawn onto the driveway, runs under the panel edge, and erodes the subgrade over time. The corner or edge sinks, creating the classic step between driveway panels.
Leveling vs replacement for driveways: A structurally sound driveway with settled panels is an ideal candidate for leveling. The existing concrete — which has already weathered and cured — is often stronger than fresh replacement concrete and eliminates the colour mismatch that makes replacement panels visible for years.
Worked Example — Two-Panel Driveway Settlement:
Two adjacent driveway panels — panel A has settled 2 inches at the corner, panel B is level. Standard residential two-car driveway. Quote comparison: mudjacking $650, foam $950, full replacement $3,800. Mudjacking selected — adequate for exterior driveway application, good void-filling capacity at this scale, cost advantage significant for a budget-conscious homeowner. Result: panels level within 1/8 inch, job completed in 3 hours.
Patio and Walkway Leveling
Patio slabs and concrete walkways typically carry lighter loads than driveways, making them ideal candidates for leveling when settlement occurs.
Common patio settlement causes: Settlement adjacent to house foundations (where roof runoff concentrates), near tree root systems, and in areas where backfill was used during house construction (backfill around foundations compresses over years).
Special consideration for patios: If the patio has a decorative finish — stamped, exposed aggregate, or colored — the hole patches from leveling will be visible. For decorative concrete where aesthetics are critical, discuss patching options with the contractor before proceeding.
Basement and Interior Floor Leveling
Interior concrete floors — basement floors, garage floors, warehouse floors — present unique challenges for leveling. The enclosed environment limits access, mess from drilling and injection must be managed carefully, and the smaller hole size of foam injection makes it the preferred method.
Does foam work on interior floors? Yes — foam injection is particularly well-suited to interior floor leveling because the small hole size (5/8 inch) minimises the visual impact of repairs on finished or functional surfaces, and the near-immediate cure time means the space can be returned to use the same day.
Basement floor dips and uneven surfaces: If a basement floor has dips or low spots from soil settlement beneath it, foam injection can raise the entire floor to a uniform level. The process is the same as exterior leveling — holes drilled through the floor, foam injected beneath, slab raised.
Concrete Steps and Stairs
Concrete steps are both a common settlement problem and a safety-critical application — a step that has settled even 1 inch creates an irregular riser height that causes falls.
How step leveling works: The approach depends on the step construction. Monolithic steps (poured as a single unit) can sometimes be lifted as a unit. Steps with separate risers and treads may require individual attention for each settled component.
When replacement is the better answer for steps: If the step risers are cracked or separated, or if the settlement is due to rebar corrosion causing spalling (visible rust staining, flaking concrete), replacement is typically more appropriate than leveling.
Commercial Concrete Leveling
Large commercial projects — parking lots, warehouse floors, loading docks, sidewalks at commercial properties — benefit significantly from leveling versus replacement due to the scale of the cost difference and the operational disruption of replacement.
Loading dock leveling: A critical commercial application — loading docks settle from the repeated impact of trucks, creating elevation differences that damage vehicles, equipment, and cargo. Foam injection can level dock areas quickly with minimal operational downtime.
Warehouse floor leveling: Warehouse floors with elevation variations cause forklift stability issues and damage floor-mounted racking systems. Leveling restores the floor flatness required for safe forklift operation without the week-long downtime of replacement.
How Much Does Concrete Leveling Cost?
Cost by Method
| Method | Cost Per Square Foot | Minimum Job Cost | Best For |
|---|---|---|---|
| Mudjacking | $3–$8/sq ft | $300–$500 | Large exterior slabs, budget projects |
| Foam injection | $5–$25/sq ft | $400–$800 | All applications, interior, precision |
| Self-leveling compound | $2–$5/sq ft materials | $200–$400 | Interior, minor irregularities |
| Slab replacement | $6–$18/sq ft | $800–$2,500 | Severely damaged slabs |
Cost by Application
| Application | Typical Project Cost (Leveling) | Replacement Cost | Savings |
|---|---|---|---|
| Residential driveway (2 panels) | $400–$900 | $2,500–$5,000 | 60–80% |
| Patio (200 sq ft) | $600–$1,200 | $3,000–$6,000 | 70–80% |
| Sidewalk (3 sections) | $300–$600 | $1,500–$3,000 | 60–80% |
| Basement floor (400 sq ft) | $1,500–$4,000 | $6,000–$12,000 | 60–75% |
| Commercial parking (2,000 sq ft) | $8,000–$25,000 | $30,000–$60,000 | 50–70% |
Factors That Affect Price
Severity of settlement: Deeper settlement requires more material and longer injection time — increasing cost.
Accessibility: Hard-to-access slabs (interior spaces with limited equipment access, landscaping obstacles) require more time and increase labour cost.
Slab thickness: Thicker slabs require more material to lift and may need more injection points.
Soil conditions: Very poor soil with extensive voids requires more material to fill before the slab can be lifted.
Geographic location: Labour rates and material costs vary significantly by region — the same job can cost 40–60% more in high-cost urban markets versus rural areas.
Concrete Leveling vs Replacement — The Decision Framework
Use this framework to determine whether leveling or replacement is the right answer for your specific situation:
Level — when these conditions are met:
- The slab is structurally intact — no severe cracking, no sections broken into multiple pieces
- The concrete is at least 3 inches thick
- The settlement is caused by soil void beneath the slab (not by the concrete itself failing)
- The settlement is 4 inches or less
- The concrete is not severely deteriorated (significant spalling, exposed aggregate, rebar corrosion)
Replace — when any of these conditions apply:
- The slab is cracked into multiple small sections
- The concrete is thin (under 3 inches) and would not survive the lifting process
- The settlement exceeds 4–5 inches
- The concrete shows significant deterioration — spalling, rebar corrosion, chemical damage
- The slab has been repaired multiple times and continues to settle (indicating a chronic problem that leveling cannot solve permanently)
- The slab is at the end of its functional service life (40+ years, significant wear)
Post-Leveling Care and Maintenance
Immediate Post-Treatment
Mudjacking: Avoid vehicle traffic for 24–48 hours. Light foot traffic is acceptable after 1–2 hours. Do not apply any sealers or coatings until the slurry has fully cured.
Foam injection: Vehicle traffic can typically resume within 30 minutes. The foam cures in 15 minutes — the limiting factor is any grout patch curing at the injection holes.
Long-Term Maintenance
Address the root cause: Concrete leveling raises the slab but does not eliminate the conditions that caused it to settle. If poor drainage was the cause, improve drainage after leveling or the slab will settle again.
Seal the cracks: Cracks that were present before leveling, or that appeared during lifting, should be filled and sealed to prevent water infiltration that could cause future settlement. See our types of cracks in concrete guide for crack type identification and repair methods.
Seal the slab: Applying a concrete sealer after leveling reduces water penetration beneath the slab edges — addressing the erosion mechanism that caused the original settlement. See our types of concrete sealers guide for sealer selection.
Monitor quarterly: For the first year after leveling, inspect the treated area quarterly. Minor re-settlement (under 1/4 inch) is normal as the leveling material fully consolidates. More significant re-settlement indicates an ongoing water or soil problem that needs investigation.
How to Prevent Future Concrete Settlement
- Improve surface drainage: Grade adjacent soil to slope away from concrete edges. Ensure gutters and downspouts direct water away from slabs.
- Seal concrete edges: Edge sealing prevents water from running beneath slab edges — the primary erosion pathway.
- Manage tree proximity: Keep large trees at a distance from concrete that reflects their mature canopy spread.
- Address plumbing leaks promptly: Underground plumbing leaks are a significant cause of slab settlement — water leak detection services can identify leaks before they cause major settlement.
Choosing a Concrete Leveling Contractor
Not all concrete contractors perform leveling — it requires specialist equipment (pumps, foam injection systems) and experience with the precision of the lifting process. Choosing the wrong contractor risks uneven lifting, over-lifting, or slab damage.
What to verify:
Specialisation: Ask specifically how many concrete leveling projects the contractor has completed in the past year. A contractor who leveled 50 driveways last year is more qualified than a general concrete contractor who does occasional leveling.
Method offered: Understand what methods the contractor uses and why they are recommending the method they propose. A contractor who only offers one method has an obvious bias toward that method regardless of whether it is optimal for your project.
Warranty: Reputable concrete leveling contractors offer a warranty on their work — typically 1–5 years. The warranty terms define what is covered (settlement recurrence) and what is not (new soil problems developing in adjacent areas).
Insurance: Verify the contractor carries liability insurance — if the slab is damaged during lifting, you need to know who covers the cost.
References: Request references for projects similar to yours (same application type, similar settlement severity) completed in the past 12 months.
Frequently Asked Questions
What is concrete leveling?
Concrete leveling is the process of raising a settled, sunken concrete slab back to its original elevation by injecting material beneath it. The existing concrete is retained — no removal or replacement required. The two main methods are mudjacking (pumping stone slurry beneath the slab) and polyurethane foam injection (expanding foam that fills voids and lifts the slab). Leveling typically costs 30–70% less than full slab replacement.
How does concrete leveling work?
Small holes are drilled through the concrete at strategic locations. Leveling material — either stone slurry or polyurethane foam — is injected under pressure through these holes into the void beneath the slab. The injected material fills the void and its pressure lifts the slab back toward its original elevation. Holes are sealed after lifting is complete. The process typically takes 2–4 hours for a residential project.
What is the difference between mudjacking and foam leveling?
Mudjacking pumps a heavy slurry of water and stone or soil beneath the slab through 1–2 inch holes. Foam leveling injects lightweight expanding polyurethane foam through 5/8 inch holes. Foam cures in 15 minutes (versus 24–48 hours for mudjacking), is waterproof and lightweight, and causes minimal disruption. Mudjacking costs less per square foot and is effective for large exterior slabs. Foam is preferred for interior floors, precision applications, and situations where downtime must be minimised.
How much does concrete leveling cost?
Mudjacking costs $3–$8 per square foot. Polyurethane foam injection costs $5–$25 per square foot depending on the extent of voids and difficulty of access. A typical two-panel residential driveway leveling costs $400–$900 — compared to $2,500–$5,000 for full panel replacement. Minimum job costs are typically $300–$500 regardless of slab size.
How long does concrete leveling last?
Results typically last 5–15 years depending on the method, the root cause of settlement, and whether the underlying drainage or soil issues are addressed. Polyurethane foam tends to last longer than mudjacking slurry in areas with active water flow because foam is waterproof and does not erode. Properties with improved drainage after leveling generally see longer-lasting results than those where the drainage problem remains.
Can concrete leveling fix all uneven concrete?
No — concrete leveling is appropriate only when the slab is structurally intact. Severely cracked or broken slabs, very thin concrete (under 3 inches), and concrete that has deteriorated significantly cannot be leveled. Settlement exceeding 4–5 inches, or concrete with significant rebar corrosion and spalling, typically requires replacement rather than leveling.
How long does concrete leveling take?
A typical residential concrete leveling project (2–4 slab panels) takes 2–4 hours from start to finish. Large commercial projects may take a full day or multiple days. Return to traffic depends on the method — foam leveling allows traffic in 15–30 minutes; mudjacking requires 24–48 hours before vehicle traffic.
Is concrete leveling permanent?
Concrete leveling is a repair, not a permanent solution to poor soil conditions. If the underlying cause of settlement — poor drainage, compressible soil, tree roots — is not addressed, the slab may settle again. However, many leveled slabs remain stable for 10–15+ years, particularly when polyurethane foam is used (waterproof) and drainage is improved after the work.
Conclusion
Concrete leveling is one of the most cost-effective repair options available to property owners dealing with settled slabs. The majority of sunken driveways, patios, walkways, and interior floors are candidates for leveling rather than the far more expensive and disruptive replacement. Mudjacking works well for large exterior slabs where cost matters most. Polyurethane foam excels for precision lifting, interior applications, and situations where downtime is a concern. The decision between leveling and replacement comes down to the structural condition of the concrete itself — sound concrete with a void beneath it is a leveling candidate; fractured, deteriorated, or severely damaged concrete needs replacement. For any concrete replacement work that follows leveling of adjacent sections, calculate your volumes accurately using the ConcreteCal free concrete calculator, and see our how to maintain concrete guide for the ongoing care that keeps repaired concrete performing well.

Pingback: Concrete Driveway Leveling: Complete Guide