
Here is the thing nobody tells you when you start planning a concrete project: the measurement is the hardest part. Not the pour. Not the finishing. The measuring. Get a dimension wrong by a few inches and you either run short mid-pour — which creates a cold joint that weakens the entire slab — or you over-order and pay for concrete that ends up in a pile in the corner of your yard.
Knowing how to measure for concrete is the skill that makes everything else work. The formula itself is simple arithmetic. What takes practice is knowing what to measure, how to handle irregular shapes, what to do when the ground is not perfectly flat, and how to translate those measurements into a sensible order for bags or ready mix. Use the free concrete calculator at ConcreteCalc for measurements.
This guide walks through every measurement scenario you will actually encounter — rectangular slabs, post holes, footings, curves, slopes, and L-shaped areas — with worked examples you can follow directly on your own site.
Once your measurements are done, plug them straight into our free concrete slab calculator to get your cubic yards and bag count instantly. And if you want to cross-check your unit conversions, our cubic yards calculator handles the math.
Table of Contents
- Why Accurate Measurement Matters
- Tools You Need to Measure for Concrete
- How to Measure for Concrete — The Core Formula
- How to Measure a Concrete Slab
- How to Measure for Concrete Post Holes
- How to Measure for Footings and Foundation Trenches
- How to Measure Curved and Circular Concrete Areas
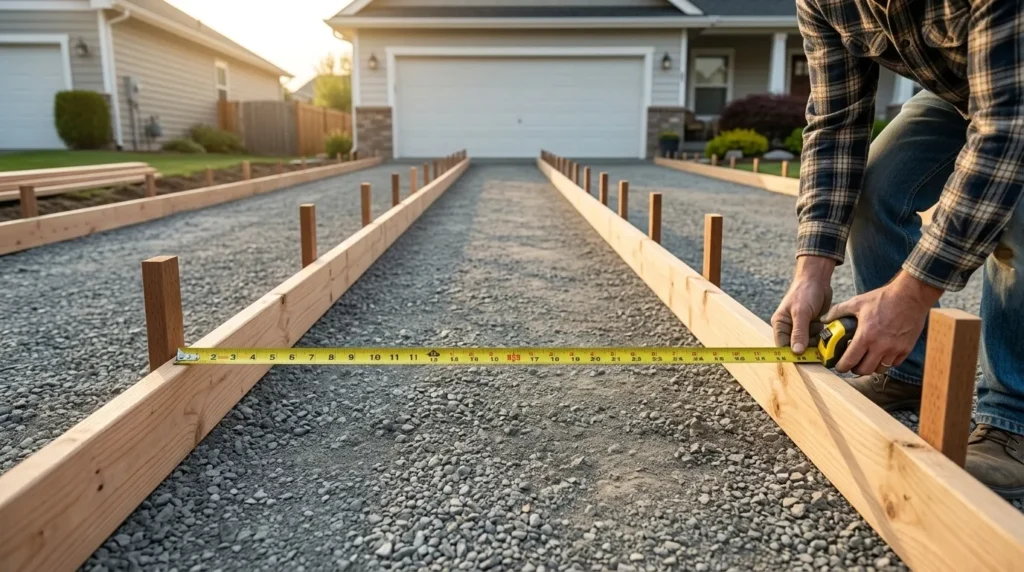
- How to Measure for a Concrete Driveway
- Adding the Waste Factor
- From Measurements to Order — Bags vs. Ready Mix
- Frequently Asked Questions
Why Accurate Measurement Matters Before You Order
Concrete is not like paint or timber where you can make a second trip to the hardware store mid-job. Once a pour starts, it has to finish. The concrete in the truck is setting from the moment it was mixed — you have a working window of roughly 90 minutes from batching to final placement. If you run short, you stop. And stopping mid-pour means your slab has a cold joint — a seam between the placed concrete and the fresh batch that is structurally weaker than the surrounding material and visually obvious.
The Cost of Getting It Wrong — Too Little vs. Too Much
Too little concrete: You stop pouring mid-slab. The first batch hardens while you wait for a second delivery or while you run to a hardware store for bags. The result is a cold joint — a permanent weak point in your slab that can crack progressively under load, collect water, and eventually fail. Not fixable without removing and replacing the affected section.
Too much concrete: You pay for material you don’t use. A cubic yard of ready mix costs $130–$200. An 80 lb bag costs $7–$8. Neither is expensive individually — but over-ordering by 15–20% on a large pour adds real cost. And leftover mixed concrete cannot be stored — it hardens and has to be disposed of.
The sweet spot is ordering approximately 10% more than your calculation says you need. That buffer covers measuring errors, uneven subgrades, and the overfill that inevitably happens at form edges. It does not require you to over-measure deliberately — just to account for the real world.
What Measurements You Actually Need
For any concrete project, you need three dimensions:
- Length — the longest dimension of your project area
- Width — the perpendicular dimension
- Thickness (depth) — how deep the concrete will be poured
For post holes and columns: diameter (or length and width for rectangular) and depth.
For footings: length, width, and depth of the footing trench.
Everything else — cubic feet, cubic yards, bag counts — flows from these three numbers. Get them right and the rest is arithmetic.
Tools You Need to Measure for Concrete
You do not need expensive equipment to measure for a concrete pour. What you need is accuracy and the right approach for the shape you are measuring.
Essential tools:
| Tool | Use |
|---|---|
| 30-foot steel tape measure | Length and width of slabs, footings, driveways |
| 100-foot tape or laser distance measure | Long driveways, large slabs |
| 4-foot level | Checking form board height, measuring depth on sloped ground |
| String line and stakes | Setting out straight edges, establishing square corners |
| Depth gauge or folding ruler | Measuring post hole depth and footing trench depth |
| Notepad and pencil | Recording measurements — do not rely on memory |
| Calculator | Basic arithmetic for the volume formula |
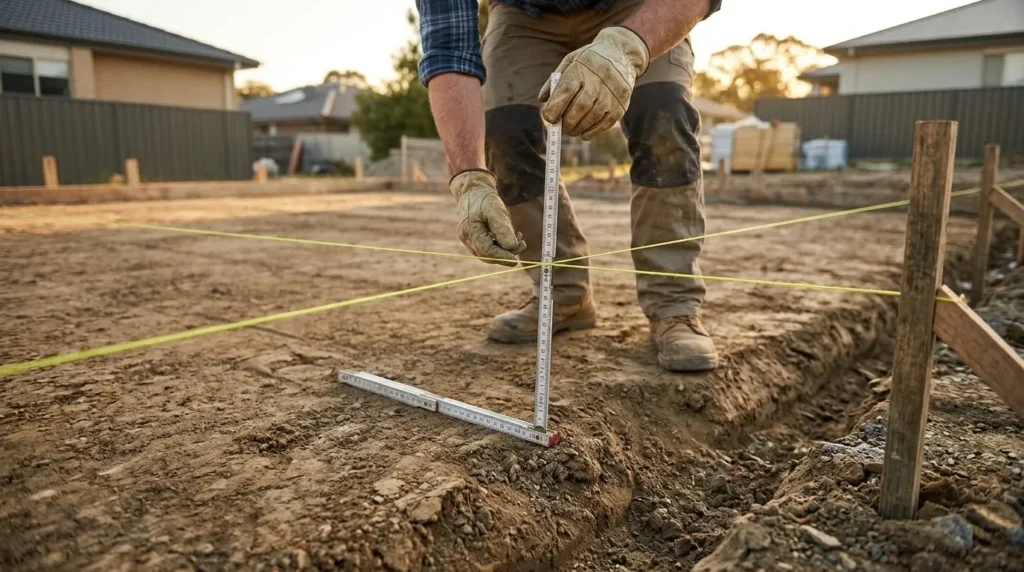
One tool people forget: A depth gauge for post holes. Most people measure hole diameter carefully and then guess the depth. Depth matters as much as diameter for post hole volume — a 10-inch hole at 24 inches deep uses half the concrete of the same hole at 48 inches deep. Lower a folding ruler or a marked stake into the hole to get the actual depth before calculating.
Laser distance measures have become genuinely useful and affordable — $30–$60 buys you a device that measures to 1/16-inch accuracy across 100 feet. For large driveways, curved paths, and any area where pulling a tape measure accurately is awkward, a laser measure saves time and eliminates the stretched-tape error.
How to Measure for Concrete — The Core Formula
The formula for concrete volume is always the same:
Volume = Length × Width × Thickness
The catch is units. All three measurements must be in the same unit before you multiply. The most common error in DIY concrete calculation is multiplying feet by feet by inches — which produces a number that is wrong by a factor of 12.
The volume formula used here is consistent with the method outlined by the American Concrete Institute (ACI) for estimating concrete quantities in residential and commercial construction — length × width × thickness, with a waste allowance applied after the base calculation.
Converting Inches to Feet
Thickness is almost always measured in inches — but the formula requires feet. Divide by 12:
| Thickness | In Feet |
|---|---|
| 3 inches | 0.25 ft |
| 3.5 inches | 0.292 ft |
| 4 inches | 0.333 ft |
| 5 inches | 0.417 ft |
| 6 inches | 0.500 ft |
| 8 inches | 0.667 ft |
Tattoo these on your brain. A 4-inch slab is 0.333 feet thick. Multiply length (feet) × width (feet) × 0.333 and you have cubic feet.
Converting to Cubic Yards
Ready mix concrete in the United States is sold by the cubic yard. One cubic yard equals 27 cubic feet.
“Cubic yards = Cubic feet ÷ 27”
Worked Example: A 12 ft × 20 ft patio, 4 inches thick:
12 × 20 × 0.333 = 79.9 cubic feet 79.9 ÷ 27 = 2.96 cubic yards Add 10% waste: 2.96 × 1.10 = 3.26 → order 3.5 yards
For a deeper understanding of the cubic yard conversion process, our cubic yards of concrete calculator handles this step automatically.
Converting to Cubic Meters
Outside the US, concrete is measured in cubic meters (m³).
Volume (m³) = Length (m) × Width (m) × Thickness (m)
Convert millimetres to metres by dividing by 1,000. A 100mm thick slab is 0.1 metres.
Worked Example: A 4m × 6m slab, 100mm thick:
4 × 6 × 0.1 = 2.4 m³ Add 10% waste: 2.64 m³
How to Measure a Concrete Slab
A concrete slab is the most common residential concrete project — and the straightforward cases are genuinely straightforward. The interesting cases are everything else.
Standard Rectangular Slab
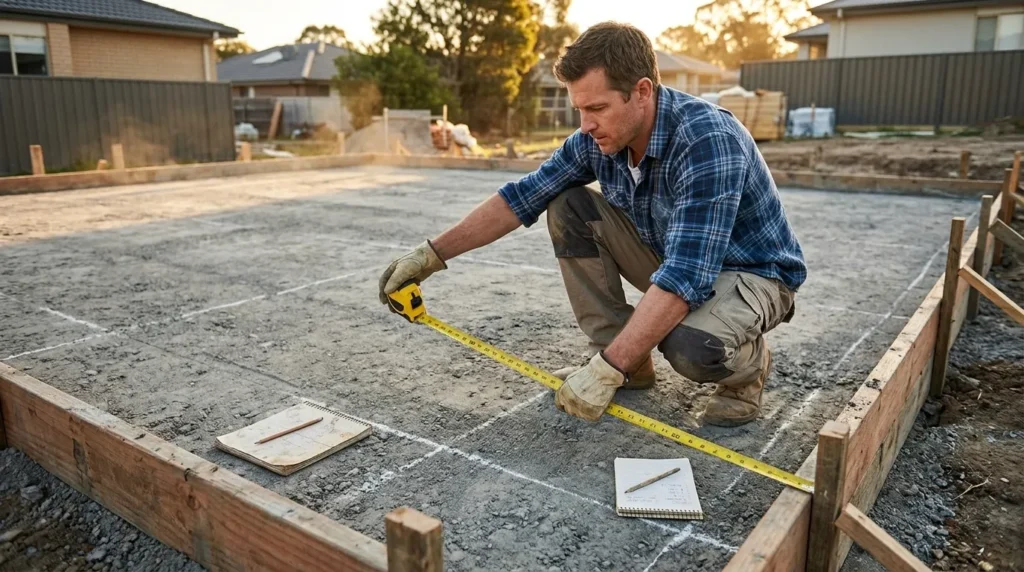
Pull your tape measure from one corner to the opposite corner along each side. Record both measurements. Confirm the slab is square by measuring both diagonals — if the diagonals are equal, the slab is square. If not, the corners are not at 90 degrees, which means your length × width calculation will overestimate the area.
Measuring technique for long slabs: Do not pull a tape measure freehand across a 40-foot driveway. The tape will sag and give you a reading that is 2–4 inches longer than the actual distance. Either use a laser measure, or pull the tape tight between two stakes and read at the second stake.
Worked Example — Standard Driveway: A two-car driveway measured as 16.5 ft wide and 38 ft long, 5 inches thick.
”16.5 × 38 × 0.417 = 261.5 cubic feet 261.5 ÷ 27 = 9.69 cubic yards Add 10%: 10.65 → order 11 yards
L-Shaped and Irregular Slabs
An L-shaped patio or driveway with a turn is not one rectangle — it is two. Break it into the smallest number of rectangles that cover the shape, calculate each volume separately, and add them together.
Worked Example — L-Shaped Patio:
Imagine an L-shaped patio:
- Section A: 12 ft × 16 ft
- Section B: 8 ft × 10 ft
- Thickness: 4 inches throughout
Section A: 12 × 16 × 0.333 = 63.9 cu ft Section B: 8 × 10 × 0.333 = 26.6 cu ft Total: 90.5 cu ft ÷ 27 = 3.35 cubic yards With 10% waste: 3.69 → order 4 yards
A critical measuring error to avoid: Do not measure the L-shape as if it were a full rectangle and subtract the missing corner. That approach works on paper but requires you to measure the cutout accurately too. Breaking into sub-rectangles is faster and less error-prone.
Measuring on Uneven or Sloped Ground
Uneven ground is where most amateur concrete measurements go wrong. If your site slopes — even gently — the slab thickness will vary across the pour, and the average thickness determines the volume.
Method:
- Set string lines at the finished slab elevation along all form edges
- Measure the distance from the string line to the subgrade at multiple points across the area — every 4 feet in both directions is adequate for residential pours
- Average the depth measurements
- Use this average depth in your volume calculation
Worked Example — Sloped Patio: A 10 ft × 14 ft patio on a slight slope. String line set at finished elevation. Depth measurements at a 4-foot grid:
| Point | Depth |
|---|---|
| Front-left | 3.5 inches |
| Front-centre | 4.0 inches |
| Front-right | 4.5 inches |
| Mid-left | 4.5 inches |
| Mid-centre | 5.0 inches |
| Mid-right | 5.5 inches |
| Rear-left | 5.5 inches |
| Rear-centre | 6.0 inches |
| Rear-right | 6.5 inches |
Average depth: (3.5+4.0+4.5+4.5+5.0+5.5+5.5+6.0+6.5) ÷ 9 = 5.0 inches average
Volume: 10 × 14 × (5.0÷12) = 10 × 14 × 0.417 = 58.3 cubic feet = 2.16 cubic yards
If you had used only the minimum depth of 3.5 inches, you would have calculated 1.51 yards — nearly 30% short. Averaging across the slope is not optional — it is the measurement.
How to Measure for Concrete Post Holes
Post holes are trickier to measure than slabs because the measurements are three-dimensional and the post itself displaces a portion of the concrete. Most people underestimate how much this matters for large posts in small holes.
Round Post Holes with Round Posts
The volume of concrete in a round post hole is the hole volume minus the post volume.
Hole volume: π × (hole radius)² × depth Post volume: π × (post radius)² × depth Concrete needed: Hole volume − Post volume
Worked Example: A 12-inch diameter hole, 42 inches deep, with a 4-inch diameter round post.
Hole volume: π × (6÷12)² × (42÷12) = π × 0.25 × 3.5 = 2.75 cubic feet Post volume: π × (2÷12)² × 3.5 = π × 0.028 × 3.5 = 0.306 cubic feet Concrete needed per hole: 2.75 − 0.31 = 2.44 cubic feet
For 6 fence posts: 6 × 2.44 = 14.64 cubic feet = 0.54 cubic yards Using 80 lb bags: 14.64 ÷ 0.60 = 24.4 → 27 bags with 10% waste
Round Post Holes with Rectangular Posts
Rectangular posts (4×4, 6×6) in round holes follow the same principle — subtract the rectangular post cross-section from the circular hole area.
Post cross-section area: Length × Width Hole area: π × radius² Concrete area per hole: Hole area − Post cross-section
Worked Example: A 12-inch diameter hole, 36 inches deep, with a 4×4-inch (actual 3.5×3.5 inch) square post.
Hole area: π × (0.5)² = 0.785 sq ft Post cross-section: (3.5÷12) × (3.5÷12) = 0.0851 sq ft Concrete area per hole: 0.785 − 0.085 = 0.70 sq ft Volume per hole: 0.70 × (36÷12) = 2.1 cubic feet
For 8 posts: 8 × 2.1 = 16.8 cubic feet = 0.62 cubic yards Using 80 lb bags: 16.8 ÷ 0.60 = 28 → 31 bags with 10% waste
Multiple Post Holes — Batch Calculation
When setting multiple posts of the same size in the same depth holes — a fence line, a deck perimeter — calculate one hole and multiply.
Quick reference — concrete per hole (80 lb bags), 12-inch diameter hole:
| Hole Depth | Bags Per Hole (80 lb) | Notes |
|---|---|---|
| 24 inches | 2 bags | Shallow — warm climates |
| 30 inches | 2–3 bags | Standard light fence |
| 36 inches | 3 bags | Standard residential |
| 42 inches | 3–4 bags | Northern frost depth |
| 48 inches | 4 bags | Deep frost/heavy post |
Use our concrete bags calculator to get the exact bag count for your specific hole dimensions — it handles the post displacement calculation automatically.
How to Measure for Concrete Footings and Foundation Trenches
Footings support walls and columns — they transfer loads to the bearing soil. Measuring them accurately matters because they are typically the deepest and most voluminous concrete element in residential construction.
Strip Footings
A strip footing is a continuous trench of concrete running beneath a wall. It has three measurements: length, width, and depth.
Length: Measure along the centreline of the footing — not the outer edge. For corners, measure to the centreline intersection, not the outer corner. This prevents double-counting the corner volume.
Width: Standard residential strip footings are typically 12–18 inches wide. Measure the actual form width — not the wall width above it.
Depth: Measure the actual trench depth from the bottom of the excavation to the top of the footing. Do not assume a standard depth — measure it. Footings that have been excavated by hand often vary by 2–3 inches along their length.
Worked Example — Perimeter Foundation Footing: A rectangular building perimeter: 30 ft × 40 ft. Strip footing 12 inches wide, 10 inches deep.
Perimeter (centreline): 2 × (30 + 40) = 140 linear feet Volume: 140 × (12÷12) × (10÷12) = 140 × 1.0 × 0.833 = 116.7 cubic feet In cubic yards: 116.7 ÷ 27 = 4.32 yards With 10% waste: 4.75 → order 5 yards
Pad Footings and Isolated Columns
Isolated pad footings are square or rectangular blocks of concrete supporting individual columns or posts. Measure length, width, and depth of the excavated pad.
Worked Example — Deck Post Pad Footings: Four pad footings for deck posts, each 18 inches × 18 inches × 12 inches deep.
Volume per footing: (18÷12) × (18÷12) × (12÷12) = 1.5 × 1.5 × 1.0 = 2.25 cubic feet Total: 4 × 2.25 = 9.0 cubic feet = 0.33 cubic yards
At this volume, 80 lb bags are the right choice: 9.0 ÷ 0.60 = 15 bags → 17 bags with 10% waste
How to Measure Curved and Circular Concrete Areas
Curves trip up a lot of DIYers because the standard tape-measure approach does not work for anything other than a straight line. But circular and curved measurements have their own simple formulas.
Circular Slabs and Pads
For a circular area, you need one measurement: the diameter. Everything else follows.
”Area = π × (diameter ÷ 2)² Volume = Area × Thickness”
Worked Example — Circular Patio: A circular patio, 14 feet in diameter, 4 inches thick.
Area: π × (7)² = π × 49 = 153.9 sq ft Volume: 153.9 × 0.333 = 51.3 cubic feet = 1.9 cubic yards With 10% waste: 2.09 → order 2.5 yards (round up to avoid short-load fee below minimum)
Measuring the diameter accurately: Drive a stake at what you believe is the centre point. Tie a string to it at the radius length (half the diameter). Walk a full circle, marking the perimeter with spray paint or a scratch in the subgrade. Measure across the marked circle at three or four points to confirm your diameter is consistent.
Curved Driveways and Paths
A curved driveway or path is not a circular segment — it is usually an irregular curve that does not fit a clean geometric formula. The practical approach:
Method 1 — Divide into segments: Break the curved path into short straight sections (2–4 feet each). Measure the length, width, and thickness of each segment. Calculate and add.
Method 2 — Area method: Measure the path width at multiple points. Pull a tape measure along the inner edge of the curve (the shortest path) and along the outer edge. Average the two lengths. Multiply by the average width.
Worked Example — Curved Garden Path: A curved path approximately 3 feet wide. Inner edge length: 22 feet. Outer edge length: 27 feet. Average length: 24.5 feet. Thickness: 3.5 inches.
Volume: 24.5 × 3.0 × (3.5÷12) = 24.5 × 3.0 × 0.292 = 21.4 cubic feet = 0.79 cubic yards
At this volume, bagged concrete makes sense — you are well under 1 cubic yard. 0.79 yd³ × 27 = 21.4 cu ft ÷ 0.60 (80 lb bag yield) = 35.7 → 40 bags with 10% waste.
How to Measure for a Concrete Driveway
A driveway deserves its own section because it is the most common large residential pour — and the most common source of expensive measurement errors.
Standard driveway widths:
- Single-car: 10–12 feet
- Double-car: 16–18 feet
- Triple-car or wide: 20–24 feet
Standard driveway thickness: 4 inches for residential (passenger vehicles). 5–6 inches for heavy vehicles or areas with poor subgrade.
Measurement complications:
- Driveways often flare at the street end (wider at the kerb than at the garage)
- They may have curved edges at the apron
- Slopes mean thickness varies
For a flared driveway apron: Divide into a standard rectangle (the straight portion) and a trapezoidal section (the flared portion at the street).
Trapezoid volume = [(Width 1 + Width 2) ÷ 2] × Length × Thickness
Worked Example — Standard Residential Driveway with Flare: Straight section: 16 ft wide × 30 ft long × 5 inches thick
”16 × 30 × 0.417 = 200.2 cu ft = 7.41 yd³”
Flared apron section: 16 ft at back, 22 ft at street, 6 ft long × 5 inches thick
”[(16 + 22) ÷ 2] × 6 × 0.417 = 19 × 6 × 0.417 = 47.5 cu ft = 1.76 yd³”
Total: 7.41 + 1.76 = 9.17 cubic yards With 10% waste: 10.09 → order 10.5 yards
Use our concrete slab calculator to verify your driveway calculation — enter the straight section and the apron separately, then add the results.
Adding the Waste Factor — Why You Always Order Extra
Every concrete measurement guide tells you to add a waste factor. Most do not explain why, which means people skip it when they are trying to save money — and then run short.
Here is what the waste factor actually accounts for:
Subgrade variation: Your subgrade is not perfectly flat even if it looks flat. Low spots hold extra concrete. A subgrade that varies by 0.5 inches across a 200 sq ft slab consumes approximately 0.31 extra cubic feet — roughly half an 80 lb bag.
Form edge overfill: Concrete poured against form boards is never perfectly flush. The screed removes the excess, but that excess has already been placed — it came out of your total. On a standard driveway, edge overfill typically adds 2–3% to actual consumption.
Spillage and residue: A small amount of concrete is always lost to spillage during mixing, transfer, and placement. For bag mixing, add the concrete that stays in the mixing tub and on tools. For ready mix, add the residue in the truck chute that does not make it into the pour.
Measurement error margin: If your tape measure reading was off by 1 inch on a 10-foot dimension — that is a 0.83% error per dimension. Three dimensions with 1-inch errors compound to approximately 2.5% underestimate.
Standard waste factors:
| Project Type | Waste Factor | Why |
|---|---|---|
| Small patch or repair | 5% | Controlled, low spillage |
| Residential slab (flat, level) | 8–10% | Standard variation |
| Sloped or uneven subgrade | 10–15% | Depth variation |
| Post holes | 10% | Hole depth variation |
| Foundation trench | 10–15% | Trench width irregularity |
| Complex or curved shapes | 15% | Multiple measurement sources |
Apply the waste factor after calculating your base volume — not before. Calculate the true volume first, then multiply by (1 + waste factor).
From Measurements to Order — Bags vs. Ready Mix
Once you have your volume with the waste factor included, you have one more decision: bags or ready mix.
The 1-cubic-yard rule: Under 1 cubic yard → bags are usually more economical (no delivery fee, no short-load charge). Over 1 cubic yard → ready mix is almost always cheaper per unit even after fees.
Converting cubic yards to bags:
| Bag Size | Cubic Feet Per Bag | Bags Per Cubic Yard |
|---|---|---|
| 40 lb | 0.30 cu ft | 90 bags |
| 60 lb | 0.45 cu ft | 60 bags |
| 80 lb | 0.60 cu ft | 45 bags |
Worked Example — Patio (2.5 cubic yards): 2.5 yards = 67.5 cubic feet. 80 lb bags: 67.5 ÷ 0.60 = 112.5 → 124 bags with 10% waste at $7.50 each = $930 Ready mix: 2.5 yd³ × $160 + $100 delivery = $500
At 2.5 yards, ready mix saves $430. The measurement work you did to get here just saved you nearly half the material cost by telling you that this project is firmly in ready mix territory.
For the complete bags-vs-ready-mix cost comparison for your specific project, use our concrete bags calculator — it shows both options side by side with delivery fees included.
Frequently Asked Questions
How do I measure for concrete?
Measure length, width, and thickness of your concrete area. Convert all measurements to feet (divide inches by 12). Multiply: Length × Width × Thickness = cubic feet. Divide by 27 for cubic yards. Add 10% for waste. For post holes, measure hole diameter and depth, calculate the cylinder volume, then subtract the post volume. For irregular shapes, break into rectangles and calculate each separately.
How do you measure concrete by the yard?
One cubic yard = 27 cubic feet. To convert your measurement to cubic yards: multiply length (ft) × width (ft) × thickness (ft) to get cubic feet, then divide by 27. A 10×10 ft slab at 4 inches thick = 10 × 10 × 0.333 = 33.3 cu ft ÷ 27 = 1.23 cubic yards. Add 10% for waste and you need approximately 1.35 yards.
How do I figure out how much concrete I need?
Calculate your volume (length × width × thickness in feet), convert to cubic yards (divide by 27), and add 10% for waste. Then decide between bags and ready mix — under 1 cubic yard, bags are usually more practical; over 1 cubic yard, call a ready mix supplier. Use the measurements from this guide for specific project types like post holes, curved areas, and sloped ground.
How do I measure concrete for a driveway?
Measure the length and width of the straight section. For flared aprons, measure the width at each end and use the trapezoid formula: [(W1+W2)÷2] × Length × Thickness. Add both sections together, convert to cubic yards, and add 10% waste. Standard driveways are 4–5 inches thick.
What tools do I need to measure for concrete?
A 30-foot steel tape measure, a depth gauge or folding ruler (for post holes and footings), a level and string line (for sloped ground), stakes, and a notepad. For large areas, a laser distance measure is faster and more accurate than a steel tape.
How accurate does my concrete measurement need to be?
Within 5% is adequate for most residential projects — the 10% waste factor absorbs normal measurement variation. What matters most is getting the thickness right — a 0.5-inch error in thickness on a large slab changes your volume significantly. Always measure thickness at multiple points and use the average.
What is an irregular concrete shape and how do I measure it?
Any shape that is not a simple rectangle — L-shaped slabs, curved paths, trapezoidal aprons, circular pads. Break complex shapes into simple geometric components (rectangles, circles, triangles, trapezoids). Calculate each component’s volume separately and add them together. For very irregular shapes, use the average-width-times-average-length method and add a larger waste factor (15%) to account for estimation error.
How do I measure for concrete on sloped ground?
Set string lines at the finished slab elevation. Measure the distance from the string to the subgrade at multiple points (every 4 feet in both directions). Average all depth measurements and use this average in your volume formula. Do not use the minimum or maximum depth — only the average gives you the correct volume.
How do I use a concrete calculator with my measurements?
Enter your length, width, and thickness into the calculator. Most calculators output cubic yards, cubic feet, or cubic meters plus a recommended bag count. Our concrete slab calculator accepts measurements in feet and inches, handles the conversion automatically, and includes a waste factor option. For cubic yard conversions from other units, use our cubic yards calculator.
Conclusion
Measuring for concrete is a field skill, not a desk skill. You need to be standing on the site, tape measure in hand, looking at the actual shape and condition of the ground. Rectangular slabs on flat ground are genuinely simple. Sloped ground, curved edges, post holes, and L-shaped areas each require a slightly different approach — but none of them are difficult once you know what to measure and why. Get the three core measurements right (length, width, thickness), handle the special cases with the formulas in this guide, add your 10% waste factor, and then run the numbers through our concrete slab calculator before you call the supplier. The measurement is the work. The calculation is just arithmetic.