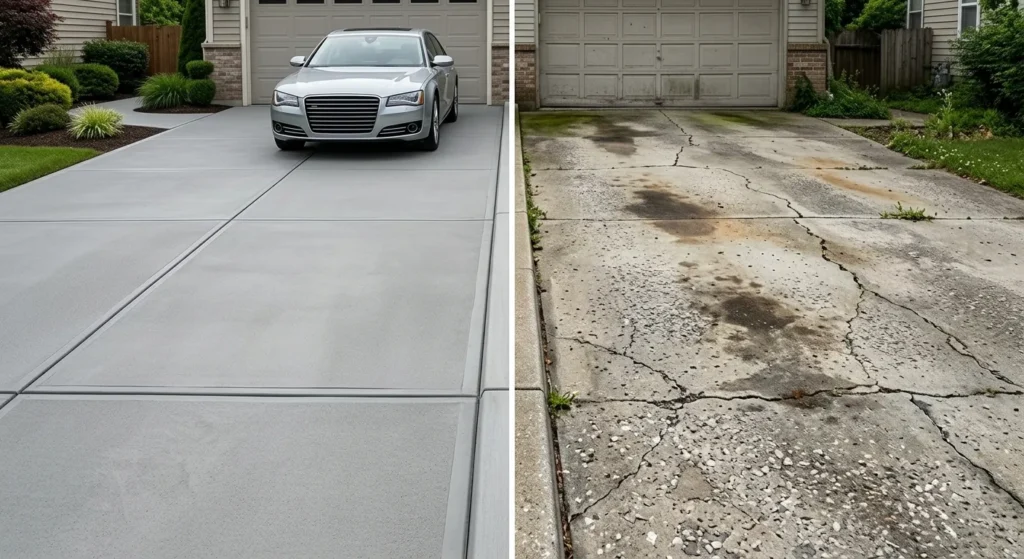

Concrete is the most durable common building material available — but durable does not mean maintenance-free. A concrete driveway, patio, or sidewalk that receives no attention will last 25–30 years. The same slab, properly maintained, will last 40–50 years and look significantly better throughout that lifespan.
The gap between those outcomes is not expensive or technically difficult. Knowing how to maintain concrete comes down to a small number of tasks done consistently — cleaning, sealing, crack repair, drainage management, and seasonal discipline. None of these require specialist skills or costly professional services for most residential applications.
What they do require is timing. Concrete maintenance done at the right intervals prevents the kind of deterioration that eventually forces expensive repairs or replacement. A $15 tube of polyurethane caulk in a control joint today prevents a $500 resurfacing job in five years. A $40 sealer application this autumn prevents surface scaling that cannot be reversed once it starts.
This guide covers every concrete maintenance task — what it involves, when to do it, and how to do it correctly — with a complete annual schedule you can follow for any concrete surface.
For any concrete repair or replacement project, calculate your material requirements accurately with the free concrete calculator at ConcreteCal.
Table of Contents
- Why Concrete Maintenance Pays for Itself
- How to Maintain Concrete — The Complete Schedule
- 1. Regular Cleaning
- 2. Concrete Sealing
- 3. Crack Repair and Joint Caulking
- 4. Void Filling and Slab Leveling
- 5. Drainage Management
- 6. Seasonal Concrete Maintenance
- 7. Removing Organic Growth
- 8. Avoiding Common Maintenance Mistakes
- Annual Concrete Maintenance Checklist
- Frequently Asked Questions
Why Concrete Maintenance Pays for Itself
Before going through specific maintenance tasks, it is worth establishing why maintenance is worth doing at all — particularly for homeowners who view concrete as a “set and forget” material.
The Cost of Neglect vs. The Cost of Maintenance
A concrete driveway costs $4,000–$8,000 to install. Replacing it costs the same or more. The maintenance cost over 20 years to avoid replacement:
| Maintenance Task | Frequency | Cost Per Event | 20-Year Total |
|---|---|---|---|
| Cleaning (DIY pressure wash) | Annually | $0 (own equipment) | $0 |
| Penetrating sealer | Every 5 years | $40–$80 (DIY) | $160–$320 |
| Joint caulking | Every 3–5 years | $20–$40 (DIY) | $100–$200 |
| Crack repairs (minor) | As needed | $15–$30 per repair | $100–$200 |
| Total 20-year maintenance | $360–$720 |
Against a $6,000 replacement cost — or even a $1,500–$3,000 resurfacing job — the maintenance investment is trivially small. The homeowners who replace driveways at 15–20 years are almost always the ones who did none of these tasks. The homeowners with 35-year-old driveways still in good condition did most of them consistently.
Which Concrete Surfaces Need the Most Attention
Not all concrete requires equal maintenance intensity:
| Surface | Maintenance Priority | Key Risks |
|---|---|---|
| Driveway | High | Vehicle loads, deicer damage, oil staining |
| Patio | Medium | Staining, algae, joint deterioration |
| Sidewalk/walkway | Medium | Crack propagation, joint movement |
| Garage floor | High (interior) | Chemical staining, surface wear |
| Retaining wall | High | Drainage failure, crack propagation |
| Basement floor | Low | Moisture, efflorescence |
| Steps | High | Edge chipping, ice damage |
How to Maintain Concrete — The Complete Schedule
The maintenance tasks in this guide are organised by type — but timing them correctly matters as much as doing them. Here is the annual rhythm before diving into each task:
| Season | Tasks |
|---|---|
| Spring (March–May) | Inspection, rinse away deicer residue, clean, repair cracks |
| Summer (June–August) | Deep clean, reseal (if due), caulk joints, address drainage |
| Autumn (September–October) | Seal (if not done in summer), clean gutters, pre-winter prep |
| Winter (November–February) | Snow removal discipline, deicer minimisation, monitor |
1. Regular Cleaning
Concrete cleaning is the most basic maintenance task — and the one most consistently skipped. Dirt, oil, organic matter, and biological growth all contribute to surface deterioration when left unchecked. Cleaning prevents this and is the starting point for any other maintenance task.
Routine Cleaning
Frequency: At minimum once annually (spring). Ideally twice — spring and autumn.
Method for general dirt and grime:
- Sweep loose debris with a stiff broom
- Wet the surface with a garden hose
- Apply a pH-neutral concrete cleaner diluted per manufacturer instructions
- Scrub with a stiff brush (deck brush or push broom)
- Rinse thoroughly with clean water
For most residential concrete surfaces, this simple routine removes surface dirt, light staining, and any salt residue from the previous winter.
Pressure Washing
For deeper cleaning — removing embedded dirt, algae, moss, and biological growth — pressure washing is the most effective method.
Correct pressure settings:
- Standard concrete (driveways, patios, sidewalks): 2,000–3,000 PSI
- Decorative or stamped concrete: 1,200–1,500 PSI (high pressure damages sealer and pattern edges)
- Concrete block walls: 1,500–2,000 PSI
Technique:
- Use a 25-degree fan nozzle for general cleaning, 40-degree for delicate surfaces
- Hold wand 6–12 inches from surface — consistent distance produces consistent results
- Work in overlapping passes in one direction
- Never use a zero-degree (pinpoint) nozzle on concrete — it etches the surface
Worked Example — Spring Driveway Cleaning: A 640 sq ft driveway after a winter of deicer use. Light salt residue, some algae in shaded corner near garage, tire tracks. Pressure wash at 2,500 PSI with 25-degree nozzle, concrete cleaner applied first. Total cleaning time: approximately 45 minutes. Result: clean surface ready for crack inspection and joint caulking.
Removing Specific Stains
Oil and grease stains: Apply commercial degreaser or dish detergent, work in with a stiff brush, allow 15–20 minutes dwell time, rinse. For old, set-in oil stains: apply absorbent poultice (cat litter or commercial concrete degreaser poultice) overnight, then pressure wash.
Rust stains: Apply oxalic acid-based concrete rust remover. Allow to work per manufacturer instructions (typically 5–10 minutes). Rinse thoroughly. Never use muriatic acid on decorative or coloured concrete — it affects surface colour.
Algae and mold: Mix 1 part bleach to 4 parts water. Apply to affected area, allow 10–15 minutes, scrub with stiff brush, rinse. For stubborn growth, commercial concrete algaecide products provide longer-lasting results. See the dedicated section below on organic growth removal.
Tyre marks: Pressure wash first. If marks persist, apply citrus-based degreaser and agitate. Most tyre marks on unsealed concrete are permanent or very difficult to remove — sealing prevents future tyre mark absorption.
Efflorescence (white mineral deposits): Diluted muriatic acid (1:10 in water) or commercial efflorescence remover. Apply to dry surface, allow to react, rinse thoroughly with water, and neutralise with baking soda solution. Always test in an inconspicuous area first on coloured or decorative concrete.
2. Concrete Sealing
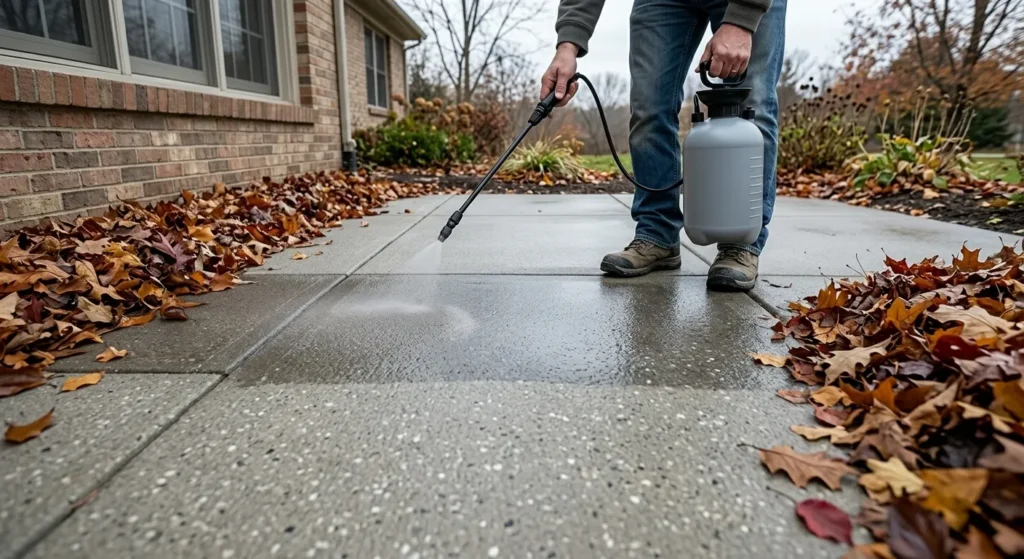
Sealing is the single highest-impact maintenance task for exterior concrete — it dramatically reduces water penetration, chloride ingress, staining, and biological growth simultaneously.
When to First Seal New Concrete
New concrete must cure for a minimum of 28 days before any sealer is applied. Sealing too early traps moisture in the curing concrete, which prevents proper strength development and causes the sealer to fail within weeks.
For stamped or coloured decorative concrete: wait the full 28 days regardless of how the surface looks or what the contractor suggests. The 28-day rule is non-negotiable for sealer performance.
How Often to Reseal
| Surface Type | Sealer Type | Reapplication Frequency |
|---|---|---|
| Driveway (vehicle traffic) | Penetrating silane-siloxane | Every 5–7 years |
| Patio (foot traffic) | Penetrating silane-siloxane | Every 7–10 years |
| Stamped/coloured concrete | Acrylic film-forming | Every 1–3 years |
| Garage floor (epoxy) | Two-component epoxy | Every 7–10 years |
| Sidewalk/walkway | Penetrating | Every 7–10 years |
Signs that resealing is due:
- Water no longer beads on the surface — it absorbs instead
- Surface staining appears where it previously did not
- Dull or faded appearance (acrylic sealers)
- Surface feels rough or chalky
Choosing the Right Sealer
For most exterior residential concrete (driveways, patios, walkways): a penetrating silane-siloxane sealer is the correct choice — invisible, long-lasting, and provides excellent freeze-thaw and chloride protection.
For decorative or stamped concrete: acrylic sealer for colour enhancement and gloss.
For the complete sealer selection guide including all product types, application instructions, and surface-by-surface recommendations, see our dedicated post on types of concrete sealers.
3. Crack Repair and Joint Caulking
Cracks and open joints are the primary entry points for water — and water is the primary driver of concrete deterioration. Keeping joints sealed and cracks filled is the maintenance task with the highest damage-prevention return per dollar spent.
Hairline Cracks — Monitor or Repair?
Not every crack in concrete requires immediate repair. Understanding which cracks to repair now versus monitor is the first diagnostic step.
Monitor (do not repair immediately):
- Hairline cracks under 1/8 inch (3mm) wide, stable, no displacement between faces
- Surface crazing — fine network of surface-only cracks
- Cracks that have been stable for over a year
Repair promptly:
- Any crack over 1/8 inch (3mm) wide
- Cracks with vertical displacement (one side higher than the other)
- Cracks that are actively growing — recheck quarterly if uncertain
- Any crack in a step edge, where water entry would accelerate deterioration
- Cracks adjacent to joints where the joint filler has failed
For a complete guide to crack types, severity assessment, and repair methods, see our post on types of cracks in concrete.
DIY crack repair for cracks under 1/2 inch (12mm):
- Clean the crack with a wire brush and compressed air or blow pump
- Widen slightly with an angle grinder (creates a better filler profile)
- Apply self-leveling polyurethane caulk or concrete crack filler
- Smooth flush with the surface
- Allow to cure before foot or vehicle traffic
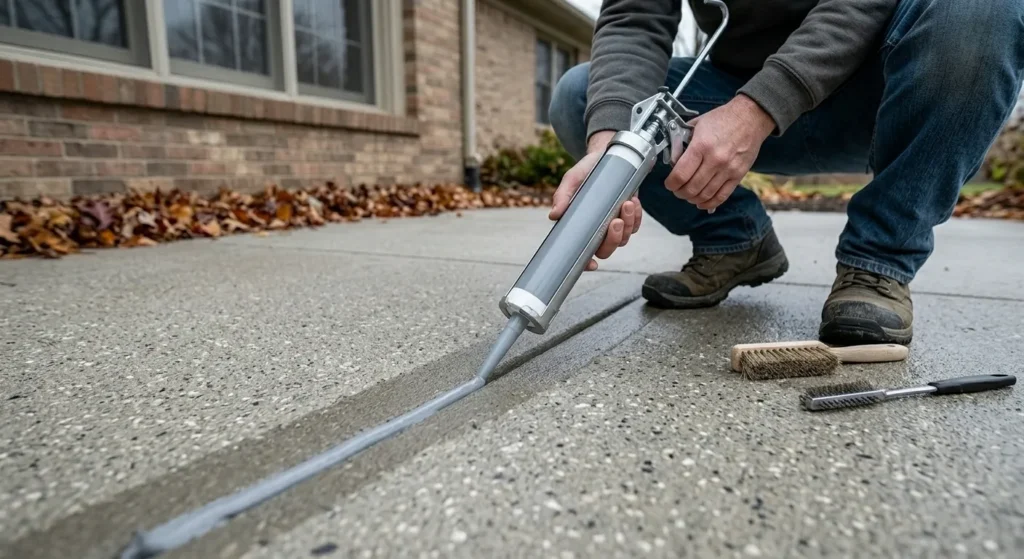
How to Caulk Concrete Joints
Control joints and expansion joints are designed movement points in concrete — they exist specifically to accommodate concrete movement. When the filler in these joints fails, water enters, erodes the subgrade, and creates the conditions for slab settlement.
How often: Inspect joints every 2–3 years. Recaulk when the existing filler is cracked, missing, or has pulled away from the joint faces.
Materials: Self-leveling polyurethane sealant for horizontal joints (driveways, patios). Non-sag polyurethane or silicone for vertical joints (wall-to-slab interfaces).
Step-by-step joint caulking:
- Remove old failing caulk with a utility knife and wire brush
- Clean joint of all debris with compressed air or brush
- Install backer rod (closed-cell foam rope) to the correct depth — the sealant should be 1/4 inch below the surface and no more than 1/2 inch deep
- Apply self-leveling polyurethane sealant from a caulk gun
- Allow to cure per manufacturer instructions before traffic
Worked Example — Driveway Joint Maintenance: A 16×40 ft driveway with three cross-joint lines (three control joints at 10-foot spacing) plus one expansion joint at the garage apron. Total joint length: 16 ft × 4 = 64 linear feet. Backer rod: one 100 ft roll. Polyurethane sealant: approximately 3 tubes at 10 oz each for 64 linear feet. Total material cost: under $40. Time: 2 hours. This $40 and 2 hours prevents water from undermining the subgrade, which causes slab rocking and eventual replacement.
When to Call a Professional
DIY crack repair is appropriate for cracks under 1/2 inch with no displacement or active movement. Call a structural engineer or concrete contractor when:
- Cracks are wider than 1/2 inch (12mm)
- Cracks show vertical displacement between faces
- Multiple cracks form a pattern suggesting foundation movement
- Cracks are in a structural element (retaining wall, foundation wall, column)
- Cracks are active and growing despite previous repairs
4. Void Filling and Slab Leveling
Voids develop beneath concrete slabs when the supporting soil erodes, settles, or is displaced by water. A slab with voids beneath it has no support in those areas — it deflects under load and eventually cracks at the unsupported span.
Signs of Voids Beneath Your Slab
Hollow sound: Walk the slab and listen. Tap with a hammer handle or rod. Sound areas produce a solid thud. Areas with voids beneath produce a hollow, resonant sound — the difference is immediate and unmistakable.
Slab rocking: Step on different sections of the slab. If one section deflects noticeably or rocks slightly relative to an adjacent section, subgrade support has been lost.
Water pooling: If water consistently pools in one area after rain, the surface has settled — indicating void or subgrade loss beneath.
Settled sections: Any slab section that has dropped below adjacent sections indicates subgrade movement. Even settlement of 1/4 inch changes the drainage pattern and accelerates deterioration.
DIY vs. Professional Void Filling
DIY approach (small voids, accessible edges): For small voids accessible from the edge of the slab — a settled patio edge, a corner that has sunk — flowable concrete grout or self-leveling concrete can be injected or poured into drilled holes to fill voids beneath the slab.
Drill 1-inch holes at 18-24 inch spacing over the suspected void area. Pour or pump flowable grout until it fills the void (grout will begin to appear at adjacent holes when the void is full). Plug holes with mortar after curing.
Professional methods:
- Mudjacking (slabjacking): A slurry of soil, cement, and water is pumped under pressure through drilled holes — lifting the slab and filling voids simultaneously. Effective and economical for large settled slabs.
- Polyurethane foam injection: Expanding polyurethane foam injected through small drilled holes — lifts the slab, fills voids, and cures within minutes. More expensive than mudjacking but faster and less disruptive.
When void filling is worth it: When the slab itself is structurally sound — no active cracking, no rebar corrosion, surface in good condition. Void filling saves a sound slab from unnecessary replacement.
When replacement is necessary: When the slab has significant surface deterioration, structural cracking, or corroded reinforcement — void filling a damaged slab is treating the symptom not the cause.
5. Drainage Management
Poor drainage is the underlying cause of a large proportion of concrete maintenance problems. Water that collects against or beneath concrete deteriorates it from below — eroding subgrade, creating freeze-thaw conditions, and introducing the moisture that drives chemical and biological deterioration.
Gutters and Downspouts
Gutters and downspouts direct roof runoff — which can be thousands of gallons per year — away from the building. When gutters are clogged or downspouts discharge onto or adjacent to concrete slabs, the water load on the subgrade is enormous.
Maintenance tasks:
- Clean gutters twice annually — spring and autumn. Blocked gutters overflow and discharge directly onto concrete below.
- Extend downspout extensions minimum 4 feet from the foundation. Downspouts discharging at the foundation edge saturate the subgrade immediately adjacent to the slab edge.
- Check that splash blocks direct water away from concrete, not pooling against it.
Soil Level Around Concrete
Soil grade adjacent to concrete slabs should be level with or slightly below the slab surface — not higher. When soil level is above the slab edge or against the concrete surface, moisture is in constant contact with the concrete edge and the subgrade beneath.
Check annually: Walk the perimeter of any concrete slab and note any areas where soil has built up above slab level. Cut back soil to slightly below slab level and add a gravel border if needed for drainage.
The tree and plant adjacency problem: Tree roots grow beneath concrete slabs and displace subgrade — causing heave and cracking. Shrubs and ground cover planted against concrete edges retain moisture. Maintain a minimum 12-inch clear zone between plantings and concrete edges.
Surface Slope and Grading
Concrete slabs should slope minimum 1–2% away from structures (approximately 1/8 inch per foot) to direct surface water away from the building and the slab edges. Over time, settlement can reverse this slope — creating areas where water pools on or around the slab.
Assessment: After heavy rain, observe where water pools on and around your concrete. Any area of consistent ponding indicates a drainage issue that will accelerate deterioration.
Correction: Minor slope corrections can sometimes be achieved with a thin concrete overlay — but significant slope reversal from settlement requires mudjacking or replacement of the affected section.
6. Seasonal Concrete Maintenance
Different seasons create different maintenance requirements — a seasonal maintenance rhythm ensures nothing critical is missed.
“The American Concrete Institute (ACI 362.1R) guide for the design and construction of durable concrete parking structures specifies that concrete surfaces subject to deicer exposure should be sealed with penetrating sealers and inspected annually — a standard that applies equally well to residential concrete driveways and walkways in chloride-exposure environments.”
Spring — Inspection and Rinse
Spring is the most important maintenance window — the first opportunity to assess winter damage and address it before it progresses.
Spring tasks:
- Rinse all concrete surfaces with a hose or pressure washer to remove deicer residue. Chloride residue left on concrete through spring continues migrating deeper into the slab as temperatures rise and moisture increases.
- Inspect for new cracks — walk every concrete surface and note any new cracking or crack widening. Mark with chalk and monitor over 30 days before deciding whether to repair or continue monitoring.
- Check joint condition — are control joint fillers intact? Any cracked, missing, or separated caulk needs replacement before the next winter.
- Assess drainage — observe during rain and identify any new pooling areas.
- Check for heave — any slab sections that lifted during frost heave will be visible as raised or rocking sections.
Summer — Cleaning and Sealing Window
Summer is the best season for sealing and deep cleaning — warm temperatures, low humidity, and long daylight hours provide ideal conditions for sealer application and curing.
Summer tasks:
- Deep clean any stained or algae-affected areas using the methods described above.
- Reseal if penetrating sealer is due (check the water bead test — pour water on the surface; if it absorbs rather than beads within 30 seconds, resealing is due).
- Caulk control joints if not done in spring.
- Repair cracks identified in spring inspection.
Ideal sealing conditions: Air and surface temperature 50°F–85°F, no rain forecast for 24 hours, concrete dry for minimum 48 hours before application.
Autumn — Pre-Winter Preparation
Autumn is the last opportunity to protect concrete before winter conditions arrive. This is the most important preparation window.
Autumn tasks:
- Clean gutters — remove leaf debris before winter rainfall and to prevent overflow onto concrete.
- Apply sealer if not done in summer — penetrating silane-siloxane applied in September or October provides winter protection. Do not apply below 50°F (10°C).
- Stock concrete-safe deicer — purchase CMA or sand before the first freeze rather than reaching for rock salt out of convenience. For guidance, see our complete guide on what type of ice melt is safe for concrete.
- Check expansion joints at garage aprons and building transitions — ensure they are sealed before freeze-thaw cycles begin.
Winter — Snow Removal and Deicer Discipline
Winter maintenance is primarily about what you do not do — avoiding the most damaging practices.
Winter do list:
- Remove snow promptly before it compacts and bonds to the surface — easier to remove fresh snow than ice
- Use a plastic-blade snow shovel or rubber-edged pusher — metal blades chip concrete surfaces and damage sealer
- Apply sand or grit for traction on ice without chemical deicer
- Use CMA if chemical melting is genuinely required
Winter do not list:
- Do not use rock salt — ever, on any concrete surface
- Do not use calcium chloride regularly — occasional use on extreme cold events only
- Do not pile snow removed from concrete back against the building foundation or on landscaping adjacent to concrete
- Do not use metal shovels or ice choppers that chip and scratch the surface
7. Removing Organic Growth — Algae, Moss, and Mold
Organic growth on concrete causes both aesthetic problems (staining, discolouration) and surface deterioration (biological acids from algae and moss gradually etch the cement paste). It also creates slip hazards — particularly on steps and walkways.
Conditions that promote growth:
- Shaded surfaces that remain damp
- North-facing concrete
- Areas adjacent to soil, mulch, or vegetation
- Concrete near water features or under trees
Removal method:
- Mix 1 part household bleach to 4 parts water in a garden sprayer
- Apply to affected area (protect adjacent plants with water first)
- Allow 10–15 minutes dwell time — do not let it dry on the surface
- Scrub with a stiff brush
- Rinse thoroughly with clean water
For persistent or extensive growth, commercial concrete algaecide products provide better long-term results — they leave a residual biocide that inhibits regrowth for 6–12 months.
Prevention: A penetrating sealer with biocide additive dramatically reduces biological growth on exterior concrete — the hydrophobic surface stays drier and is less hospitable to algae and moss. This is another benefit of the regular sealing programme.
8. Avoiding Common Maintenance Mistakes
Mistake 1 — Sealing wet concrete. Applying sealer to concrete that is damp from rain or morning dew traps moisture beneath the film-forming sealer — causing whitening and delamination within weeks. Always wait minimum 48 hours of dry weather before sealing, and apply the plastic sheet moisture test before any sealer application.
Mistake 2 — Using rock salt on concrete. This single mistake causes more preventable concrete deterioration than all other maintenance errors combined. The temptation to use the cheapest available deicer is understandable — but the cost of driveway replacement at 15 years instead of 35 years dwarfs any deicer savings. Switch to sand or CMA.
Mistake 3 — Pressure washing too aggressively. Pressure above 3,000 PSI on concrete, or using a zero-degree nozzle, etches the surface paste and progressively removes the densest, hardest layer of concrete. Over years of aggressive pressure washing, the surface becomes increasingly rough and porous — accelerating the very deterioration cleaning is meant to prevent.
Mistake 4 — Ignoring control joints. Control joints were installed specifically to control where cracking occurs. When they are left unfilled or the filler fails, the joint becomes a water entry point. Water undermines the subgrade, freeze-thaw cycles widen the joint, and what was a planned maintenance item becomes a structural problem.
Mistake 5 — Planting against concrete edges. Ground cover, shrubs, and mulch beds planted directly against concrete edges trap moisture in constant contact with the concrete and subgrade. This accelerates edge deterioration and introduces roots that displace the subgrade over years. Maintain a 12-inch clear zone.
Mistake 6 — Waiting until damage is visible to act. Every maintenance task in this guide is most effective when done preventively — before damage appears. Sealing before the surface has absorbed chlorides. Caulking joints before water has eroded the subgrade. Cleaning before stains have permanently penetrated. The waiting-until-it-looks-bad approach always costs more than the preventive approach.
Annual Concrete Maintenance Checklist
Use this checklist annually to ensure no critical maintenance tasks are missed:
SPRING (March–May):
- [ ] Rinse all concrete surfaces to remove winter deicer residue
- [ ] Inspect all slabs for new cracks — mark and monitor
- [ ] Check control joint and expansion joint filler condition
- [ ] Assess drainage — identify any new pooling areas
- [ ] Check for frost heave damage — rocking or raised slab sections
- [ ] Clean gutters and check downspout extensions
SUMMER (June–August):
- [ ] Deep clean stained or algae-affected surfaces
- [ ] Test sealer effectiveness (water bead test)
- [ ] Reseal if due — apply in dry, warm conditions
- [ ] Caulk failed control joints (self-leveling polyurethane)
- [ ] Repair cracks identified in spring
- [ ] Check soil level around concrete perimeter
AUTUMN (September–October):
- [ ] Clean gutters before leaf fall
- [ ] Apply penetrating sealer if not done in summer
- [ ] Purchase concrete-safe deicer (CMA or sand) before first freeze
- [ ] Check and reseal expansion joints at garage aprons
- [ ] Remove any vegetation growth against concrete edges
WINTER (November–February):
- [ ] Use plastic-bladed snow shovel only
- [ ] Apply sand for traction — avoid rock salt
- [ ] Use CMA only if chemical deicer is genuinely necessary
- [ ] Monitor identified cracks for widening in freeze-thaw cycles
Frequently Asked Questions
How do I maintain concrete?
Maintain concrete through four core tasks: regular cleaning (annually, with pressure washing), sealing with penetrating sealer every 5–7 years, repairing cracks and caulking joints every 3–5 years, and managing drainage by cleaning gutters and maintaining soil grade. Seasonally: rinse deicer residue in spring, seal in summer or autumn, use sand instead of rock salt in winter.
How often should concrete be sealed?
Penetrating silane-siloxane sealers last 5–10 years on exterior concrete with normal traffic. Acrylic film-forming sealers on decorative or stamped concrete last 1–3 years. Test by pouring water on the surface — if it absorbs within 30 seconds rather than beading, resealing is due.
How do I clean concrete properly?
Sweep loose debris, wet the surface, apply pH-neutral concrete cleaner, scrub with a stiff brush, and rinse thoroughly. For deeper cleaning, pressure wash at 2,000–3,000 PSI with a 25-degree fan nozzle. For specific stains: degreaser for oil, oxalic acid remover for rust, diluted bleach for algae and mold.
How do I repair cracks in concrete myself?
For cracks under 1/2 inch with no displacement: clean with a wire brush and compressed air, apply self-leveling polyurethane caulk or concrete crack filler, and smooth flush with the surface. For cracks wider than 1/2 inch or with vertical displacement between faces, consult a professional — these may indicate structural movement.
How do I prevent concrete from deteriorating?‘
The most effective prevention measures are: applying penetrating sealer every 5–7 years, avoiding chloride deicers (especially rock salt), managing drainage to prevent water accumulation beneath and around slabs, keeping control joints caulked, and cleaning promptly to prevent organic growth.
How do I maintain a concrete driveway?
Annual spring rinse to remove deicer residue. Pressure wash for deep clean. Reseal every 5–7 years with penetrating silane-siloxane sealer. Recaulk control joints every 3–5 years. Use sand or CMA deicer in winter — never rock salt. Repair cracks promptly before they admit water. Ensure drainage directs water away from the driveway edge.
What maintenance does concrete need in winter?
Use a plastic-bladed snow shovel to remove snow — metal blades chip and scratch. Apply sand or coarse grit for traction. If chemical deicer is necessary, use calcium magnesium acetate (CMA) or potassium chloride — never rock salt. Rinse all deicer residue thoroughly in early spring.
How do I remove algae from concrete?
Apply a solution of 1 part bleach to 4 parts water. Allow 10–15 minutes dwell time. Scrub with a stiff brush. Rinse thoroughly. For persistent growth, use a commercial concrete algaecide. Prevent recurrence by applying a penetrating sealer with biocide additive and maintaining a clear zone between plantings and concrete.
Conclusion
Concrete maintenance is not a complex or expensive undertaking — it is a consistent one. Clean annually, seal every 5–7 years, caulk joints every 3–5 years, manage drainage, avoid rock salt in winter, and repair small cracks before they become big ones. These tasks require a few hours and modest materials each year. The alternative — reactive repair after deterioration becomes visible — always costs more and often means resurfacing or replacement that a little preventive attention would have avoided entirely. Start with this year’s spring inspection, work through the checklist, and build the maintenance rhythm from there. For any concrete repair or replacement project, calculate your material requirements accurately with the ConcreteCal free concrete calculator.