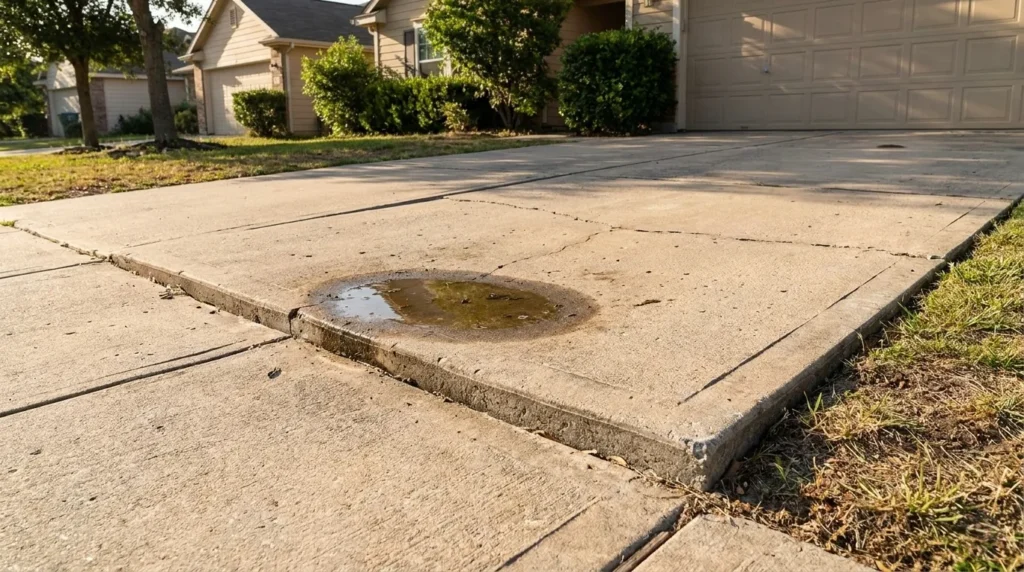

A driveway with a sunken panel is one of the most common — and most ignored — concrete problems at residential properties. The settlement happens gradually, so gradually that most homeowners do not notice until the step between two panels is large enough to catch a tyre or cause someone to stumble. By that point, the void beneath the slab is often significant, the crack at the joint has widened, and every rain event sends water pooling against the garage apron.
Concrete driveway leveling addresses this problem by raising the settled panel back to its original elevation — no demolition, no concrete disposal, no weeks of waiting for new concrete to cure. A settled driveway panel that would cost $3,000–$8,000 to replace can typically be leveled for $400–$1,200. The existing concrete — already cured, weathered, and matching the adjacent panels in colour — is preserved.
This guide covers everything specific to driveways: why driveways settle, how to assess whether your driveway is a leveling candidate, what the leveling process actually involves, what it costs, and whether leveling or replacement is the right answer for your specific situation.
For any concrete volume calculations if replacement sections are needed, use the free concrete calculator at ConcreteCal. For a complete overview of all concrete leveling applications beyond driveways, see our concrete leveling guide.
Table of Contents
- Why Driveways Settle More Than Other Concrete Surfaces
- Signs Your Driveway Needs Leveling
- Concrete Driveway Leveling Methods
- DIY Driveway Leveling — What Is Actually Possible
- Concrete Driveway Leveling Cost — Detailed Breakdown
- Concrete Driveway Leveling vs Replacement — Which Is Right?
- How the Driveway Leveling Process Works
- How Long Does Concrete Driveway Leveling Last?
- Preventing Driveway Settlement — After Leveling
- Hiring a Concrete Driveway Leveling Contractor
- Frequently Asked Questions
Why Driveways Settle More Than Other Concrete Surfaces
Driveways experience conditions that no other residential concrete surface does — repeated vehicle loads, constant exposure to runoff from the largest impervious surface on most properties, and edges adjacent to lawn areas where water concentrates. Understanding these specific causes helps explain why driveway leveling is such a common requirement.
Vehicle Load and Impact
A typical passenger car weighs 3,000–4,500 lbs. A loaded pickup truck weighs 6,000–8,000 lbs. Every time a vehicle drives over a driveway panel that has a void beneath it, the unsupported concrete flexes slightly under the load. Over thousands of loading cycles, this flexing progressively compresses the void edges and widens cracks at panel joints.
The impact load problem: The moment a vehicle tyre transitions from one panel to another at a stepped joint, it creates an impact load significantly greater than the static vehicle weight. Each transition over a stepped joint hammers the lower panel downward — accelerating the settlement that created the step in the first place.
How this affects leveling timing: The longer a settlement is left unaddressed, the more vehicle-load damage accumulates in the concrete above and the more the void below expands. Early intervention — when the step is under 1 inch — produces the best leveling results and the lowest cost.
Water Runoff from Adjacent Lawn and Garden
Driveways typically sit adjacent to lawn areas — and lawns generate significant surface runoff during rain events. This water flows across the lawn, reaches the driveway edge, and has two destinations: it runs down the driveway surface toward the street, or it flows under the driveway panel edge and beneath the slab.
The under-slab flow problem: Water flowing beneath a concrete panel carries fine soil particles with it — a process called erosion or piping. Even a slow, persistent flow gradually removes the fine material that supports the slab, creating a growing void over months and years.
The concentrated runoff areas: Settlement is most common at the edges and corners of driveway panels adjacent to lawn areas — because this is where the water flow concentrates. A driveway panel that has settled at the corner adjacent to the front garden has almost certainly been subject to sustained under-slab water flow at that location.
Driveway Edge Erosion
The edges of concrete driveway panels are the most vulnerable point — the concrete is no longer supported on the lawn side, and any water flow at the edge finds a direct pathway beneath the slab. This edge erosion creates a classic settlement pattern: the corner or edge of a panel drops while the centre remains relatively stable.
Identifying edge erosion settlement: Look at which part of the panel has settled. If the corner adjacent to the lawn has dropped but the centre of the panel is stable, edge erosion is the primary cause. If the whole panel has dropped uniformly, the subgrade beneath the entire panel has compressed — a different problem requiring different treatment.
Tree Root Damage
Trees near driveways cause settlement through two mechanisms — active and passive.
Active root heave: Growing tree roots beneath a driveway panel push the concrete upward, creating heave rather than settlement. The heaved section is a trip and tyre hazard from above rather than below.
Passive root decomposition: When a tree is removed — or dies naturally — its root system decomposes over the following 5–15 years. As the root mass decreases in volume, it creates voids beneath the driveway, leading to progressive settlement.
The challenge: If a tree is still present and actively growing near the driveway, leveling the heaved panel provides only temporary correction — the roots will continue to grow and the panel will rise again within 2–5 years.
Signs Your Driveway Needs Leveling
Panel Step — The Trip and Tyre Hazard
The most visible sign — a distinct elevation difference between two adjacent driveway panels at their joint. As a general guideline:
| Step Height | Assessment | Action |
|---|---|---|
| Under 1/4 inch | Monitor — normal variation | Seal joint, monitor quarterly |
| 1/4 to 1/2 inch | Early-stage settlement | Schedule leveling assessment |
| 1/2 to 1 inch | Active settlement — safety concern | Level promptly |
| Over 1 inch | Significant settlement | Level immediately or replace |
| Over 3 inches | Severe settlement | Replacement likely needed |
Why early action saves money: A 1/2-inch step requires filling a smaller void than a 2-inch step — less material, shorter injection time, lower cost. A panel that has settled 2 inches has typically also developed more extensive cracking from vehicle impact loading, which may complicate or rule out leveling.
Water Pooling After Rain
Walk your driveway after the next rain event and note where water pools. Water should drain from the driveway surface toward the street within minutes of rain stopping — on a correctly graded driveway, no pooling should persist.
What pooling locations tell you:
- Pooling at a panel edge adjacent to the lawn: classic edge erosion settlement at that location
- Pooling in the centre of a panel: the full panel has settled uniformly
- Pooling at the garage apron: the apron has settled away from the garage threshold
- Pooling at a specific joint: one side of the joint has dropped relative to the other
Cracks at Panel Joints
Concrete driveway panels are designed to crack at the saw-cut control joints between panels — that is what the joints are for. But settlement causes the width and pattern of these cracks to change in characteristic ways.
Signs of settlement-related cracking:
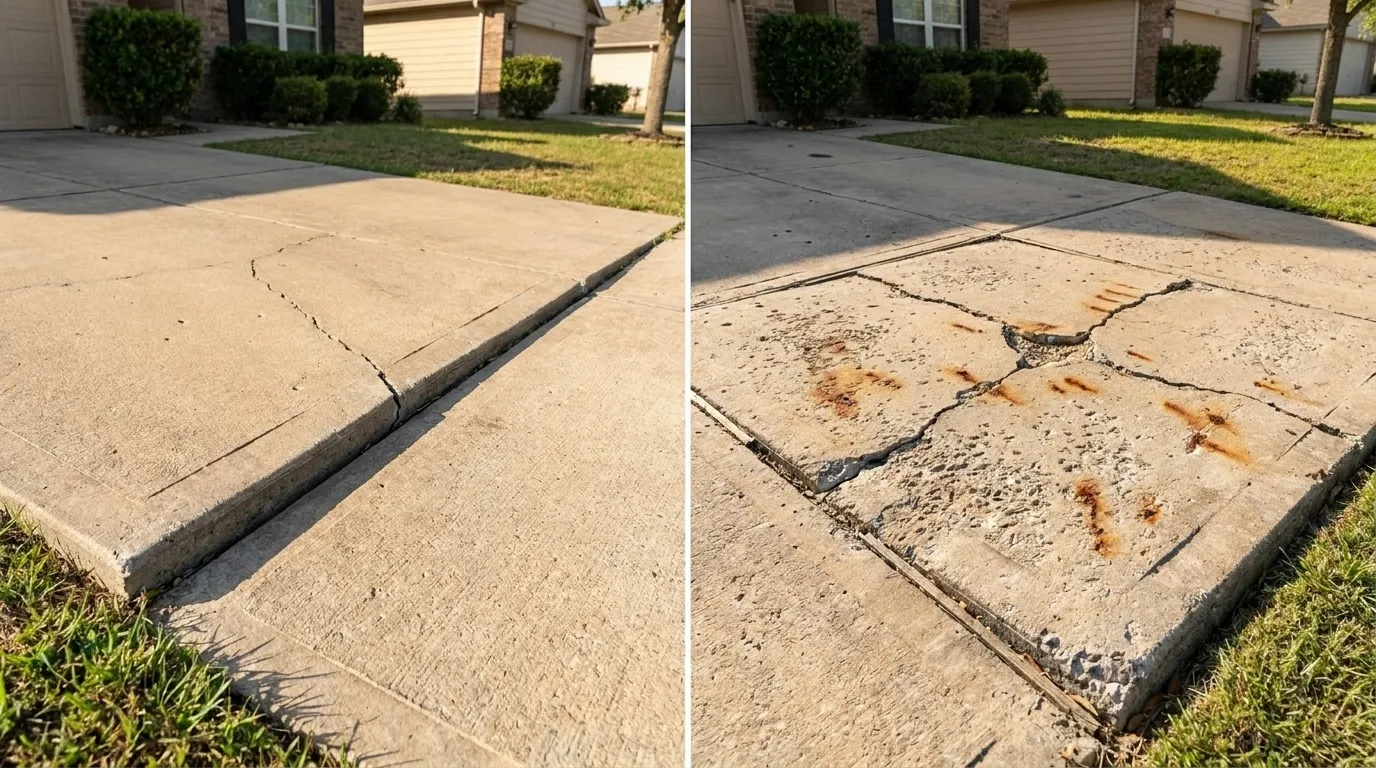
- A crack that was hairline width 2 years ago is now 1/4 inch wide
- Vertical displacement at a crack — one side is noticeably higher than the other
- A diagonal crack running from the corner of a panel toward the centre (classic settlement crack pattern)
- Cracks that widen after rain events (water flow beneath the slab is moving material)
For a complete guide to identifying crack types and their causes, see our types of cracks in concrete guide.
Garage Apron Settlement
The garage apron — the section of driveway immediately in front of the garage door — is the section most subjected to both vehicle impact loading and runoff from the garage interior. It is one of the most common settlement locations on any residential driveway.
The garage apron challenge: If the apron has settled relative to the garage threshold, water flows into the garage rather than away from it. This creates both a flooding risk and a trip hazard at the threshold.
Apron leveling specifics: The apron is typically separated from the main garage floor slab by a construction joint — leveling the apron does not require touching the interior floor. The apron is raised to match the garage threshold elevation, restoring the outward drainage slope.
Concrete Driveway Leveling Methods
Mudjacking for Driveways
Mudjacking — pumping stone slurry beneath the settled slab through drilled holes — is the traditional concrete leveling method and remains effective and cost-competitive for residential driveways.
Why mudjacking works well for driveways:
- Driveways are exterior surfaces — the larger drill holes (1–2 inches) are less of an aesthetic concern than on decorative interior concrete
- The stone slurry is dense and heavy — well-suited to supporting vehicle loads once cured
- Lower material cost makes mudjacking economical for the larger void volumes common in driveway settlement
Limitations for driveways: The 24–48 hour cure time before vehicle traffic means the driveway is unavailable for 1–2 days. For households dependent on the driveway for daily commuting, this downtime needs to be planned.
Polyurethane Foam Leveling for Driveways
Polyurethane foam injection has become the preferred method for driveway leveling by many contractors — the 15-minute cure time, smaller injection holes, and waterproof foam characteristics address the specific challenges of driveway applications effectively.
Why foam excels for driveways:
- Vehicle traffic in 15–30 minutes — the driveway is back in use the same morning it was treated
- Waterproof foam directly addresses the water erosion that caused the settlement — future water flow beneath the slab cannot wash foam away
- Small injection holes (5/8 inch) are less visible after patching than mudjacking holes
Worked Example — Two-Panel Driveway Settlement:
A two-car driveway, left panel settled 1.75 inches at the corner adjacent to the lawn. Contractor assessment: slab structurally sound, single void of approximately 2.5 inches maximum depth at the corner, reducing to 0.5 inches toward the centre. Foam injection: 5 holes drilled, foam injected in sequence from corner outward. Slab raised 1.75 inches at corner, 0.5 inches at centre, panels now level within 1/8 inch. Holes patched with grout. Vehicle traffic resumed 25 minutes after injection started. Total job time: 2.5 hours. Cost: $780.
DIY Concrete Driveway Leveling Options
The honest assessment of DIY driveway leveling: genuine slab lifting — raising a settled panel back to its original elevation — requires specialist equipment (pumping machinery, foam injection guns) that is not practical for DIY use on a one-time project. Full DIY leveling of a settled driveway panel is not realistic for most homeowners.
What IS realistic for DIY:
- Minor surface irregularities (not settlement) addressed with resurfacing compound
- Temporary shimming of a small step hazard
- Sealing cracks to slow the settlement process
- Improving drainage to prevent further settlement
Covered in detail in the next section.
When Full Replacement Is the Right Answer
Driveway panel replacement is appropriate when:
- The panel is cracked into multiple sections
- The concrete is severely deteriorated (spalling, exposed aggregate throughout, rebar corrosion)
- Settlement exceeds 4–5 inches
- The concrete is at the end of its service life (40+ years with extensive wear)
- Previous leveling has failed repeatedly — indicating a chronic soil problem that leveling cannot address
The colour match challenge with replacement: New concrete cured for less than 2–3 years is noticeably lighter in colour than the adjacent panels it is replacing. If colour consistency matters, either replace multiple adjacent panels simultaneously or wait until the new concrete has weathered to match.
DIY Driveway Leveling — What Is Actually Possible
Self-Leveling Compound for Minor Surface Issues
Self-leveling compound — a cementitious product that flows to fill low spots — is appropriate for surface irregularities, not for genuine settlement.
What it fixes: Minor roughness, surface low spots under 1/2 inch, and surface preparation before a decorative overlay.
What it does not fix: Any settlement where the slab panel has actually dropped — the compound sits on top of the existing surface and does not fill the void beneath it. Applying self-leveling compound to a settled panel creates a surface that looks level but continues to settle beneath the compound layer.
The self-leveling compound available at hardware stores — such as products in the resurfacing category — is a legitimate tool for the right application. The concrete resurfacing product here is the type of surface repair material appropriate for minor surface imperfections, roughness, and preparation work on otherwise stable driveway surfaces. Always verify that the surface is stable before applying — if the panel has settled, address the void first.
Shimming and Patching Raised Edges
Where a panel has heaved upward (from tree roots, frost, or expansion) rather than settled downward, the raised edge can sometimes be ground down flush with an angle grinder and diamond grinding cup — a genuine DIY option for small areas.
Limitations: Grinding removes concrete at the raised edge but does not address the cause of heave. If tree roots caused the heave, the root must be managed or the concrete will rise again.
What DIY Cannot Fix
Be realistic about DIY limitations for driveway leveling:
- Genuine settlement (void beneath the slab): Requires professional equipment to inject material beneath the slab. No DIY product fills a sub-slab void effectively.
- Significant step hazards (over 1/2 inch): Surface products cannot bridge a 1/2-inch step with adequate thickness and durability for vehicle traffic.
- Structural cracks with displacement: Cracks where one side is higher than the other indicate structural movement — surface patching is temporary and cosmetic only.
Concrete Driveway Leveling Cost — Detailed Breakdown
Cost by Method
| Method | Cost Per Square Foot | Typical 2-Panel Job | Typical 4-Panel Job |
|---|---|---|---|
| Mudjacking | $3–$8/sq ft | $350–$800 | $700–$1,600 |
| Polyurethane foam | $5–$25/sq ft | $500–$1,200 | $1,000–$2,400 |
| DIY resurfacing (minor) | $0.50–$2/sq ft materials | $100–$300 | $200–$600 |
| Panel replacement | $8–$18/sq ft all-in | $2,000–$5,000 | $4,000–$10,000 |
The cost advantage is clear: Even at the higher end of foam injection pricing, two-panel leveling at $1,200 is significantly less than the minimum $2,000–$3,000 for replacement panels — typically 60–75% less.
Cost by Driveway Size
| Driveway Configuration | Panels Typically Settled | Leveling Cost Range | Replacement Cost Range |
|---|---|---|---|
| Single car, 1 panel issue | 1 panel | $300–$600 | $1,200–$2,500 |
| Single car, full driveway | 2–3 panels | $600–$1,200 | $3,000–$6,000 |
| Double car, partial | 2–3 panels | $700–$1,500 | $4,000–$8,000 |
| Double car, full | 4–6 panels | $1,200–$3,000 | $8,000–$16,000 |
Hidden Costs to Watch For
Mobilisation fee: Many contractors charge a minimum job fee ($200–$400) regardless of project size. For very small jobs (one panel corner), this minimum may make the per-square-foot cost significantly higher than the listed rate.
Additional soil stabilisation: If the contractor identifies severely unstable soil beneath the slab — beyond the simple void filling that leveling addresses — additional soil stabilisation work may be recommended. This adds $200–$800 to a typical residential driveway project.
Crack repair after leveling: Cracks that existed before leveling, or that appear during lifting, should be sealed after the slab is at the correct elevation. Factor in $50–$200 for crack sealing if the driveway has significant existing cracking.
Sealing after leveling: Sealing the driveway after leveling protects the repaired surface and reduces future water infiltration. A penetrating sealer application by the contractor runs $200–$600 for a full residential driveway — or you can apply it yourself for $40–$100 in materials. See our types of concrete sealers guide for sealer selection.
Concrete Driveway Leveling vs Replacement — Which Is Right?
The Five Questions That Decide
Answer these five questions about your driveway panels:
1. Is the concrete structurally intact?
Walk the panel. Does it feel solid, or does it rock? Are there areas where the concrete sounds hollow (slap with your palm — hollow vs solid sound)? Are there cracks running across the full width of the panel? A panel that rocks, sounds hollow broadly, and has full-width cracks may be too compromised to lift cleanly.
2. How much has it settled?
Measure the step between panels with a tape measure or level. Under 3 inches: leveling is typically appropriate. Over 4 inches: the void is large and the lifting process becomes more challenging and less predictable.
3. How old and thick is the concrete?
Driveways poured before 1980 may be only 3–3.5 inches thick — the minimum to survive the lifting process. Very old, thin concrete is at greater risk of cracking during lifting. Thicker slabs (4–5 inches, standard for driveways poured after 1990) lift more reliably.
4. What is the root cause?
If the settlement is from a one-time event (underground utility work disturbed the subgrade, a tree was removed) — leveling and improved drainage provides a good long-term outcome. If settlement is from chronic water flow (poor drainage that cannot be easily improved) — leveling may recur within 3–5 years regardless of method.
5. What is the concrete’s overall condition?
A settled panel on an otherwise well-maintained driveway is a clear leveling candidate. A settled panel on a driveway where every panel has significant cracking, surface scaling, and aggregate exposure is a signal that the entire driveway is nearing end of life — leveling one panel while replacement of the full driveway is 2–3 years away is rarely worthwhile.
When Leveling Wins
- Structurally sound concrete, settlement under 3 inches
- Driveway is otherwise in good condition with years of life remaining
- Root cause can be addressed (drainage improvement after leveling)
- Budget constraints make replacement impractical
- Colour matching of new panels is a concern
- Downtime must be minimised (foam leveling — driveway back in use same day)
When Replacement Wins
- Concrete is cracked into multiple sections
- Settlement exceeds 4–5 inches with large voids
- Driveway is end-of-life (40+ years, widespread deterioration)
- Multiple leveling attempts have failed — chronic soil problem
- The driveway is being widened or reconfigured — replacement makes sense at the same time
How the Driveway Leveling Process Works
Contractor Assessment
A reputable contractor assesses the driveway before quoting — not from the street, but by walking the surface and evaluating:
- Slab integrity: Listening for hollow sections, checking crack patterns, assessing concrete thickness at any exposed edge
- Void size and location: Experienced contractors can identify void locations by the hollow sound when the slab is struck. Ground-penetrating radar is used for large commercial projects but is rarely needed for residential driveways.
- Settlement cause: Looking for evidence of the drainage pattern, proximity to trees, proximity to underground utilities
- Lifting feasibility: The contractor’s professional judgment on whether the specific panels are suitable candidates for lifting
Red flag during assessment: A contractor who quotes without walking the driveway and assessing the concrete condition is not providing a professional evaluation.
Drilling and Injection
Hole pattern for driveways: Typically 3–5 injection holes per settled panel section, positioned to allow material flow to all areas of the void. Holes near the outer edge (where erosion voids typically originate) are critical for effective treatment.
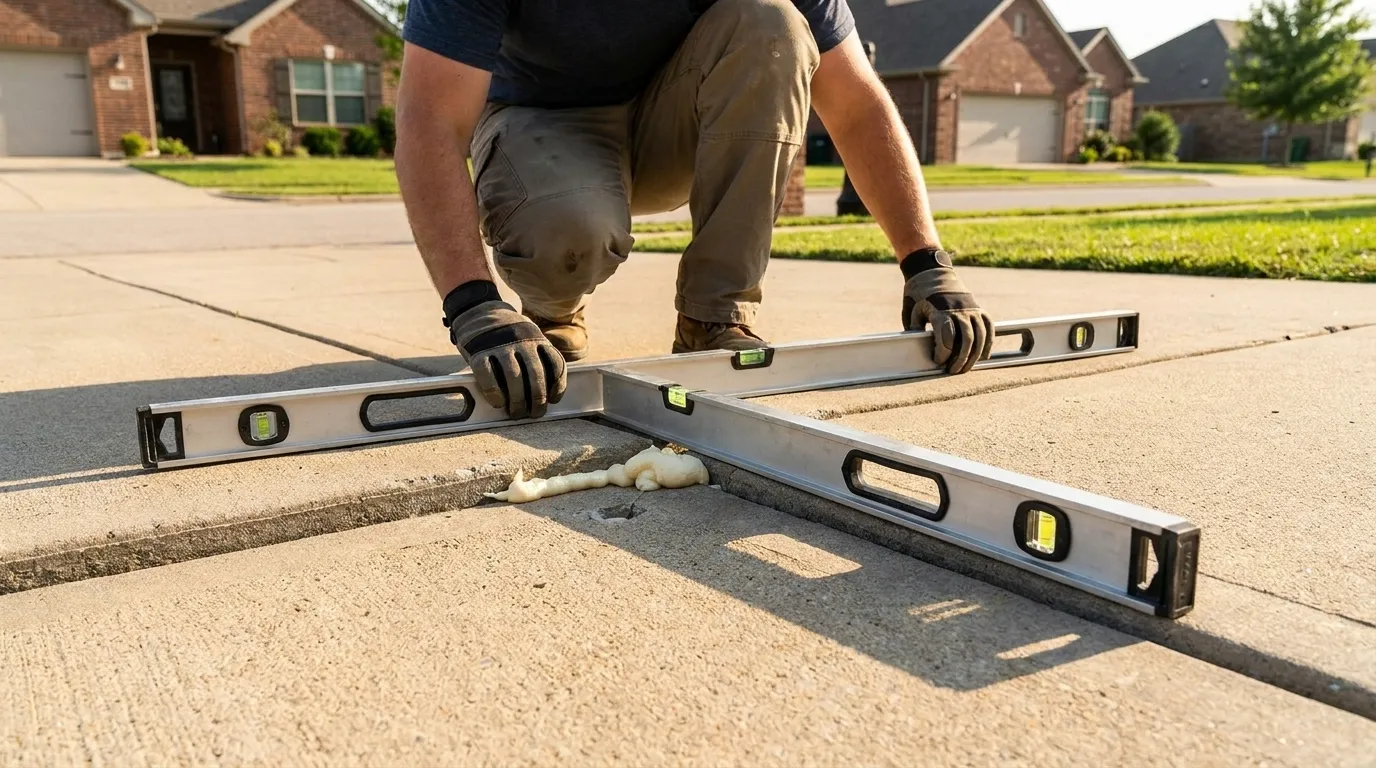
Monitoring during injection: A quality contractor monitors slab elevation at multiple points during injection — typically with a level resting on a straight edge spanning the joint between panels. The goal is to raise the settled panel to within 1/8 inch of the adjacent panel level.
Overshoot risk: It is possible to inject too much material and raise the panel above the correct elevation. Experienced operators control this carefully — foam especially can raise a slab very quickly if injection is not stopped at the right moment.
Monitoring the Lift
Foam injection monitoring: The operator makes a short injection burst, observes the slab movement (visible at the joint), pauses to allow the foam to fully expand, then assesses whether additional injection is needed. This burst-pause-assess cycle continues until the target elevation is reached.
Mudjacking monitoring: Slurry pumps continuously while the operator monitors elevation. When the target is reached, pumping stops and the hole is plugged.
Multiple-point monitoring: On a panel that has settled unevenly — corner lower than centre — monitoring multiple points simultaneously prevents one side from being over-raised while the other remains low.
Patching and Finishing
After lifting, injection holes are patched:
- Mudjacking: Non-shrink grout troweled flush with the surface. The 1–2 inch patches are visible and will remain slightly different in colour from the surrounding concrete.
- Foam injection: Patching compound troweled into the 5/8-inch holes. Much less visible than mudjacking patches — particularly on aged concrete where the colour difference between old concrete and new patch is less stark.
The joint between panels: After leveling, the joint between the previously stepped panels should be sealed with polyurethane caulk to prevent water infiltration at the new elevation. This is the most important post-leveling step for long-term performance.
How Long Does Concrete Driveway Leveling Last?
Factors That Affect Longevity
Method: Polyurethane foam typically lasts longer than mudjacking slurry on driveways — the foam is waterproof and cannot be washed away by the same erosion mechanism that caused the original settlement. Stone slurry mudjacking is durable but slightly more susceptible to water erosion over time.
Root cause addressed: The single most important factor. If drainage was improved after leveling — soil graded away from the driveway edge, downspouts extended, planting beds raised — the conditions for settlement have been changed and leveling lasts longer. If nothing changed, the same erosion continues and the slab may settle again within 3–8 years.
Soil type: Clay-heavy soils that expand and contract seasonally apply ongoing stress to any leveling material. Sandy, well-draining soils are more stable long-term after leveling.
Concrete condition: Well-maintained concrete with sealed joints resists water infiltration better than concrete with open, unsealed joints — reducing the water flow beneath the slab that drives settlement recurrence.
How to Extend the Life of Leveled Concrete
Typical longevity ranges:
- Foam + drainage improvement: 10–20 years
- Foam without drainage improvement: 5–12 years
- Mudjacking + drainage improvement: 8–15 years
- Mudjacking without drainage improvement: 4–10 years
To maximise longevity after leveling:
- Seal the panel joints: Polyurethane caulk in all driveway joints prevents water infiltration at the most vulnerable points. This is the single most effective post-leveling maintenance step.
- Seal the concrete surface: A penetrating silane-siloxane sealer reduces water absorption through the concrete surface and at the edges, slowing the erosion that causes settlement.
- Improve drainage: Grade soil adjacent to the driveway so water flows away from the edges. Extend downspout extenders minimum 4 feet away from the driveway. If roof drainage runs toward the driveway, redirect it.
- Monitor quarterly: For the first 12 months after leveling, check the panel elevation and joint condition every 3 months. Early re-settlement (under 1/4 inch) is manageable; left for years, it becomes a larger problem again.
Preventing Driveway Settlement — After Leveling
The most effective post-leveling investment is addressing what caused the settlement in the first place. Most driveway settlement is caused by water — fix the water problem and the settlement does not recur.
Practical drainage improvements:
Soil grading at driveway edges: The soil adjacent to the driveway should slope away from the driveway edge at minimum 6 inches of drop over 10 feet (5% slope). If soil is level with or higher than the driveway edge, water flows under the slab edge rather than away from it.
Planting bed management: Raised planting beds adjacent to the driveway concentrate water at the driveway edge when watered or during rain. Lower the bed level or install edging that directs water away from the driveway.
Downspout management: Every downspout that discharges near a driveway is a potential settlement accelerator. Extend with flexible pipe minimum 4–6 feet away from the driveway edge.
Joint sealing: Sealing the joints between driveway panels with polyurethane caulk prevents water from flowing directly into the joint and under the slab. Inspect and reseal joints every 3–5 years as part of routine driveway maintenance. For complete concrete maintenance guidance, see our how to maintain concrete guide.
Hiring a Concrete Driveway Leveling Contractor
Questions to ask before hiring:
- What leveling method do you use and why is it appropriate for my driveway? A contractor who only uses one method may not be recommending the optimal solution — they may be recommending what they have equipment for.
- How many residential driveway leveling projects have you completed in the past year? Volume of experience with the specific application matters more than general concrete experience.
- What is the expected outcome — how close to level will the panels be after treatment? A reasonable expectation is within 1/8 to 1/4 inch. A promise of “perfectly level” is unrealistic — some minor variation is normal.
- What warranty do you offer? Standard warranties are 1–3 years for leveling returning to within a specified tolerance. Understand exactly what triggers the warranty and what the remediation would be.
- Will you identify and advise on the drainage issue that caused the settlement? A good contractor does not just level the slab and leave — they advise on what drainage changes would extend the life of the leveling work.
Red flags:
- Quoting by phone without site visit and assessment
- No warranty offered
- Pressure to decide on the day of assessment
- Recommending full replacement without assessing whether leveling is viable
Frequently Asked Questions
What is concrete driveway leveling?
Concrete driveway leveling is the process of raising a settled or sunken driveway panel back to its original elevation by injecting material — stone slurry (mudjacking) or expanding polyurethane foam — beneath the panel through drilled holes. The existing concrete is preserved; no demolition or replacement is required. It typically costs 60–75% less than full panel replacement.
How much does concrete driveway leveling cost?
Mudjacking costs $3–$8 per square foot; polyurethane foam costs $5–$25 per square foot. A typical two-panel residential driveway leveling job costs $400–$1,200 — compared to $2,000–$5,000 for panel replacement. Minimum job fees of $300–$400 apply regardless of slab size with most contractors.
Can I level my concrete driveway myself?
Genuine slab lifting — raising a settled panel with material injected beneath it — requires specialist equipment not practical for DIY use. What homeowners can do themselves: apply surface resurfacing compound for minor irregularities (under 1/2 inch), seal cracks to slow settlement, and improve drainage to prevent future settlement. Surface products cannot address a void beneath the slab.
How long does concrete driveway leveling last?
Typically 5–20 years depending on the method, whether the drainage problem causing settlement was addressed, and local soil conditions. Polyurethane foam with drainage improvements lasts 10–20 years. Mudjacking without drainage improvements may last 4–8 years before re-settlement occurs.
Mudjacking or foam — which is better for driveways?
Both work effectively for residential driveways. Foam is preferred when: you need the driveway back in use the same day (15-minute cure vs 24–48 hours for mudjacking), the driveway has decorative elements where smaller holes matter, or the settlement was caused by water erosion (foam is waterproof and cannot erode). Mudjacking is preferred when: cost is the primary concern and drainage improvement will address the root cause.
How do I know if my driveway needs leveling or replacement?
If the concrete is structurally intact — no cracking into multiple sections, no severe surface deterioration, no rebar corrosion — and the settlement is under 3–4 inches, leveling is appropriate. If the panel is broken into multiple pieces, severely deteriorated, or at end-of-life after 40+ years of service, replacement is the correct answer.
How long does driveway leveling take?
Most residential driveway leveling jobs take 2–4 hours from start to finish. With foam injection, the driveway can be driven on within 30 minutes of completion. With mudjacking, vehicle traffic must wait 24–48 hours. The actual work time is typically 1–2 hours — the remainder is assessment, setup, and finishing.
Conclusion
A settled driveway panel is a problem worth fixing promptly — not because it will get dramatically worse overnight, but because every month of vehicle impact loading on an unsupported panel increases the void beneath it, widens the cracks within it, and reduces the chances that leveling rather than replacement is the right answer. Get an assessment when the step is under 1 inch and the options are straightforward and affordable. Polyurethane foam is the better choice for most residential driveways — waterproof, precise, and back in use within the hour. Improve the drainage that caused the settlement or the problem will recur. And maintain the driveway after leveling — sealed joints, sealed surface, graded soil at the edges. Calculate any concrete volumes for patching or replacement sections with the ConcreteCal free concrete calculator, and see our how to maintain concrete guide for the annual routine that protects your driveway investment.