
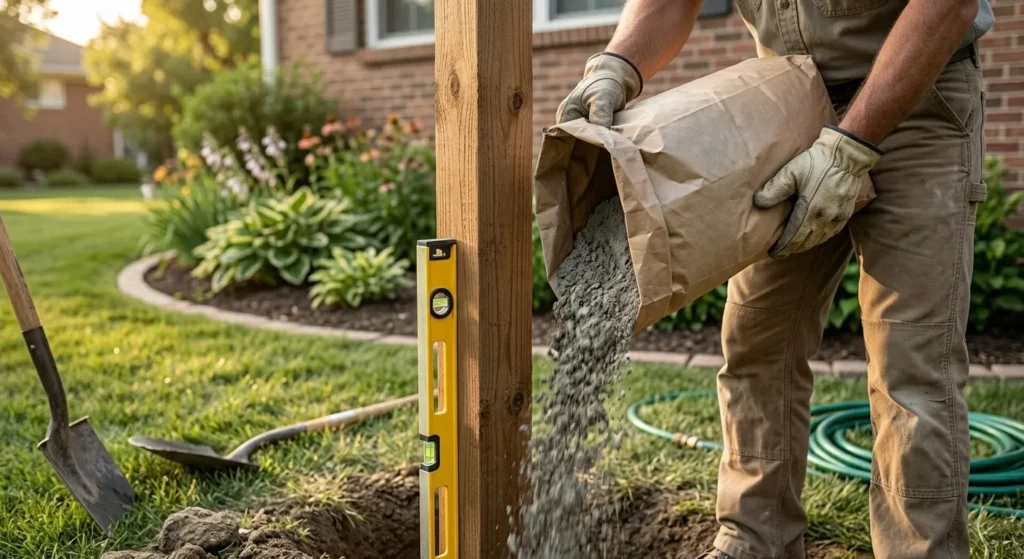

Setting fence posts in concrete is one of those tasks that looks simple from a distance — dig a hole, drop in the post, pour something around it — and turns complicated the moment you are standing at the hardware store staring at a shelf full of different concrete products, all claiming to be the right choice.
Fast-setting concrete. Standard concrete mix. Post mix. Rapid-set. All-purpose concrete. They are all different products with different setting times, different strengths, and different installation methods. Choosing the wrong one does not usually cause immediate failure — but it can mean a post that works loose in two winters instead of staying solid for twenty years.
Knowing what type of concrete for fence posts your specific project needs comes down to three questions: how fast do you need it to set, how many posts are you setting, and what kind of fence load are those posts carrying? This guide answers all three — with a complete bag calculation, installation method comparison, and the specific product recommendations that professional fence installers actually use.
Before calculating concrete for your posts, use our free concrete calculator at ConcreteCal for accurate volume estimates across your full fence line.
Table of Contents
- Do Fence Posts Actually Need Concrete?
- The Main Types of Concrete for Fence Posts
- Fast-Setting Concrete — The Most Popular Choice
- Standard Concrete Mix — The Traditional Approach
- Post Mix — Dedicated Fence Post Product
- Should You Use Dry Pour or Wet Mix?
- How Much Concrete Do You Need Per Fence Post?
- How Deep Should Fence Post Concrete Be?
- Wood Posts vs. Metal Posts in Concrete
- Common Fence Post Concrete Mistakes
- Frequently Asked Questions
Do Fence Posts Actually Need Concrete?
Before choosing a concrete type, it is worth being honest about whether concrete is always necessary — because for certain fence types and soil conditions, it genuinely is not.
When Concrete Is Essential
Any fence over 4 feet tall: Taller fences catch significantly more wind load. Without concrete, a post in loose or medium soil will work sideways under repeated wind pressure and eventually lean or fall.
Gate posts: Gate posts carry dynamic loads from opening and closing — particularly a heavy wooden gate swinging on hinges. A gate post that is not set in concrete will loosen progressively under this repeated loading.
End posts and corner posts: These posts anchor the tension in the fence panels or wire. They carry concentrated loads that intermediate posts do not — concrete is non-negotiable.
Clay or expansive soil: Clay soil shrinks and swells with moisture changes, working posts loose over time. Concrete anchors the post against this movement.
Coastal or high-wind areas: Wind loads in exposed coastal locations can be extreme. Any fence post in these conditions should be set in concrete regardless of fence height.
When You Can Skip the Concrete
Short decorative fences (under 3 feet) in stable soil: A simple picket fence or garden border in well-drained, stable soil can be set with compacted backfill rather than concrete. This is particularly true for lightweight vinyl or timber rail fences with minimal panel weight.
Temporary or seasonal fencing: Farm-style post-and-wire fencing that may need to be moved or repositioned does not benefit from concrete — compacted soil is appropriate and removal is straightforward.
Sandy or very well-drained soil with light fence panels: In ideal soil conditions, compacted gravel backfill around posts provides adequate support for lightweight fences. This is region-specific — test by pushing an unsupported post and observing deflection.
The honest answer for most residential fence projects: use concrete. The cost per post is minimal ($3–$8 in materials), the installation is simple, and the performance difference compared to compacted backfill — particularly at corner and gate posts — is significant.
The Main Types of Concrete for Fence Posts
Three main products cover the fence post concrete market — each suited to different situations:
| Product Type | Setting Time | Dry Pour? | Best For | Cost Per Bag |
|---|---|---|---|---|
| Fast-setting concrete | 20–40 minutes | ✅ Yes | Most residential fence posts | $6–$10 |
| Standard concrete mix | 24–48 hours | ❌ No | Large commercial projects, high loads | $5–$8 |
| Post mix / post fix | 10–30 minutes | ✅ Yes | Light residential, decorative fences | $5–$9 |
Fast-Setting Concrete — The Most Popular Choice
Fast-setting concrete — products like Quikrete Fast-Setting Concrete Mix and Sakrete Fast-Setting Concrete — has become the dominant choice for residential fence post installation because it solves the biggest practical problem with concrete post setting: you do not have to wait 24–48 hours before the post can be loaded.
With fast-setting concrete, the post is stable enough to attach fence panels within 3–4 hours. The dry pour method means there is no mixing, no wheelbarrow, no cleanup. You pour the dry concrete into the hole, add water, and walk away.
It is genuinely that simple — when done correctly.
How Fast-Setting Concrete Works
Fast-setting concrete uses a modified cement formulation with chemical accelerators that dramatically shorten the initial set time. The chemistry produces calcium silicate hydrate crystals faster than standard Portland cement — achieving initial set in 20–40 minutes and sufficient strength for fence panel attachment within 3–4 hours.
What it achieves:
- Initial set: 20–40 minutes
- Working strength (sufficient for fence panels): 3–4 hours
- Full design strength: approximately 4,000 PSI at 28 days
Full design strength is comparable to standard concrete — the accelerated setting time does not come at the cost of long-term strength. The post is not as strong at 4 hours as it will be at 28 days, but it is stable enough for fence panel attachment.
The Dry Pour Method
The dry pour method is the reason fast-setting concrete has become the standard for fence post installation. Instead of mixing concrete in a wheelbarrow and shovelling it into the hole, you pour the dry product directly into the hole and add water on top.
Step-by-step dry pour:
- Dig hole to correct depth (see the depth section below)
- Add 3–4 inches of gravel at the bottom for drainage
- Set post to correct height and check plumb with a level
- Brace the post temporarily (scrap timber, post holder, or a helper holding it)
- Pour dry fast-setting concrete into the hole around the post — fill to within 3–4 inches of the top
- Add water — approximately 1 gallon per 50 lb bag, poured slowly around the perimeter
- Allow water to absorb — add a little more if the surface looks dry
- Check plumb again before the concrete sets
- Allow 3–4 hours before attaching fence panels. 24 hours before full loading.
The water addition is critical: The concrete must be completely wetted through the full depth of the hole. Pour water slowly — if you add it too fast, it runs off the top rather than soaking through. Wait 30 seconds between additions and observe whether the surface is still absorbing.
Pros and Cons of Fast-Setting Concrete
Pros:
- No mixing required — saves significant time and equipment on multi-post jobs
- Post stable within hours — fence panels same day in most cases
- No cleanup — no wheelbarrow, no mixing tools
- Available everywhere — universal hardware store product
- Easy to calculate quantities — bags per post
- Forgiving of small errors — can add more dry product if hole is underfilled
Cons:
- More expensive per pound than standard concrete mix
- Cannot be easily adjusted once poured — commits you to a position
- Less workable than wet mix for complex or irregular holes
- Not ideal for very large holes (over 12 inch diameter) where the water distribution through a thick dry column is less reliable
“The American Concrete Institute’s ACI 332 residential concrete guide specifies minimum concrete compressive strength requirements for residential applications — for fence post footings, a minimum 3,000 PSI at 28 days is the baseline, though most fast-setting concrete products exceed this at 4,000 PSI.”
Best Brands and Products
Quikrete Fast-Setting Concrete Mix (50 lb, 80 lb): The most widely available product. Achieves 4,000 PSI at 28 days. Well-tested for the dry pour method. The 50 lb bag is manageable for single-person installation; the 80 lb bag covers larger holes more efficiently.
Sakrete Fast-Setting Concrete Mix: Comparable performance to Quikrete. Good availability at Lowe’s and independent hardware stores.
Quikrete All-Purpose Gravel + Fast-Set: Some contractors pre-fill the bottom of the hole with gravel then use fast-setting for the upper section — this improves drainage beneath the post without sacrificing the convenience of fast-set.
Standard Concrete Mix — The Traditional Approach
Before fast-setting concrete became widely available, fence posts were set with standard concrete mix — Portland cement, sand, and aggregate — mixed with water and poured into the hole in wet form. This is still the correct approach for certain situations.
When Standard Mix Makes Sense
Large commercial or agricultural fence projects: When setting 50+ posts over multiple days, buying standard concrete mix in bulk (or ordering ready mix for very large projects) is significantly more economical than fast-setting bags. The time premium of fast-setting concrete is not worth the cost at scale.
Heavy structural posts: Gate posts, corner posts for tall privacy fencing, and any post carrying significant structural load benefit from standard concrete’s ability to be poured and vibrated to eliminate voids — particularly in large-diameter holes where dry pour water distribution is less reliable.
Ready mix delivery: For very large fence projects — commercial sites, agricultural facilities, long property boundary fences — ready mix concrete delivered by truck is the most economical option. Ready mix is ordered by the cubic yard; see our concrete bags calculator to find where the crossover from bags to ready mix becomes economical.
Pros and Cons of Standard Mix
Pros:
- Lower material cost — particularly important for large projects
- Wet mix can be worked into irregular holes more thoroughly
- Ready mix option available for very large projects
- Can be vibrated to eliminate voids in large holes
Cons:
- Requires mixing equipment (barrel mixer or manual mixing)
- Post must be braced for 24–48 hours before fence panel attachment
- Significantly more labour per post than fast-setting dry pour
- Cleanup required — mixer, tools, residue
The realistic assessment for residential projects: For most homeowners setting 10–30 fence posts on a weekend project, fast-setting concrete is the better choice. Standard mix becomes competitive at 50+ posts or when bulk aggregate pricing is available.
Post Mix — Dedicated Fence Post Product
Post mix (sold under names like Postmix, Post Fix, or Post Set) is a product specifically formulated for fence post setting — typically a fine-aggregate fast-setting mix designed to flow easily into holes of standard fence post diameter.
What makes it different: Post mix typically has a finer aggregate than standard fast-setting concrete, which helps it flow around the post and fill the annular space between post and hole wall more completely. Some formulations include polymer fibres for improved crack resistance.
Setting time: Typically faster than standard fast-setting concrete — 10–20 minutes initial set, post loadable within 1–2 hours in many products.
Best for: Light residential fencing — garden picket fences, decorative rail fencing, light timber privacy fencing. For heavy gates, corner posts in exposed locations, or tall privacy fences, standard fast-setting concrete or standard mix provides better structural performance.
Limitation: Post mix is not always rated to the same strength as standard fast-setting concrete products — check the PSI rating on the bag. For any structurally significant post, verify that the product achieves minimum 3,000 PSI at 28 days.
Should You Use Dry Pour or Wet Mix?
This is the most debated fence post concrete question — and the answer is more nuanced than most guides admit.
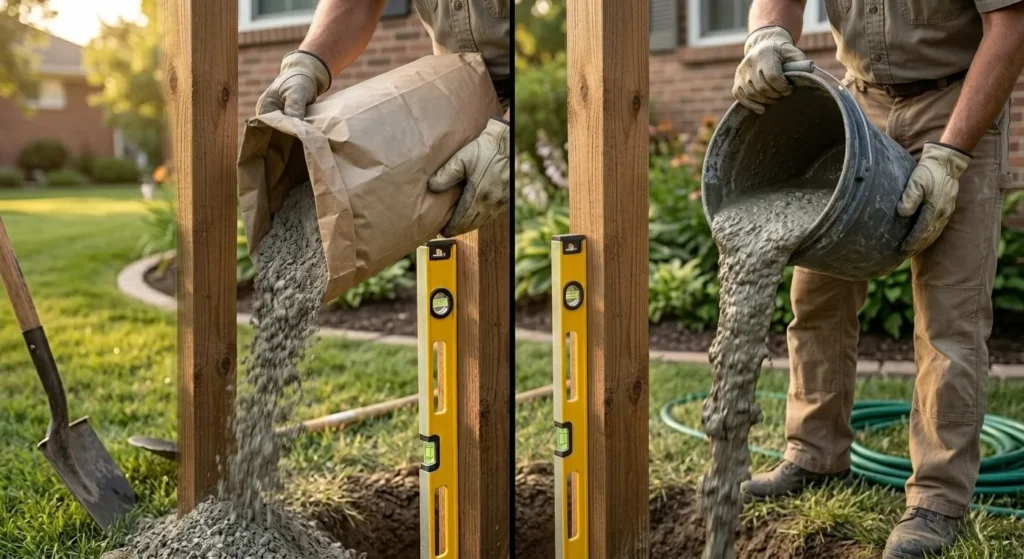
Dry Pour Method — Step by Step
Already covered in the Fast-Setting section above. The key points:
- Fast-setting concrete only — do not attempt dry pour with standard mix
- Water must fully penetrate the dry concrete column — pour slowly
- Check plumb immediately after water addition, before set begins
- 3–4 inch gravel layer at the base aids drainage
Wet Mix Method — Step by Step
When using standard concrete or fast-setting mixed wet:
- Mix concrete per manufacturer instructions — typically 0.5–0.8 gallons of water per 50 lb bag
- Mix until uniform — no dry clumps visible
- Set and brace post before pouring
- Pour wet mix into hole in layers — rod or poke with a stick between layers to eliminate voids
- Trowel the top of the concrete to slope away from the post — this is critical for drainage (see below)
- Brace post for minimum 24 hours before any loading
Which Method Is Better?
The honest comparison:
| Factor | Dry Pour | Wet Mix |
|---|---|---|
| Speed | Fast — no mixing | Slower — mixing required |
| Convenience | High — no equipment | Lower — mixer or manual |
| Void elimination | Moderate | Better — can rod and tamp |
| Large holes (over 12 inch) | Less reliable water distribution | More reliable |
| Standard fence posts | ✅ Excellent | ✅ Good |
| Gate and corner posts | ✅ Good | ✅ Better |
| First-time installer | ✅ More forgiving | Steeper learning curve |
| Cost | Higher (fast-set premium) | Lower |
For most residential fence projects with standard 4×4 or 6×6 timber posts in 8–10 inch holes: dry pour fast-setting concrete is the better practical choice. It is faster, requires no equipment, and produces comparable results for standard fence loads.
For gate posts, corner posts, or holes larger than 12 inches: wet-mixed concrete — whether fast-setting or standard — provides more reliable void elimination and better confidence in the structural result.
How Much Concrete Do You Need Per Fence Post?
This is the question every homeowner asks at the hardware store — and it depends on three variables: hole diameter, hole depth, and post size.
The Calculation Formula
The concrete fills the annular space between the post and the hole wall:
Volume (ft³) = [π × (hole radius)² − post cross-section area] × depth
For a round hole with a square post:
Hole area: π × (hole diameter ÷ 2)² Post area: post width × post width (for square timber) Concrete area: Hole area − Post area Volume: Concrete area × depth
Worked Example — Standard 4×4 Post in 10-inch Hole, 36 inches Deep:
Hole area: π × (5÷12)² = π × 0.1736 = 0.5454 sq ft Post area (4×4 actual = 3.5×3.5): (3.5÷12) × (3.5÷12) = 0.0851 sq ft Concrete area: 0.5454 − 0.0851 = 0.4603 sq ft Volume: 0.4603 × (36÷12) = 0.4603 × 3 = 1.381 cubic feet
Bags of fast-setting concrete (80 lb bag yields approximately 0.60 ft³): 1.381 ÷ 0.60 = 2.30 → 3 bags of 80 lb fast-setting concrete
Bags Per Post by Hole Size
The table most homeowners actually need — bags of 80 lb fast-setting concrete per post, for the most common hole and post combinations:
| Hole Diameter | Hole Depth | 4×4 Post | 6×6 Post |
|---|---|---|---|
| 8 inches | 24 inches | 1 bag | 1 bag |
| 8 inches | 30 inches | 1–2 bags | 1 bag |
| 8 inches | 36 inches | 2 bags | 1–2 bags |
| 10 inches | 30 inches | 2 bags | 2 bags |
| 10 inches | 36 inches | 2–3 bags | 2 bags |
| 10 inches | 42 inches | 3 bags | 2–3 bags |
| 12 inches | 36 inches | 3 bags | 3 bags |
| 12 inches | 42 inches | 4 bags | 3–4 bags |
| 12 inches | 48 inches | 4–5 bags | 4 bags |
All figures before waste factor. Purchase one extra bag per 10 posts as contingency.
Quick Reference — Total Project Bags
Worked Example — 6-foot privacy fence, 40 posts: Standard specification: 6×6 posts, 10-inch holes, 42 inches deep. Bags per post: 2–3 (use 3 for safety margin). Total bags: 40 × 3 = 120 bags of 80 lb fast-setting concrete.
At $8 per bag: $960 in concrete materials for the full fence line. This is a significant but realistic cost for a privacy fence project — and knowing this number before the project starts prevents an expensive mid-project trip to the hardware store.
For an instant cross-check on these calculations, use our concrete bags calculator — it handles the volume-to-bag conversion for any post hole dimensions.
How Deep Should Fence Post Concrete Be?
Post depth is the single most important factor in fence post stability — and the most commonly underestimated by homeowners.
Frost Line Depth
In freeze-thaw climates, fence posts must be set below the frost line — the depth at which the ground freezes in winter. A post set above the frost line will heave upward during freeze cycles and drop back down during thaw — progressively working loose from its concrete footing.
Frost line depths by US region:
| Region | Approximate Frost Depth |
|---|---|
| Southern states (FL, TX, LA) | 0–12 inches |
| Mid-Atlantic, Southeast | 12–24 inches |
| Midwest, New England | 24–36 inches |
| Northern Midwest, Mountain states | 36–48 inches |
| Alaska, Upper Midwest | 48–72+ inches |
Check your local building code or municipality for the specific frost depth requirement in your area — this is not a figure to guess at.
Above-Grade Concrete — The Flare Method
One of the most important — and most overlooked — details of fence post concrete installation is shaping the top of the concrete above grade.
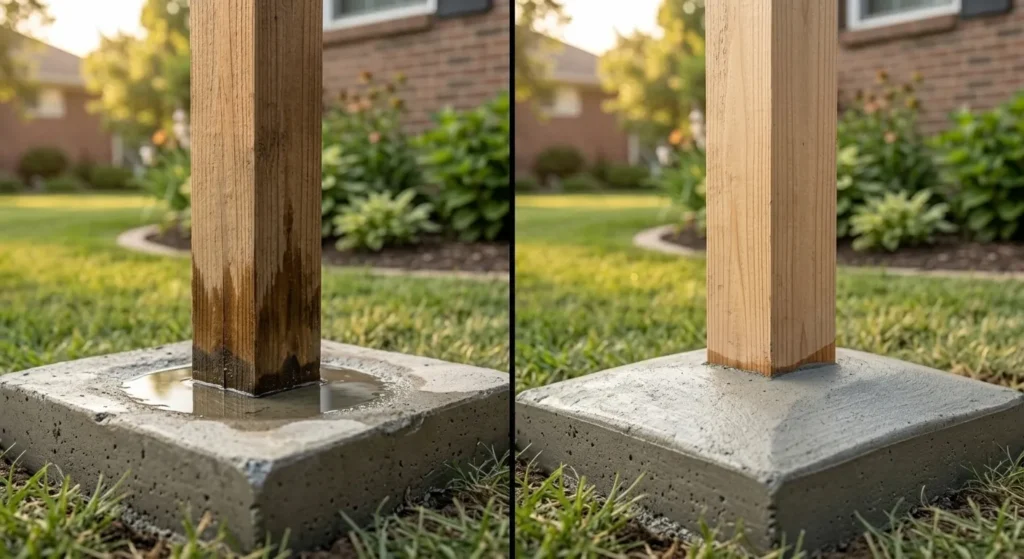
Many installations leave the concrete top flat or slightly below grade — which allows water to pool at the post-concrete interface. This is where rot begins in wood posts.
The correct approach: Slope or dome the top of the concrete away from the post — creating a slight flare or crown that directs water away from the wood. This single detail significantly extends the life of wood fence posts.
Apply this concrete shaping before the concrete sets — use a gloved hand or a trowel to push the concrete down at the post face and build it up slightly away from the post, so the top slopes outward at all sides.
Depth by Fence Height
A widely used rule of thumb: set the post to a depth equal to one-third of the above-ground post height, with a minimum of 24 inches in frost-free climates and below the frost line in freeze-thaw climates.
| Fence Height | Minimum Post Depth | Total Post Length |
|---|---|---|
| 3 feet | 18–24 inches | 5–5.5 feet |
| 4 feet | 24–30 inches | 6.5–7 feet |
| 5 feet | 30–36 inches | 8–8.5 feet |
| 6 feet | 36–42 inches | 9.5–10 feet |
| 8 feet | 42–48 inches | 12.5–13 feet |
In freeze-thaw climates, always use the deeper dimension and verify against the local frost line requirement.
Wood Posts vs. Metal Posts in Concrete
Protecting Wood Posts from Rot
The junction between a wood post and concrete is the highest-risk location for decay — moisture collects at this interface, creating the conditions that wood-rot fungi thrive in.
Practical protection measures:
Use pressure-treated timber rated for ground contact (UC4B or UC4C): Ground-contact pressure-treated timber contains preservative to a minimum retention level that significantly slows decay. Standard “above-ground” treatment (UC3) is not adequate for posts set in concrete and soil.
The charring method (traditional): Burn the bottom 12 inches of the post with a propane torch until a 2–3mm char layer forms. This carbonised layer is significantly more decay-resistant than untreated wood. Used for centuries before chemical preservatives — still effective as a supplementary measure.
Concrete flare above grade: As described above — slope the concrete top away from the post. This is the most effective single detail for reducing rot at the concrete-post interface.
Post base hardware (alternative to concrete): For applications where rot prevention is paramount — garden gates, decorative fence posts — steel post base hardware (post anchors) set in a concrete pad allows the post to sit above the concrete surface entirely. This eliminates the moisture trap at the wood-concrete interface completely.
Setting Metal Posts in Concrete
Steel and aluminium fence posts set in concrete do not have the rot concern of timber — but they do have specific requirements:
Corrosion protection: Any steel post set in concrete must be galvanised or powder-coated. Bare steel rusts at the concrete-soil interface where moisture and oxygen are present, eventually loosening the post as rust product occupies more volume than the original steel.
Do not seal the base of steel posts with caulk: A common mistake — sealing the top of the concrete around a steel post traps condensation inside the hollow post section, accelerating internal corrosion. Leave a small gap or use a vented post cap instead.
Aluminum posts: Aluminium in contact with concrete can suffer from galvanic corrosion in the presence of moisture — particularly if the concrete contains calcium chloride admixtures (common in winter-poured concrete). Isolate aluminium posts from direct concrete contact with a plastic sleeve or primer coat if this is a concern.
Common Fence Post Concrete Mistakes
Mistake 1 — Not adding water slowly enough in dry pour. The most common dry pour error. Dumping a gallon of water into the hole in one go causes it to run through the dry concrete without thoroughly wetting the full depth. Pour slowly — 1/4 gallon at a time — and observe absorption before adding more.
Mistake 2 — Setting posts before checking the fence line. Concrete does not forgive repositioning. Before pouring the first bag, string a line between the first and last post positions and verify alignment. A post that is 2 inches out of line when the concrete sets is a permanent problem.
Mistake 3 — Leaving the concrete top flat or below grade. Flat concrete tops allow water to pool at the post interface — the primary cause of premature rot in wood posts. Always slope or dome the concrete surface away from the post.
Mistake 4 — Inadequate hole depth. Shallow posts are the most common cause of leaning fences. In frost-prone climates, a post set above the frost line will heave and settle with every winter — progressively loosening the footing. Dig to the correct depth per local code and fence height recommendation.
Mistake 5 — Using standard concrete mix for dry pour. Standard concrete mix is not formulated for the dry pour method — it requires thorough mixing with water before placement. Only fast-setting concrete or dedicated post mix products are suitable for dry pour installation.
Mistake 6 — Attaching fence panels too soon. Fast-setting concrete feels firm within 20–40 minutes but has not achieved its working strength. Attaching panels or applying significant loads within 2 hours of pouring can shift the post before the concrete has developed adequate holding strength. Wait the full 3–4 hours recommended by the manufacturer.
Mistake 7 — Skipping the gravel drainage layer. Without gravel at the base of the hole, water accumulates around the bottom of the post. In cold climates this creates ice-lens heave pressure directly beneath the post. A 3–4 inch layer of coarse gravel at the base of every hole provides drainage that significantly extends post life.
Frequently Asked Question
What type of concrete is best for fence posts?
For most residential fence projects, fast-setting concrete used with the dry pour method is the best choice — no mixing, post stable within hours, and straightforward installation. For gate posts, corner posts, or large holes over 12 inches diameter, wet-mixed concrete (fast-setting or standard) provides more reliable void-free filling. Standard concrete mix is better for large commercial projects where cost at scale outweighs the convenience of fast-setting products.
Can I use dry concrete for fence posts?
Yes — this is called the dry pour method and it works well with fast-setting concrete specifically formulated for this use. You pour the dry concrete into the hole, then add water on top. The moisture from the soil and the added water hydrates the concrete in place. Do not use standard concrete mix for dry pour — it requires thorough mixing before placement.
How many bags of concrete do I need per fence post?
It depends on hole size and depth. A standard 4×4 post in a 10-inch hole at 36 inches deep requires approximately 2–3 bags of 80 lb fast-setting concrete. A 6×6 post in a 12-inch hole at 42 inches deep requires approximately 3–4 bags. Always purchase one extra bag per 10 posts as contingency for underestimates.
What is the best brand of concrete for fence posts?
Quikrete Fast-Setting Concrete Mix is the most widely available and consistently reviewed product for residential fence post installation. Sakrete Fast-Setting Concrete Mix performs comparably. For dedicated post mix products, Postmix/Post Fix brands available from regional suppliers provide faster setting times at slightly higher cost.
How long does fast-setting concrete take to cure for fence posts?
Initial set: 20–40 minutes. Sufficient for fence panel attachment: 3–4 hours. Full design strength (approximately 4,000 PSI): 28 days. The post can be loaded with fence panel weight after 3–4 hours — do not apply full fence load within the first 2 hours.
Do all fence posts need to be set in concrete?
No — light decorative fences under 3 feet tall in stable, well-drained soil can sometimes use compacted backfill. However, gate posts, corner posts, end posts, and any post in a fence over 4 feet tall should always be set in concrete. In frost-prone climates, concrete is particularly important to prevent frost heave from loosening posts.
How deep should fence post concrete go?
The post should be buried to a depth of approximately one-third of its above-ground height — minimum 24 inches in frost-free climates. In freeze-thaw climates, the post must extend below the local frost line depth, which ranges from 12 inches in the south to 48 inches in northern states. Always check local building code for the frost depth requirement in your area.
Should I use gravel under fence post concrete?
Yes — always add 3–4 inches of coarse gravel at the base of the hole before setting the post. Gravel provides drainage beneath the concrete, preventing water accumulation at the post base and reducing frost heave pressure in cold climates. This simple addition significantly extends post life.
Conclusion
For most homeowners, the answer to what type of concrete for fence posts is the same: fast-setting concrete, dry pour method, 2–3 bags of 80 lb per standard post, gravel at the base of every hole, and concrete top sloped away from the post. It is the combination of product and installation detail that determines whether a fence stands solid for decades or starts leaning after its third winter. Get the depth right for your frost line, brace posts carefully while the concrete sets, and resist the temptation to attach panels before the concrete has reached working strength. Calculate your total concrete quantities for the full fence line using our free concrete calculator at ConcreteCal before your first trip to the hardware store — and use our concrete bags calculator to confirm bag counts for your specific hole dimensions.