
The finish on a concrete slab is determined almost entirely by what happens in the last hour before the concrete fully sets. Get the trowel type wrong, use it at the wrong time, or apply incorrect technique — and the result is permanent: delamination, surface defects, drag marks, or a finish that wears quickly under traffic.
The types of trowels for concrete cover a wide range — from small margin trowels for tight corners to ride-on power trowels that finish 10,000 square foot warehouse floors. Each type produces a different surface result and suits a different stage of the finishing process.After the concrete has been properly finished and cured, the next step in many projects is drilling holes for anchors, fasteners, or fixtures. If you’re unsure which drill is best for concrete, read our guide on what type of drill for concrete.
This guide covers every concrete trowel type, the floats that work alongside them, notched trowels for overlay applications, and power trowels for large commercial pours — with timing guidance, technique, and a complete selection table.
Before any pour, calculate your exact concrete requirements with the free concrete calculator at ConcreteCal — then use this guide to select the right finishing tools for the job.
Table of Contents
- What Does a Concrete Trowel Actually Do?
- Types of Trowels for Concrete — Complete Overview
- Hand Trowels for Concrete
- Concrete Floats — How They Differ from Trowels
- Notched Trowels for Concrete Applications
- Power Trowels for Concrete
- How to Choose the Right Trowel for Your Project
- Concrete Troweling Technique — Step by Step
- Trowel Care and Maintenance
- Frequently Asked Questions
What Does a Concrete Trowel Actually Do?
A concrete trowel compresses and closes the surface paste — forcing the cement matrix together to create a dense, hard, smooth surface. Each trowel pass drives bleed water and air upward, closes surface voids, and compacts the paste layer.
The result depends on timing and blade angle. Early passes with a flat blade produce a textured, open surface. Later passes with the blade tilted at a steeper angle produce the burnished, steel-grey mirror finish seen on high-end warehouse floors and polished concrete bases.
Float vs. Trowel — The Key Difference
This is the most common confusion in concrete finishing:
| Tool | Surface It Creates | When Used | Blade Material |
|---|---|---|---|
| Float | Open, slightly rough texture | Before troweling | Magnesium, wood, resin |
| Trowel | Smooth, dense, closed | After floating | Steel |
Float: Levels and consolidates the surface without fully closing it. Leaves a slightly sandy, open texture suitable for outdoor surfaces requiring traction (broom finish goes over a float finish).
Trowel: Closes and densifies the surface further. Creates a smooth, hard surface suitable for interior floors, garage floors, and any application where a smooth finish is specified.
Both tools are used in sequence on most interior slabs — float first, trowel after.
The Concrete Finishing Sequence
Understanding where trowels fit in the full finishing workflow:
- Screed — establish level surface elevation
- Bull float — flatten ridges, embed aggregate
- Wait — bleed water rises and evaporates
- Hand float / magnesium float — further level and begin surface closure
- First steel trowel pass — initial surface closure (flat blade)
- Second trowel pass — increased blade angle, further densification
- Third trowel pass — maximum blade angle, final burnish (if smooth finish required)
- Edge and groove — run edger and groover between trowel passes
- Broom (if exterior) — drag broom over troweled surface for traction
Skipping any step — or doing them out of sequence — produces surface defects.
Types of Trowels for Concrete — Complete Overview
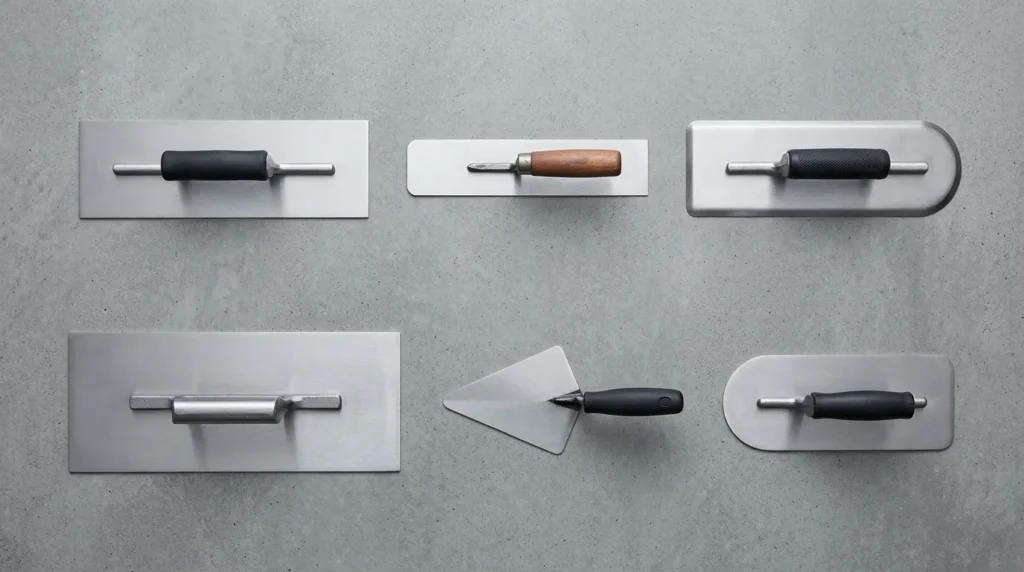
| Trowel Type | Blade Shape | Size Range | Primary Use |
|---|---|---|---|
| Finishing trowel | Rectangular, flat | 4×10″ to 5×18″ | Main finishing tool — all flatwork |
| Margin trowel | Small rectangular | 2×5″ to 3×8″ | Edges, repairs, tight spaces |
| Pool trowel | Rounded ends | 4×10″ to 5×18″ | Curved surfaces, smooth interiors |
| Fresno trowel | Large rectangular, offset | 8×24″ to 8×48″ | Large flat areas, fast finishing |
| Gauging trowel | Rounded rectangular | 4×7″ to 5×10″ | Mixing, applying patching compounds |
| Pointing trowel | Triangular | 4″ to 7″ | Joints, pointing, repair work |
| Notched trowel | Rectangular with notches | Variable | Overlay, adhesive, tile setting |
| Power trowel | Rotating blades | 24″–96″ diameter | Large commercial/industrial floors |
Hand Trowels for Concrete
Finishing Trowel (Steel Trowel)
The finishing trowel is the primary concrete finishing tool — a flat, rectangular steel blade with a handle centered on the back. It is the tool most people picture when they think of “a concrete trowel.”
Blade sizes:
| Blade Size | Best For |
|---|---|
| 4×10 inches | Small patches, repairs, tight areas |
| 4×12 inches | Standard residential — versatile size |
| 5×14 inches | Medium slabs, general flatwork |
| 5×16 inches | Large residential pours |
| 5×18 inches | Professional use, large areas |
Blade steel types:
Blue steel: Flexible, holds an edge well, preferred by professional finishers. Flexes slightly under pressure — conforms to minor surface variations. Standard for finish troweling.
Stainless steel: Harder, less flexible. Resists rust better than blue steel — suitable for wet environments and decorative concrete where rust staining would be visible.
Carbon steel: Economy option — adequate for occasional DIY use but dulls faster than blue or stainless.
Worked Example — Garage Floor Finishing: A 24×24 ft garage floor finished with a 5×18-inch blue steel finishing trowel. First pass (flat blade, light pressure): removes float marks and begins surface closure — approximately 45 minutes for the full floor with two finishers. Second pass (slight blade tilt): further densification — 30 minutes. Third pass (steep blade angle): burnished finish — 20 minutes. Total hand finishing time: approximately 95 minutes for 576 sq ft.
Margin Trowel
The margin trowel is a small, narrow rectangular trowel — typically 2–3 inches wide and 5–8 inches long. It is the concrete finisher’s detail tool.
Primary uses:
- Finishing edges and corners where a full-size trowel cannot reach
- Cleaning excess concrete from form edges
- Applying and smoothing repair mortars in small areas
- Mixing small batches of patching compound
- Tooling grout joints in precast panels
When you always need one: Any concrete pour with inside corners, column bases, or tight boundaries between the slab and adjacent structures. A full-size finishing trowel cannot reach into corners without leaving a rough, unfinished zone.
Pool Trowel (Rounded Ends)
The pool trowel has the same rectangular blade as a finishing trowel but with rounded corners at both ends. This simple difference eliminates the sharp corners that can dig into and gouge the concrete surface during troweling.
Why rounded ends matter: During aggressive late-stage troweling (steep blade angle, high pressure), sharp trowel corners can catch the surface and leave gouges — particularly on stiff concrete near the end of the finishing window. Rounded ends eliminate this risk.
Best for:
- Interior residential floors where an absolutely gouge-free surface is required
- Decorative concrete where any surface defect is visible
- Finishers who prefer a more forgiving tool during final passes
- Curved or irregular concrete surfaces where the trowel must change direction frequently
Pool trowels are preferred by many professional finishers for all flatwork — not just pools — because they produce a cleaner finish with less risk of surface damage.
Fresno Trowel
The fresno trowel is a large finishing tool — typically 8 inches wide and 24–48 inches long — with an offset handle that allows it to be used on a long pole, similar to a bull float.
Key advantage: The fresno combines the reach of a bull float with the surface-closing action of a steel trowel. It can finish large areas without the finisher needing to walk on the concrete — reducing knee board time and finishing faster on large pours.
Best for: Large residential slabs, commercial flatwork under 5,000 sq ft, any pour where a walk-behind power trowel is not available but the area is too large for efficient hand troweling alone.
Worked Example: A 20×30 ft patio (600 sq ft). Using a 36-inch fresno on a 6-foot handle: one finisher can cover the full pour from the perimeter without stepping on the concrete for the first two trowel passes. Final passes at the perimeter and edges completed with a standard 5×16-inch hand trowel.
Gauging Trowel
The gauging trowel has a rounded rectangular blade — typically 4–5 inches wide and 7–10 inches long. It is primarily a mixing and application tool rather than a finishing tool.
Uses in concrete work:
- Mixing small batches of repair mortar or patching compound
- Applying bonding agent to prepared surfaces
- Troweling repair mortars into small voids and spalls
- Mixing epoxy anchor adhesive for small installations
Pointing Trowel
The pointing trowel has a triangular blade — narrowing to a point at one end. It is primarily a masonry tool but has specific applications in concrete work.
Uses in concrete:
- Pointing and filling joints in precast panels
- Applying mortar to repair cracks and voids
- Working into very tight corners and recesses
- Tooling control joints in vertical concrete surfaces
Concrete Floats — How They Differ from Trowels
Floats are the tools used before troweling — they level, consolidate, and open the surface texture. Understanding the difference prevents the most common finishing error: troweling too early before floating is complete.
Bull Float
The bull float is a large flat tool — typically 8 inches wide and 36–48 inches long — used immediately after screeding. It embeds coarse aggregate below the surface, fills voids, and flattens screed marks across the full pour.
Handle: Attached via a universal joint that allows the blade angle to be adjusted from the handle end — critical for controlling whether the leading or trailing edge lifts slightly to avoid digging in.
Material: Magnesium (preferred — lighter, slides more easily) or aluminum.
Timing: Use immediately after screeding while the surface is still plastic. The bull float must be complete before bleed water accumulates — working over bleed water drives it into the surface paste and produces a weak, dusty layer.
Magnesium Hand Float
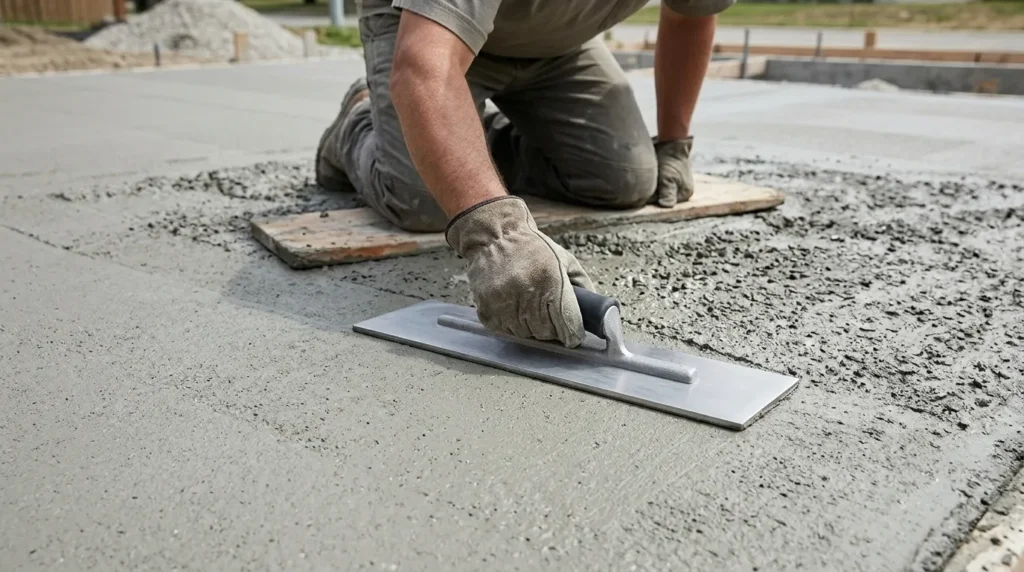
The magnesium hand float — typically 4×12 inches to 4×16 inches — is used after the bull float when the concrete has stiffened enough to support a finisher’s weight on knee boards.
What it does: Further levels minor irregularities, embeds any remaining surface aggregate, and begins the process of surface closure — leaving a slightly open, textured surface ready for steel troweling.
Timing indicator: The surface is ready for hand floating when a footprint left in the concrete depresses approximately 1/4 inch. Too early and the float sinks; too late and the surface is too stiff to work effectively.
Wood Float
A wood float produces a rougher, more open texture than a magnesium float — useful when a non-slip surface texture is desired without brooming, or as a base for decorative finishes like exposed aggregate.
Best for: Exterior flatwork requiring moderate texture, decorative overlays that need a mechanical bond with the base concrete, any application where an open surface texture is specified.
Notched Trowels for Concrete Applications
Notched trowels are used for applying adhesives, overlays, and self-leveling compounds over existing concrete — not for fresh concrete finishing. They create uniform ridges of material at a controlled thickness.
V-Notch Trowel
V-shaped notches produce thin ridges of adhesive or overlay material. Used for thin-set tile adhesive on concrete floors and walls, and for thin decorative overlay applications.
Coverage control: The V-notch size determines the coverage thickness — a 1/4-inch V-notch produces approximately 3/32-inch coverage when the ridges are flattened by the overlay or tile.
U-Notch Trowel
U-shaped notches produce rounded ridges — better for irregular surfaces where V-notches might not maintain consistent contact. Used for mosaic tile, small-format tile, and flexible adhesives.
Square-Notch Trowel
Square notches produce the highest, most consistent ridges — the standard for large-format tile on concrete floors and for thicker overlay applications.
Notch size selection for tile on concrete:
| Tile Size | Recommended Notch |
|---|---|
| Mosaic / small (under 4″) | 3/16″ V-notch |
| Medium (4″–8″) | 1/4″×3/8″ square |
| Large (8″–16″) | 1/2″×1/2″ square |
| Large format (over 16″) | 3/4″×3/4″ square |
Power Trowels for Concrete
Power trowels — also called helicopter trowels or ride-on trowels — use rotating blades to finish large concrete surfaces faster and to a higher standard than hand troweling alone.
Walk-Behind Power Trowel
A walk-behind power trowel has a single rotor of 24–36 inch diameter with 4–6 blades, controlled by an operator walking behind the machine.
Best for: Areas of 500–5,000 sq ft — large residential garage floors, commercial slabs, and any pour too large for efficient hand finishing but too small to justify a ride-on machine.
Rental cost: $150–$250 per day — typically worth renting for any garage floor over 400 sq ft.
Worked Example: A 24×30 ft (720 sq ft) commercial unit floor. Walk-behind power trowel with float blades for first two passes, switched to finish blades for final passes. Two operators: one on the power trowel, one finishing edges with a hand trowel and margin trowel. Total finishing time: approximately 90 minutes versus 3+ hours hand finishing.
Ride-On Power Trowel
A ride-on power trowel has two counter-rotating rotors — the operator sits on the machine. Available in 46–96 inch widths. Standard equipment for warehouse floors, parking structures, and any pour over 5,000 sq ft.
Production rate: A 60-inch ride-on trowel finishes approximately 3,000–5,000 sq ft per hour — making it the only practical finishing option for large commercial pours.
Rental cost: $400–$800 per day — justified only for pours over approximately 3,000 sq ft.
Power Trowel Blade Types
| Blade Type | Stage | Blade Angle | Surface Result |
|---|---|---|---|
| Float blades | First passes | Flat (0–5°) | Open, textured surface |
| Combination blades | Middle passes | 10–15° | Intermediate closure |
| Finish blades | Final passes | 20–30° | Smooth, dense, burnished |
Blade progression: Always start with float blades while the concrete is still workable. Progress to combination and then finish blades as the surface stiffens. Using finish blades too early traps bleed water and causes delamination — one of the most serious and irreparable concrete surface defects.
How to Choose the Right Trowel for Your Project
By Application
| Project | Essential Trowels | Optional |
|---|---|---|
| Small patio or walkway | 4×12 finishing trowel, margin trowel, edger | Fresno |
| Residential garage floor | 5×16 finishing trowel, fresno, margin trowel | Walk-behind power trowel |
| Large commercial floor | Walk-behind or ride-on power trowel | Hand finishing trowel (edges) |
| Concrete repair | Margin trowel, gauging trowel | Pointing trowel |
| Decorative overlay | Pool trowel, notched trowel | Fresno |
| Post holes / small pours | Gauging trowel or margin trowel | — |
By Blade Size and Material
Blade length: Longer blades cover more area per pass but require more skill to control. Beginners should start with a 4×12-inch trowel — it is more forgiving. Professionals often prefer 5×16 or 5×18-inch blades for speed.
Blade flexibility: More flexible blades conform better to slight surface variations — preferred for final passes. Stiffer blades are better for first passes where you need to cut high spots rather than follow the surface contour.
Blade material: Blue steel for professional finishing. Stainless for decorative and wet applications. Avoid chrome-plated blades — they rust quickly once the chrome is scratched.
Trowel Selection Quick Reference Table
| Factor | Choose Smaller Trowel | Choose Larger Trowel |
|---|---|---|
| Area | Under 200 sq ft | Over 400 sq ft |
| Experience | Beginner | Experienced finisher |
| Surface condition | Irregular, repairs | Flat, large format |
| Access | Tight corners, edges | Open field areas |
| Finish required | Textured, outdoor | Smooth, burnished interior |
Concrete Troweling Technique — Step by Step
Timing — When to Start Troweling
Timing is everything in concrete finishing. The surface is ready for steel troweling when:
- Bleed water has completely disappeared from the surface
- A footprint depresses the surface approximately 1/8 inch (less than the float test of 1/4 inch)
- The surface feels firm but still workable under hand pressure
- Hand floating has been completed
In hot weather: This window may arrive 30–45 minutes after screeding. In cool weather (below 60°F): 2–4 hours or more. Never rush — troweling over bleed water is the primary cause of surface delamination.
According to the American Concrete Institute (ACI 302.1R), finishing operations on fresh concrete should never be performed while bleed water is present or while the surface is soft enough that water can be worked into it — these are the conditions that cause the greatest number of concrete floor failures.
First Trowel Pass
The first trowel pass uses a flat or nearly flat blade angle — the goal is to remove float marks and begin closing the surface, not to burnish it.
Technique:
- Hold the trowel nearly flat — blade angle 5–10 degrees maximum
- Use long, overlapping arcs or straight passes
- Apply moderate pressure — enough to leave a slight impression
- Work systematically — never skip areas
On knee boards: Use knee boards (also called kneeling boards) to distribute your weight across the slab surface. Never kneel directly on fresh concrete — it leaves deep impressions that are impossible to remove later.
Second and Third Passes
Each subsequent pass uses a progressively steeper blade angle and firmer pressure — as the concrete stiffens, more pressure and angle are needed to close and densify the surface.
Second pass: Blade angle 15–20 degrees. Removes first-pass marks, further closes surface.
Third pass (final burnish): Blade angle 25–35 degrees. Maximum pressure. This is the pass that produces the characteristic steel-grey burnished finish. The surface should ring slightly under the trowel on the final pass — indicating maximum density.
Worked Example — Three-Pass Finishing on a 200 sq ft Slab:
| Pass | Blade Angle | Pressure | Time | Result |
|---|---|---|---|---|
| First | 5–10° | Light | 25 min | Float marks removed |
| Second | 15–20° | Moderate | 20 min | Surface closing |
| Third | 25–35° | Firm | 15 min | Burnished, dense |
Total: 60 minutes for 200 sq ft with one finisher.
Common Troweling Mistakes
Troweling over bleed water: The most serious mistake — results in delamination (surface layer separating from base). Always wait for complete bleed water evaporation.
Starting too late: Concrete that has stiffened beyond the finishing window cannot be troweled effectively — forced troweling tears the surface rather than closing it.
Inconsistent pressure: Light pressure in some areas and heavy in others produces a surface with alternating sheen levels — visible in raking light.
Skipping passes: Moving directly to a steep-angle final pass without the preparatory passes produces surface tears and drag marks.
Trowel Care and Maintenance
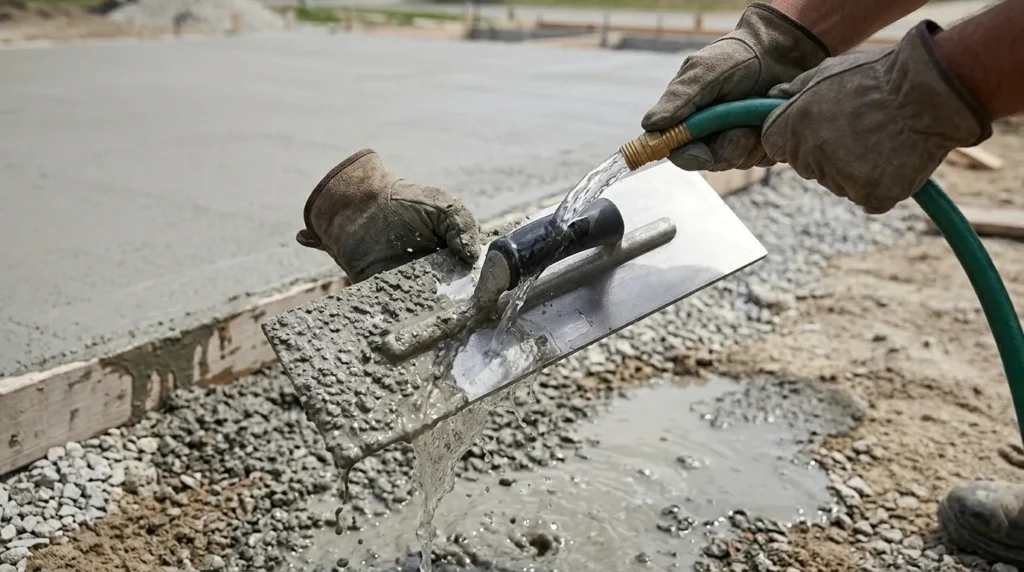
A concrete trowel that is not cleaned immediately after use will be ruined — hardened concrete cannot be removed without damaging the blade.
Immediate cleaning (within 30 minutes of use):
- Scrape excess concrete from blade with a stiff brush or putty knife
- Wash blade with water — a garden hose is adequate while concrete is fresh
- Dry completely — never store a wet steel trowel
- Apply a light coat of machine oil or WD-40 to prevent rust
Blade sharpening: A dull trowel edge drags rather than slides — reducing finishing quality and increasing effort. Sharpen the leading edge with a whetstone or fine file when it becomes rounded. Professional finishers sharpen trowels before every significant pour.
Storage: Store steel trowels hanging or lying flat — never resting on the blade edge, which causes warping. A warped blade produces an uneven finish and cannot be corrected.
Frequently Asked Questions
What type of trowel is used for concrete?
The primary concrete finishing trowel is a steel finishing trowel — a flat rectangular blade (4×12 to 5×18 inches) used to close and densify the concrete surface. For edges and corners: a margin trowel. For large areas from a standing position: a fresno trowel on a long handle. For curved surfaces: a pool trowel with rounded ends. For commercial floors: a walk-behind or ride-on power trowel.
What is the difference between a float and a trowel for concrete?
A float (magnesium, wood, or bull float) levels and consolidates the surface without fully closing it — used before troweling. It leaves a slightly open, textured surface. A steel trowel compresses and densifies the surface further — used after floating. It closes the surface and creates the smooth, hard finish. Both are used in sequence on most interior slabs.
When do you use a steel trowel on concrete?
After bleed water has completely evaporated from the surface and after hand floating is complete. In warm conditions this may be 30–60 minutes after screeding. In cool conditions it can be 2–4 hours. The key indicator: the surface should support your weight on knee boards with only a slight impression. Never trowel while bleed water is visible.
What is a fresno trowel used for?
A fresno trowel is a large finishing trowel (8×24 to 8×48 inches) on a long handle — used for finishing large concrete areas from a standing position. It combines the reach of a bull float with the surface-closing action of a steel trowel. Standard tool for large residential slabs and commercial flatwork where a walk-behind power trowel is not available.
What is a pool trowel used for in concrete?
A pool trowel has rounded ends instead of sharp corners — it can be used anywhere a standard finishing trowel is used, but it eliminates the risk of corner gouges during aggressive late-stage troweling. Many professional concrete finishers prefer pool trowels for all flatwork, not just curved or pool surfaces.
Do I need a power trowel for a garage floor?
Not necessarily — a 400–600 sq ft residential garage floor can be finished by hand with a finishing trowel and fresno. For floors over 600 sq ft, renting a walk-behind power trowel significantly reduces labor and produces a more consistent finish. For floors over 2,000 sq ft, a power trowel is effectively mandatory for a quality result.
How many times do you trowel concrete?
Typically two to three passes for interior residential slabs. The first pass (flat blade) removes float marks and begins surface closure. The second pass (moderate blade angle) further densifies the surface. The third pass (steep blade angle) produces the final burnished finish. Each pass is done as the concrete progressively stiffens — the interval between passes is typically 20–45 minutes depending on conditions.
What size trowel is best for concrete finishing?
For residential DIY use: a 4×12-inch or 5×14-inch finishing trowel is the most manageable. For experienced finishers on larger slabs: 5×16 or 5×18 inch blades cover more area per pass. For edges and corners: a 2×6-inch margin trowel is essential regardless of main trowel size. Beginners should start with a shorter blade — it is easier to control and produces fewer drag marks.
Conclusion
The right trowel at the right time produces a concrete surface that lasts decades. Float before you trowel. Wait for bleed water to disappear. Start with a flat blade and progress to steeper angles as the concrete stiffens. Use a margin trowel for every edge and corner. Clean and oil the blade immediately after finishing. For large floors, rent a walk-behind power trowel — the quality improvement over hand finishing justifies the cost. Calculate your concrete requirements before the pour with the ConcreteCal free concrete calculator — and have every trowel ready before the truck arrives.